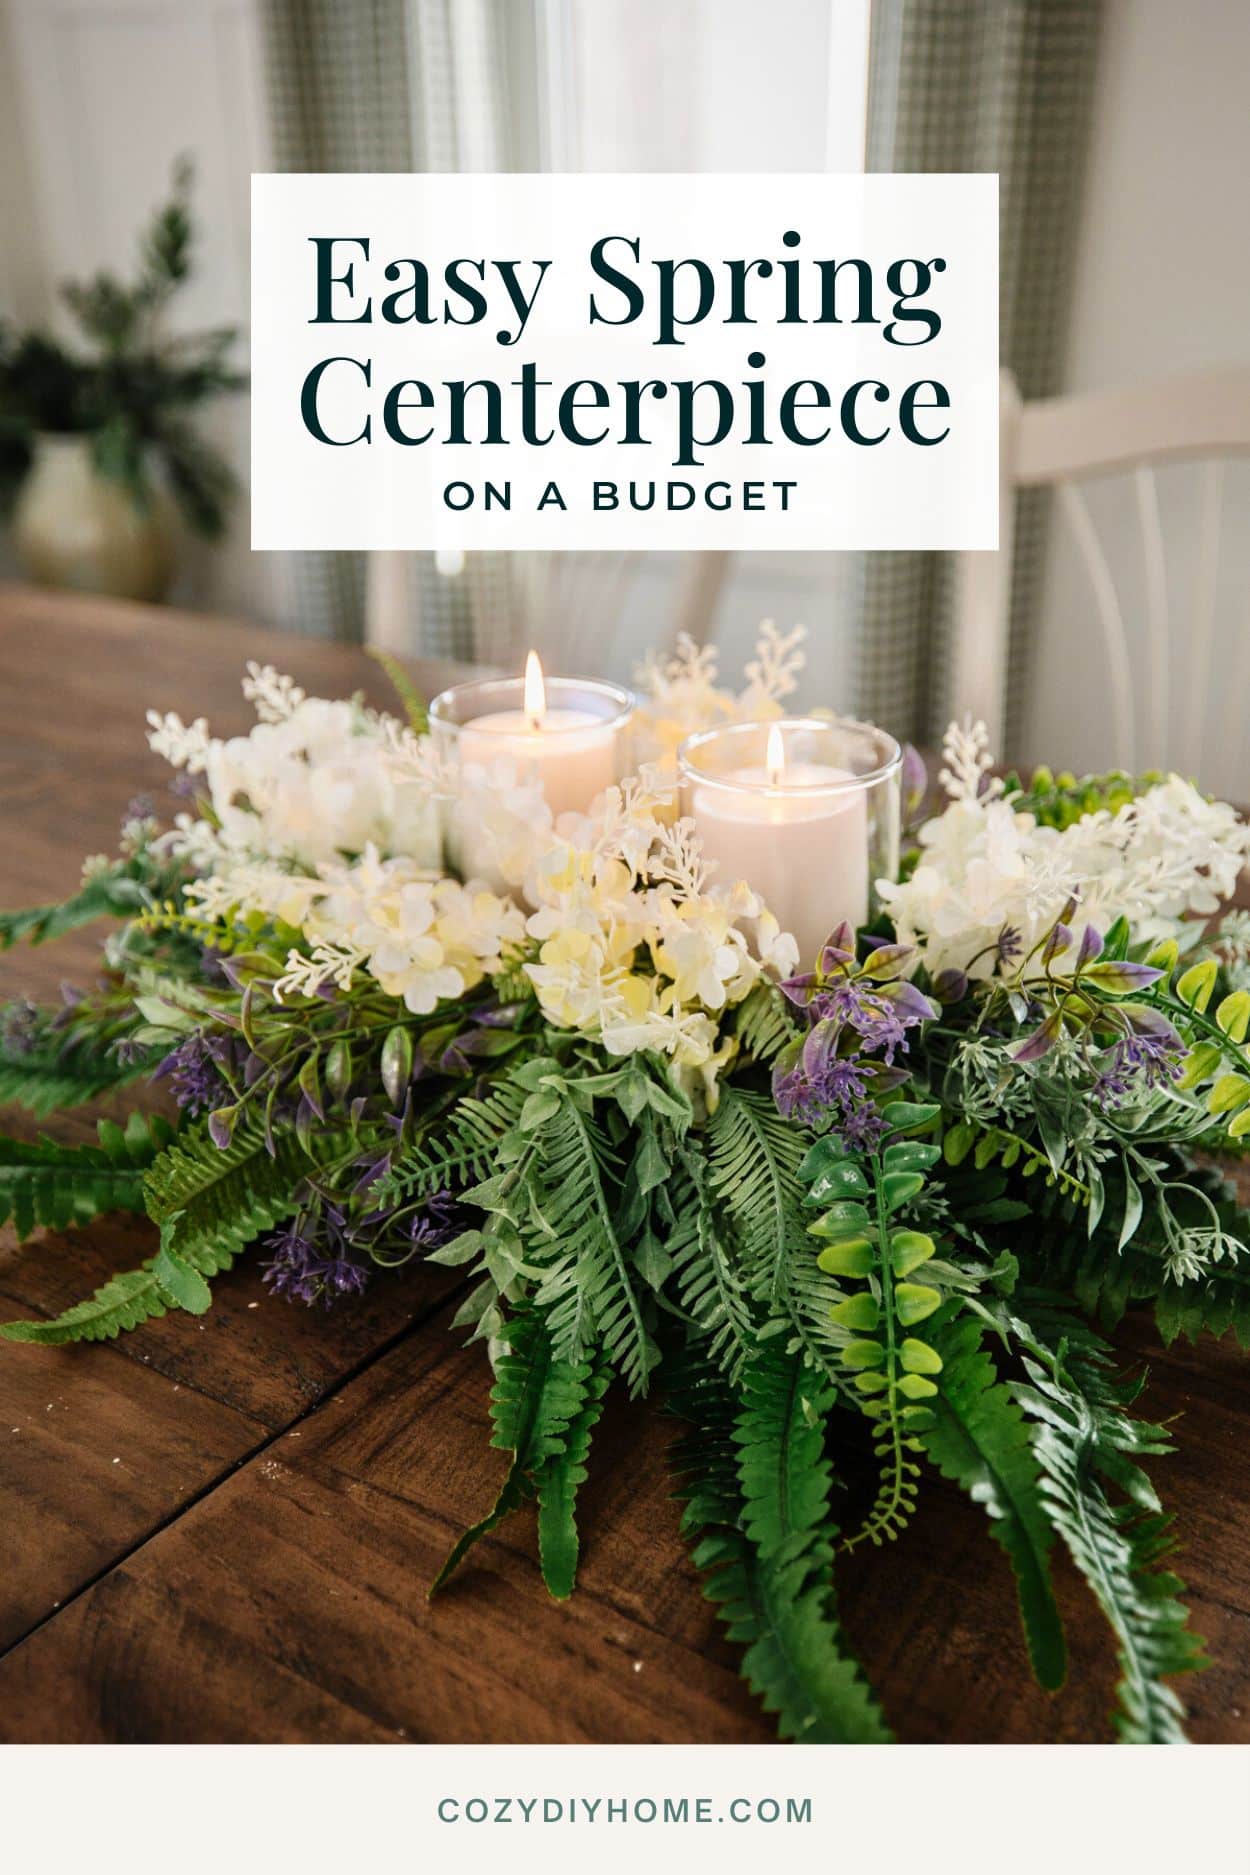
Easy Spring Centerpiece on a Budget (Dollar Tree DIY)
This post may contain affiliate links · This blog generates income via ads
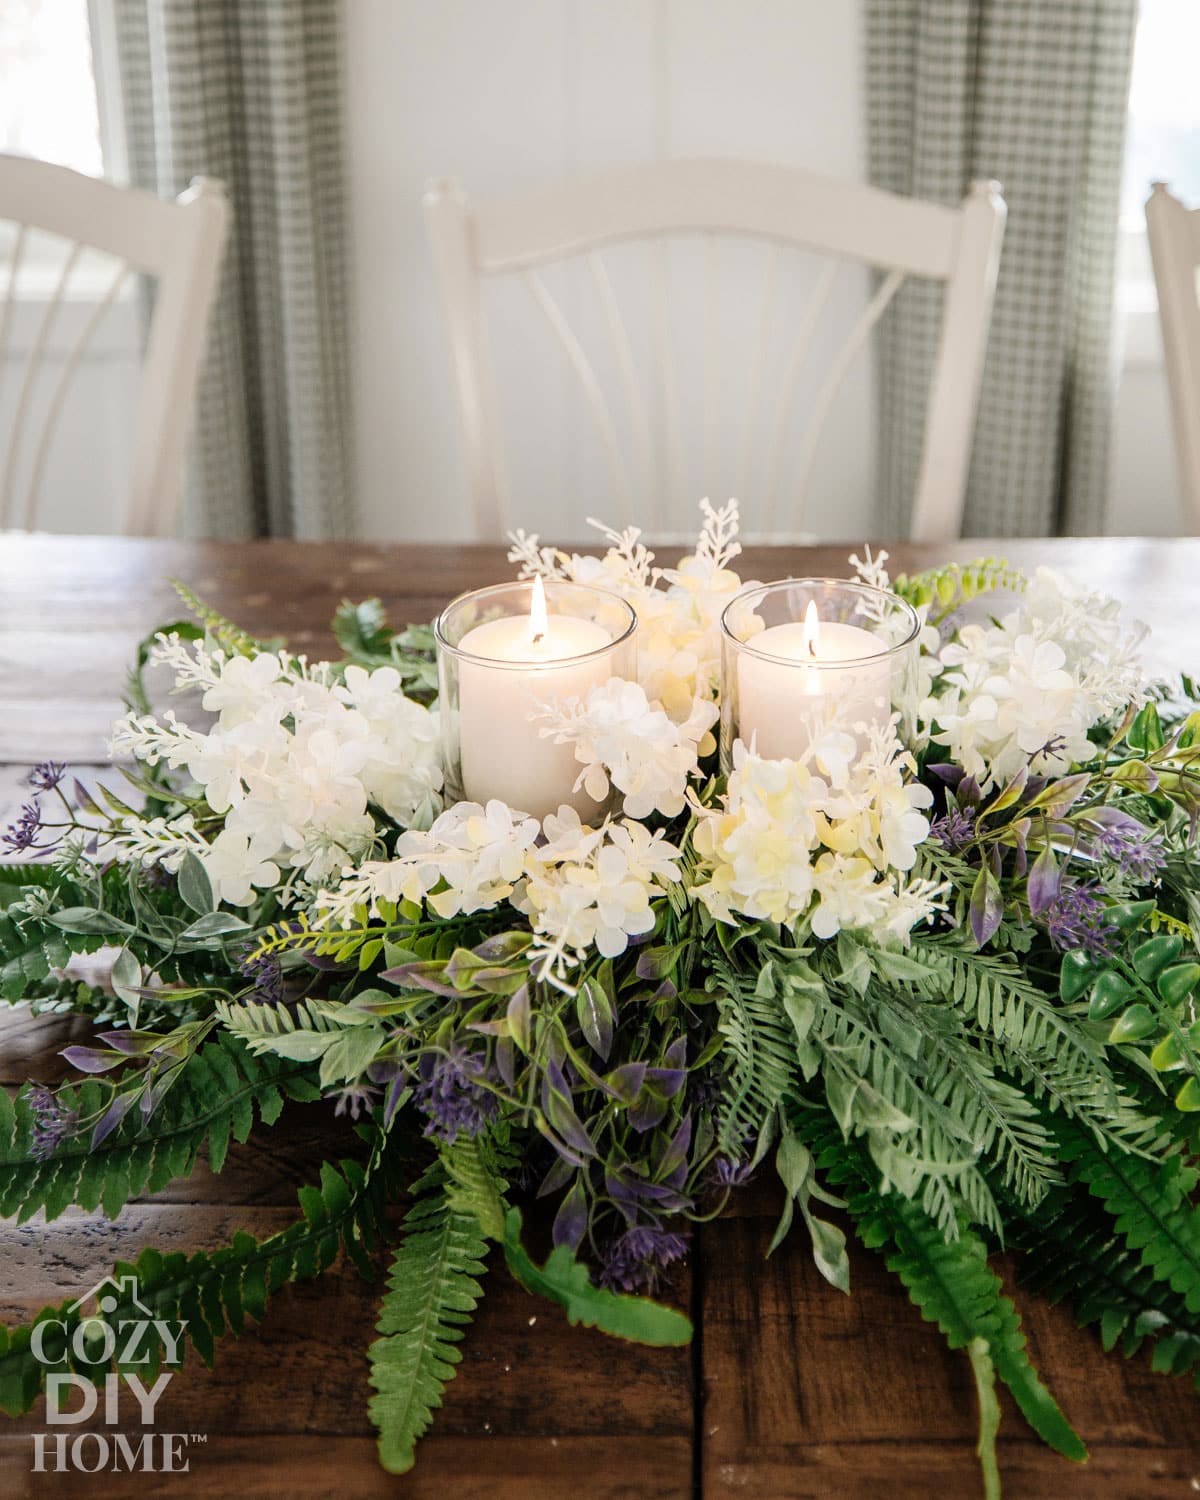
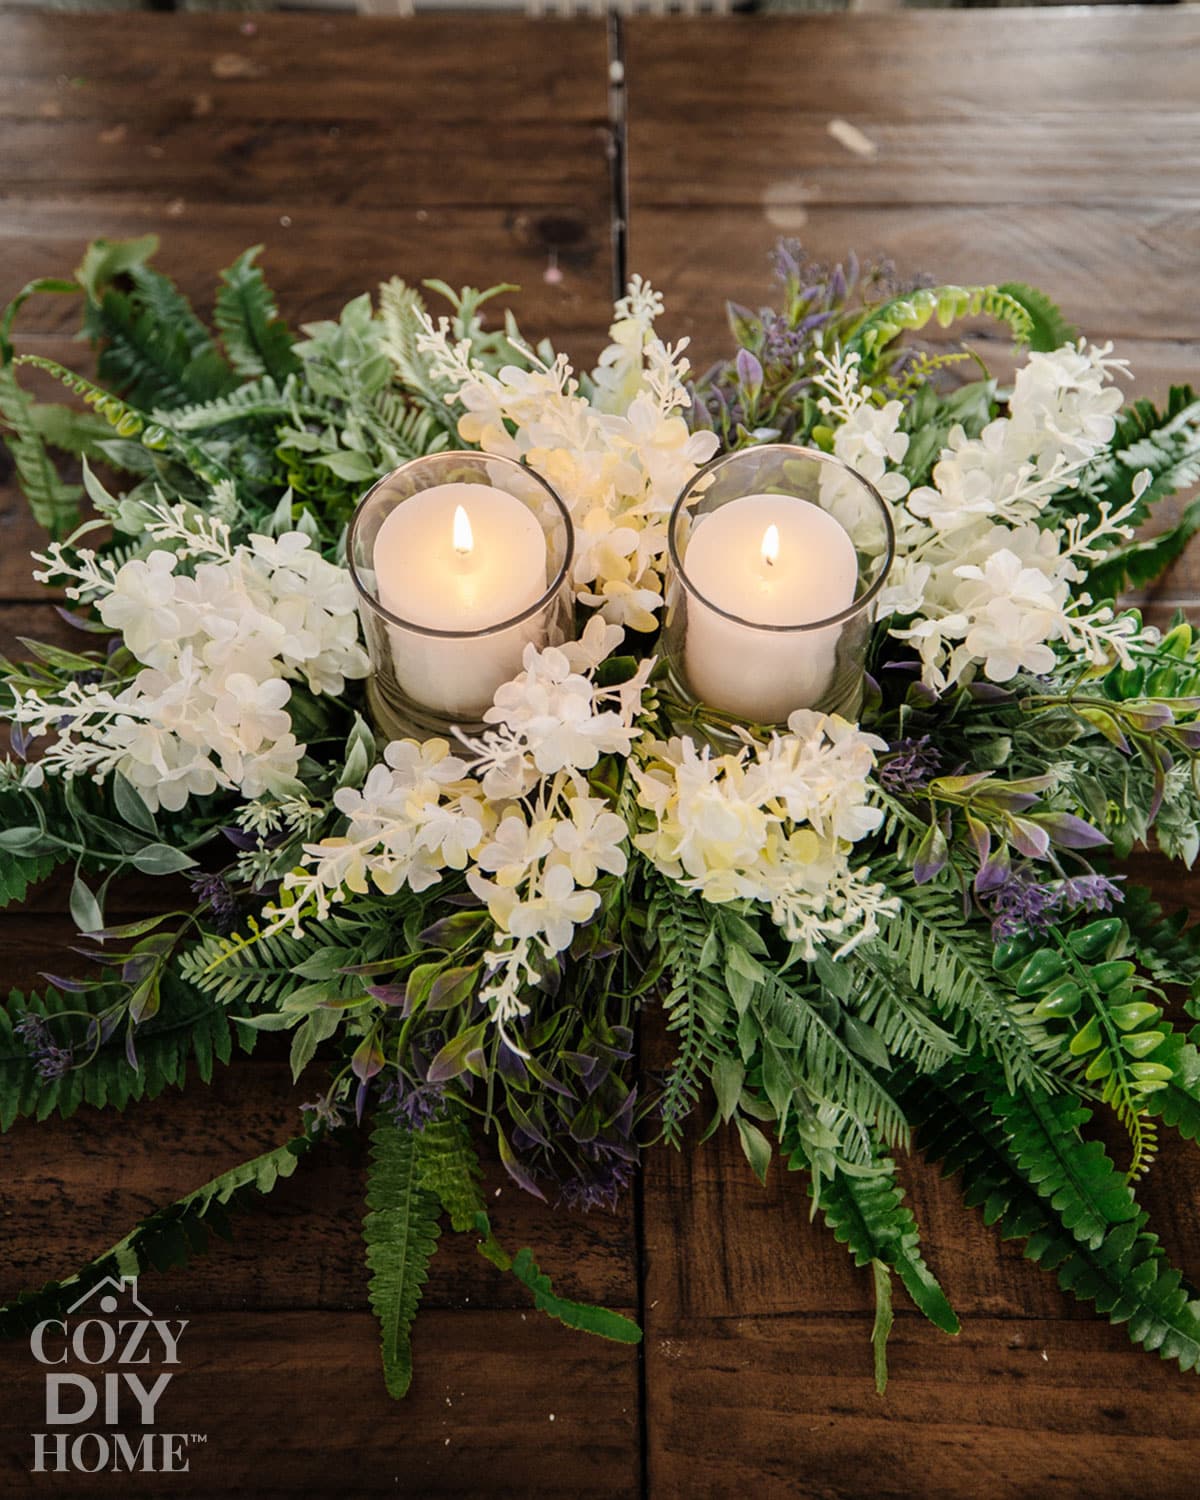
If you want a Spring table centerpiece that looks high end without spending hundreds, this is such a fun one to try! Inspired by a $299 Pottery Barn arrangement, this Dollar Tree DIY easy Spring centerpiece on a budget gives you that same full, fresh, layered look for a tiny fraction of the cost.
Spring decor can get expensive fast, especially when you start looking at those big, beautiful centerpieces from home stores! They’re definitely gorgeous, but spending that much on one seasonal piece is not always realistic.
That is why this easy Spring centerpiece is such a good DIY to keep in your back pocket! It looks lush, soft, and styled, but it uses simple Dollar Tree supplies and comes together in a very beginner-friendly way. In this post, I’ll walk you through exactly how to make it, how to get that fuller designer look, and where to style it in your home.
Quick Overview
Time: About 30 to 45 minutes
Cost: Around $20 to $30 depending on stem selection
Skill level: Beginner
Tools required: Hot glue gun, glue sticks, wire cutters or scissors

Materials List
Materials used in this project:
- Dollar Tree floral foam
- About 16 faux stems from Dollar Tree:
- Faux ferns
- Mixed greenery
- White lilac stems
- Dollar Tree pillar candles (2)
- Dollar Tree glass candle holders (2)
- Hot glue gun
- Glue sticks
- Wire cutters or strong scissors
You can usually find everything for this project at Dollar Tree. If your store has limited floral choices, you can also mix in a few stems from Walmart, Michaels, or use thrifted candle holders if needed.
Step-by-Step Tutorial
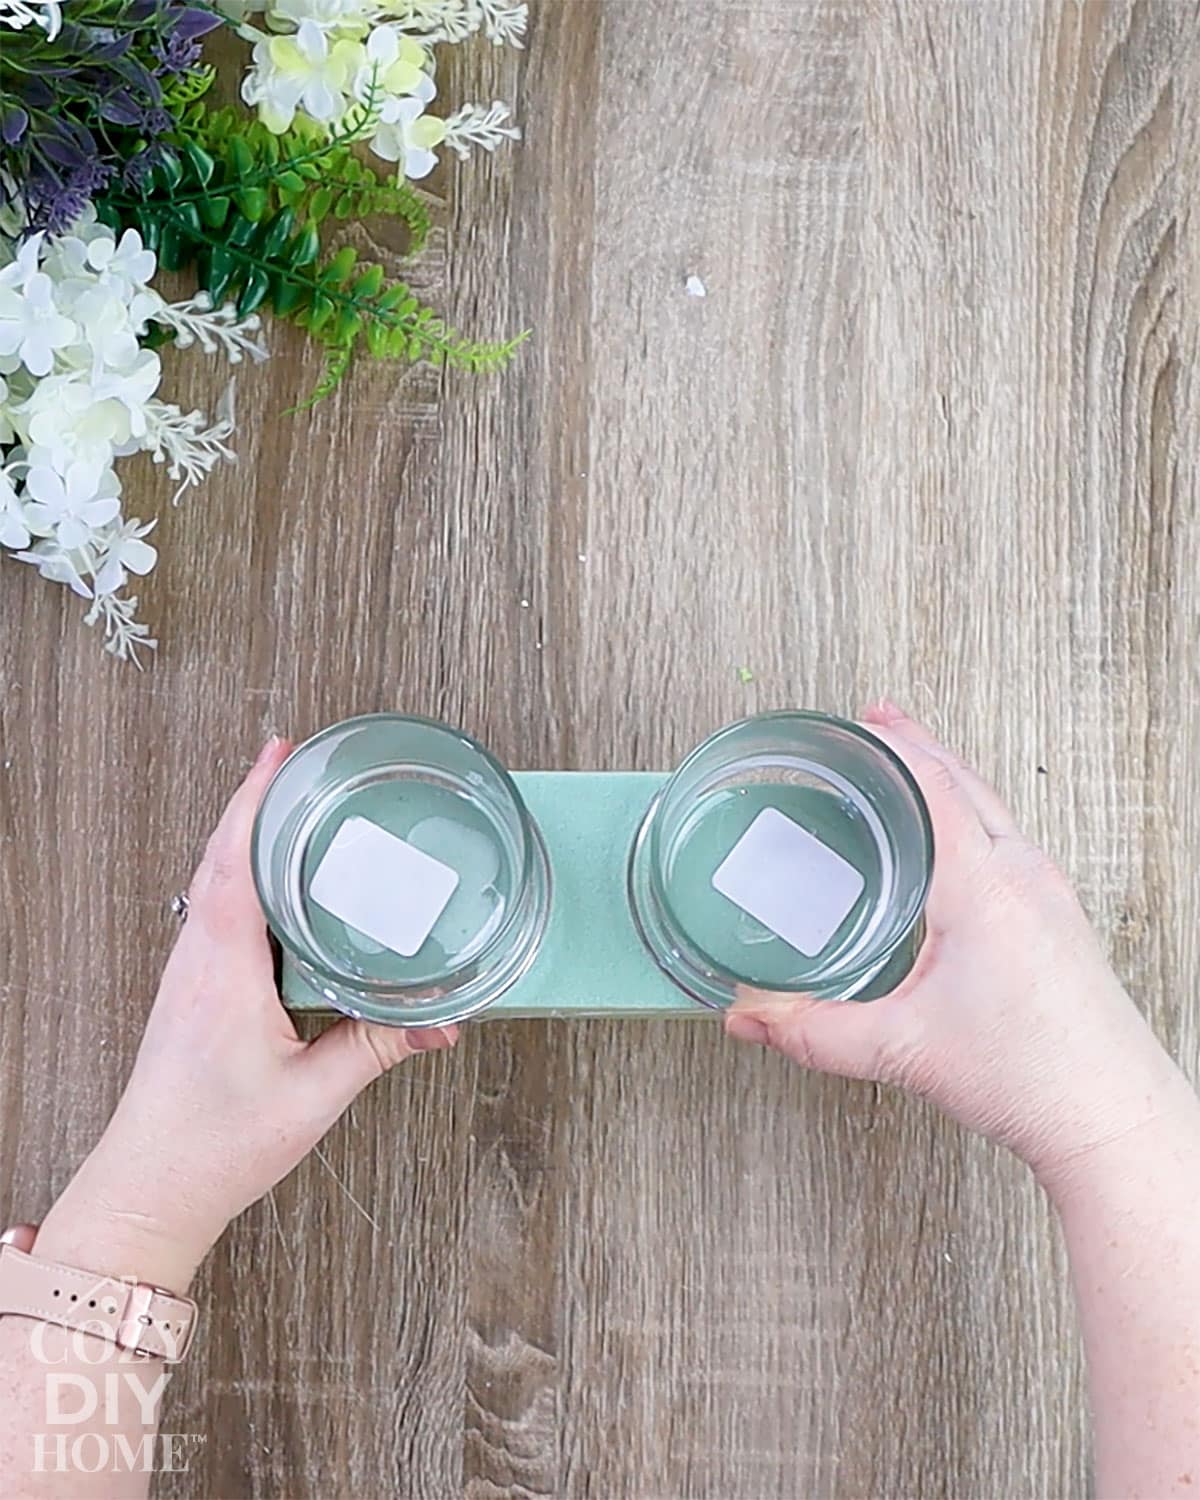
Step 1: Set the candles inside the holders
Start by placing each pillar candle inside a glass candle holder.
This helps you see the full shape of the centerpiece before you begin adding flowers and greenery. It also gives you a clear visual anchor for the design, which makes styling everything else much easier.
Tip: Make sure the candles sit evenly and feel stable before moving on.
Step 2: Glue the candle holders to the floral foam
Use hot glue to attach the glass candle holders to the top of the floral foam block.
This step matters because it keeps the candle holders from shifting while you build out the arrangement. Since the greenery and flowers will be added around them, you want the candle base to stay secure from the start.
Tip: Press each holder down firmly for a few seconds so the glue has time to grab.
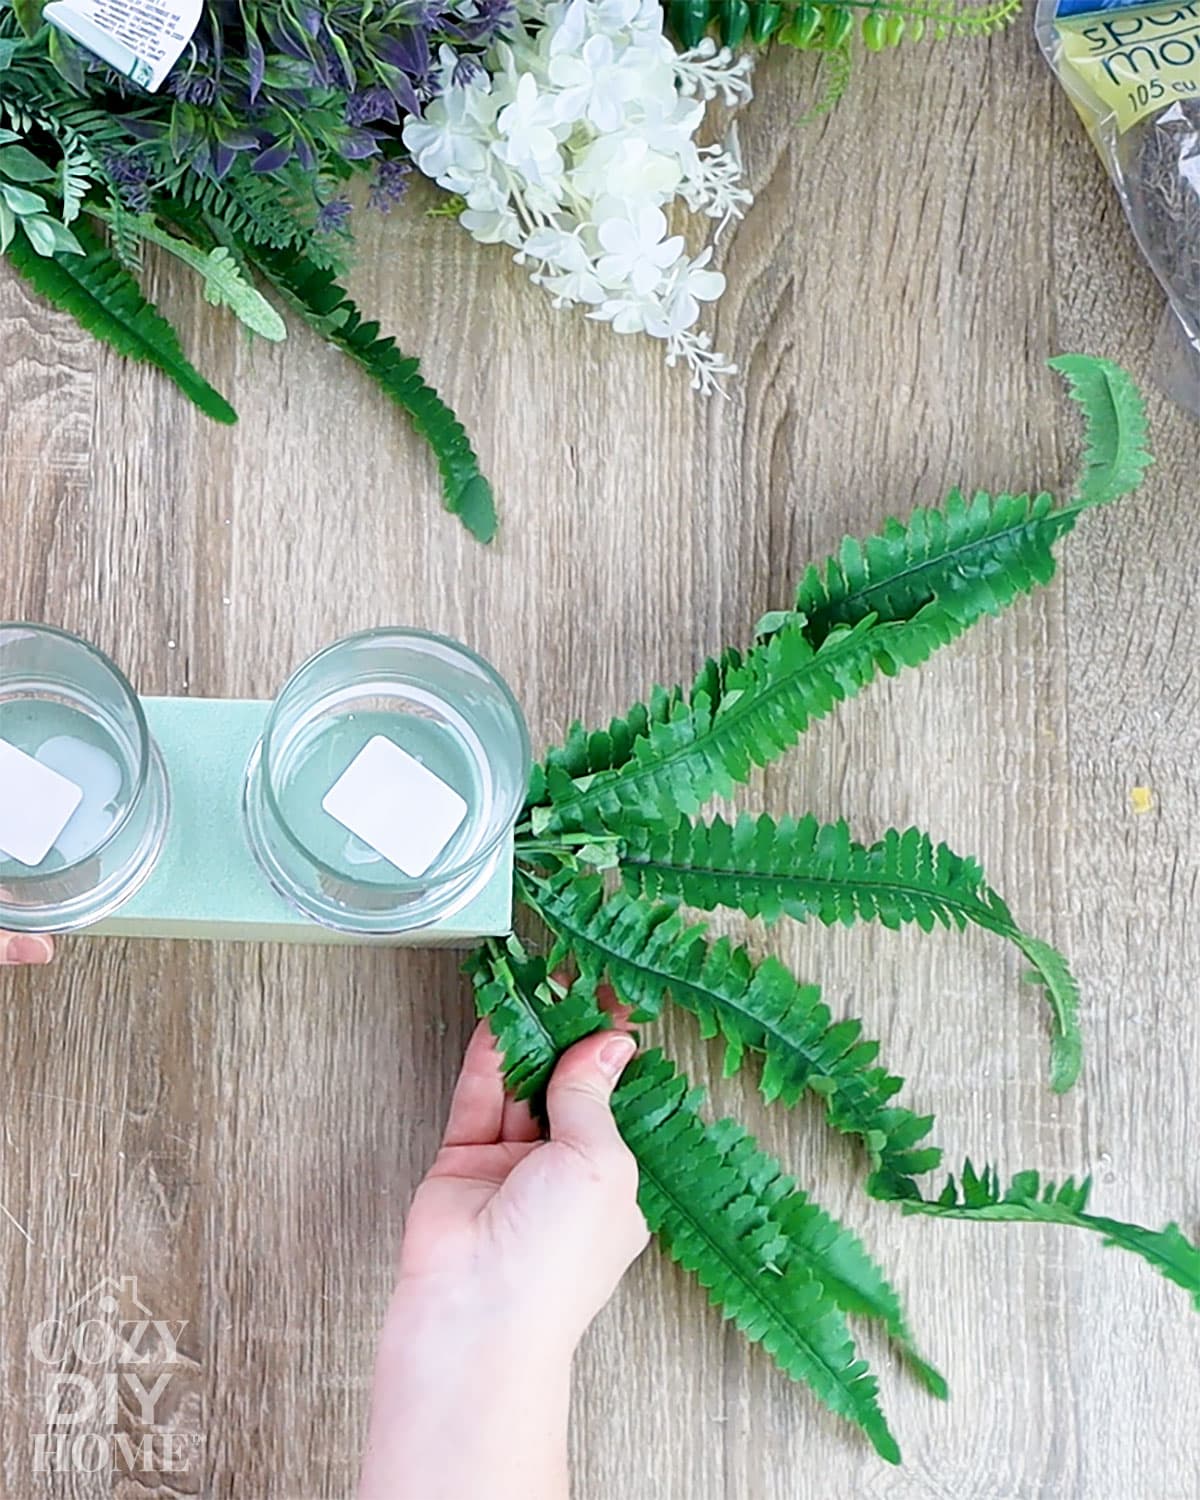
Step 3: Build the greenery base
Begin inserting the greenery into the floral foam, working outward to create a long, stretched shape across the base.
This greenery layer is what gives the centerpiece that lush, expensive look. It fills out the arrangement and makes it feel soft and natural instead of sparse.
Tip: Focus on making the design longer than it is tall. That elongated shape works especially well on dining tables, consoles, and sideboards.
Step 4: Cut the greenery into smaller sections
Before filling in the foam, cut your greenery stems into smaller pieces.
This makes a huge difference. Smaller sections are easier to place, easier to layer, and much better for creating a natural shape. Large stems can look stiff and awkward, especially in a lower arrangement like this.
Tip: Keep a mix of short and medium pieces so you can fill gaps as you go.
Step 5: Bend the stems slightly for a more realistic look
Gently bend each greenery piece before placing it into the foam.
This is one of those little tricks that makes budget florals look so much better. Straight stems can look fake very quickly, but adding a slight curve makes the arrangement feel softer and more organic.
Tip: Do not overbend. A gentle curve is enough to make the stems look relaxed and natural.
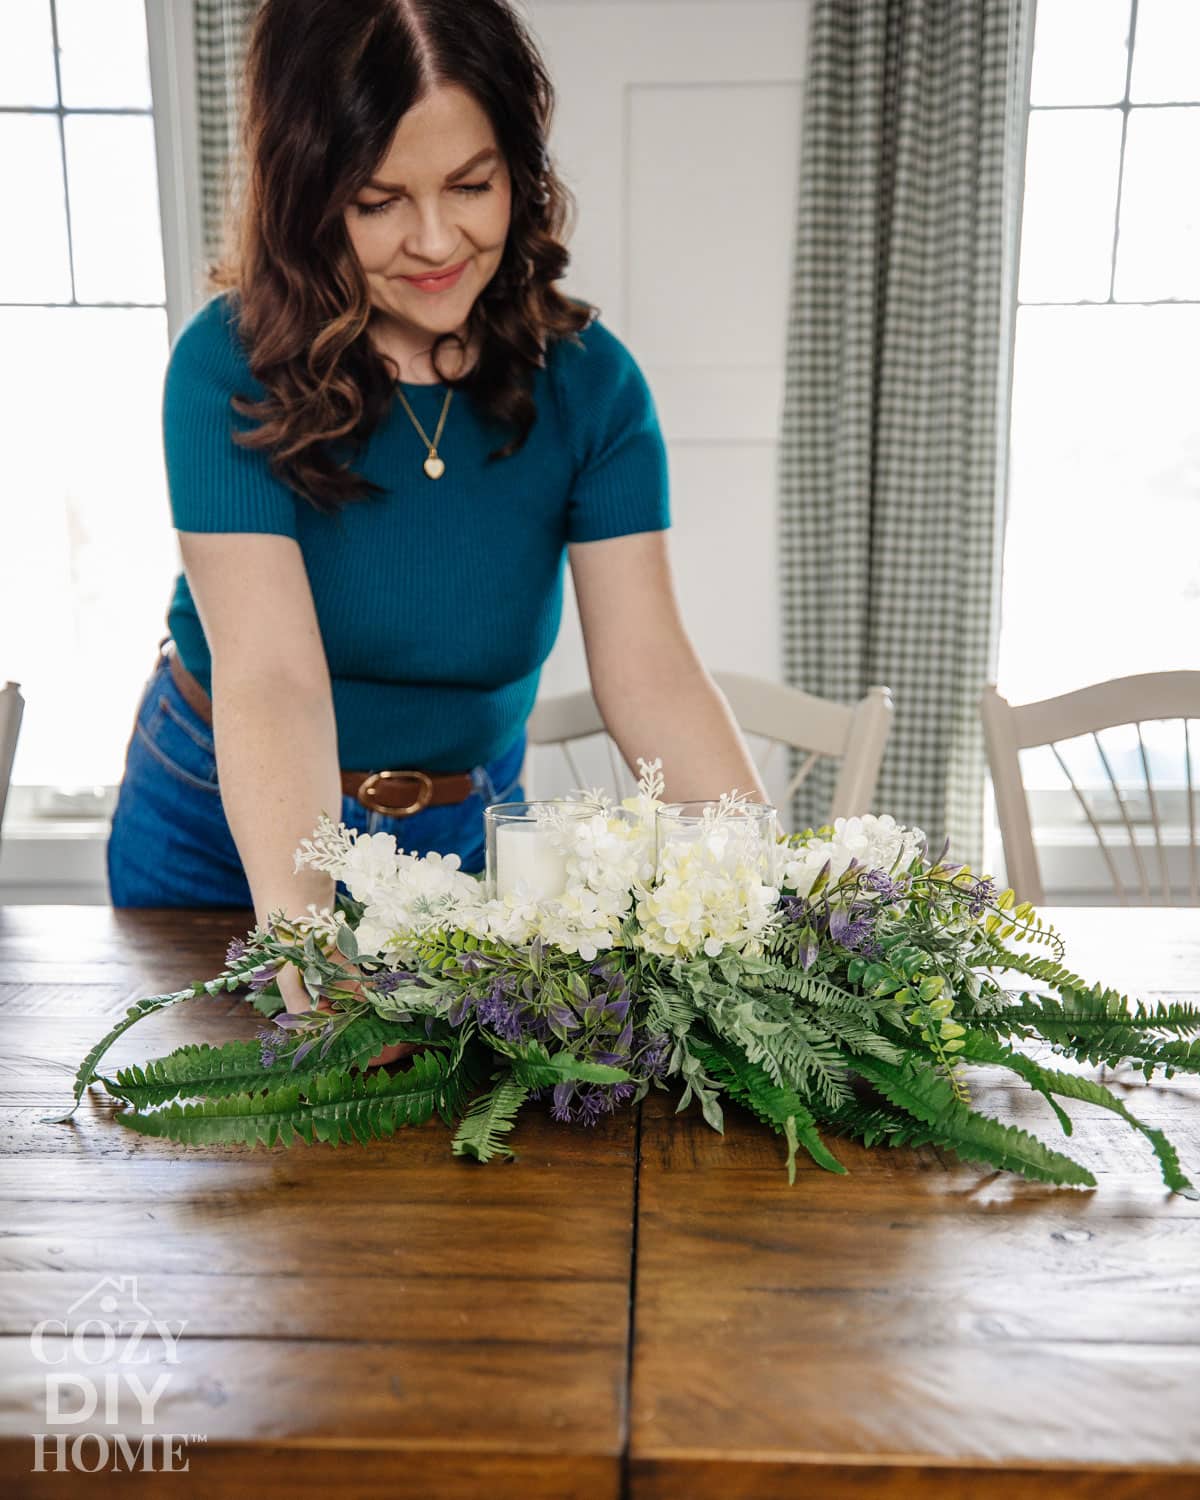
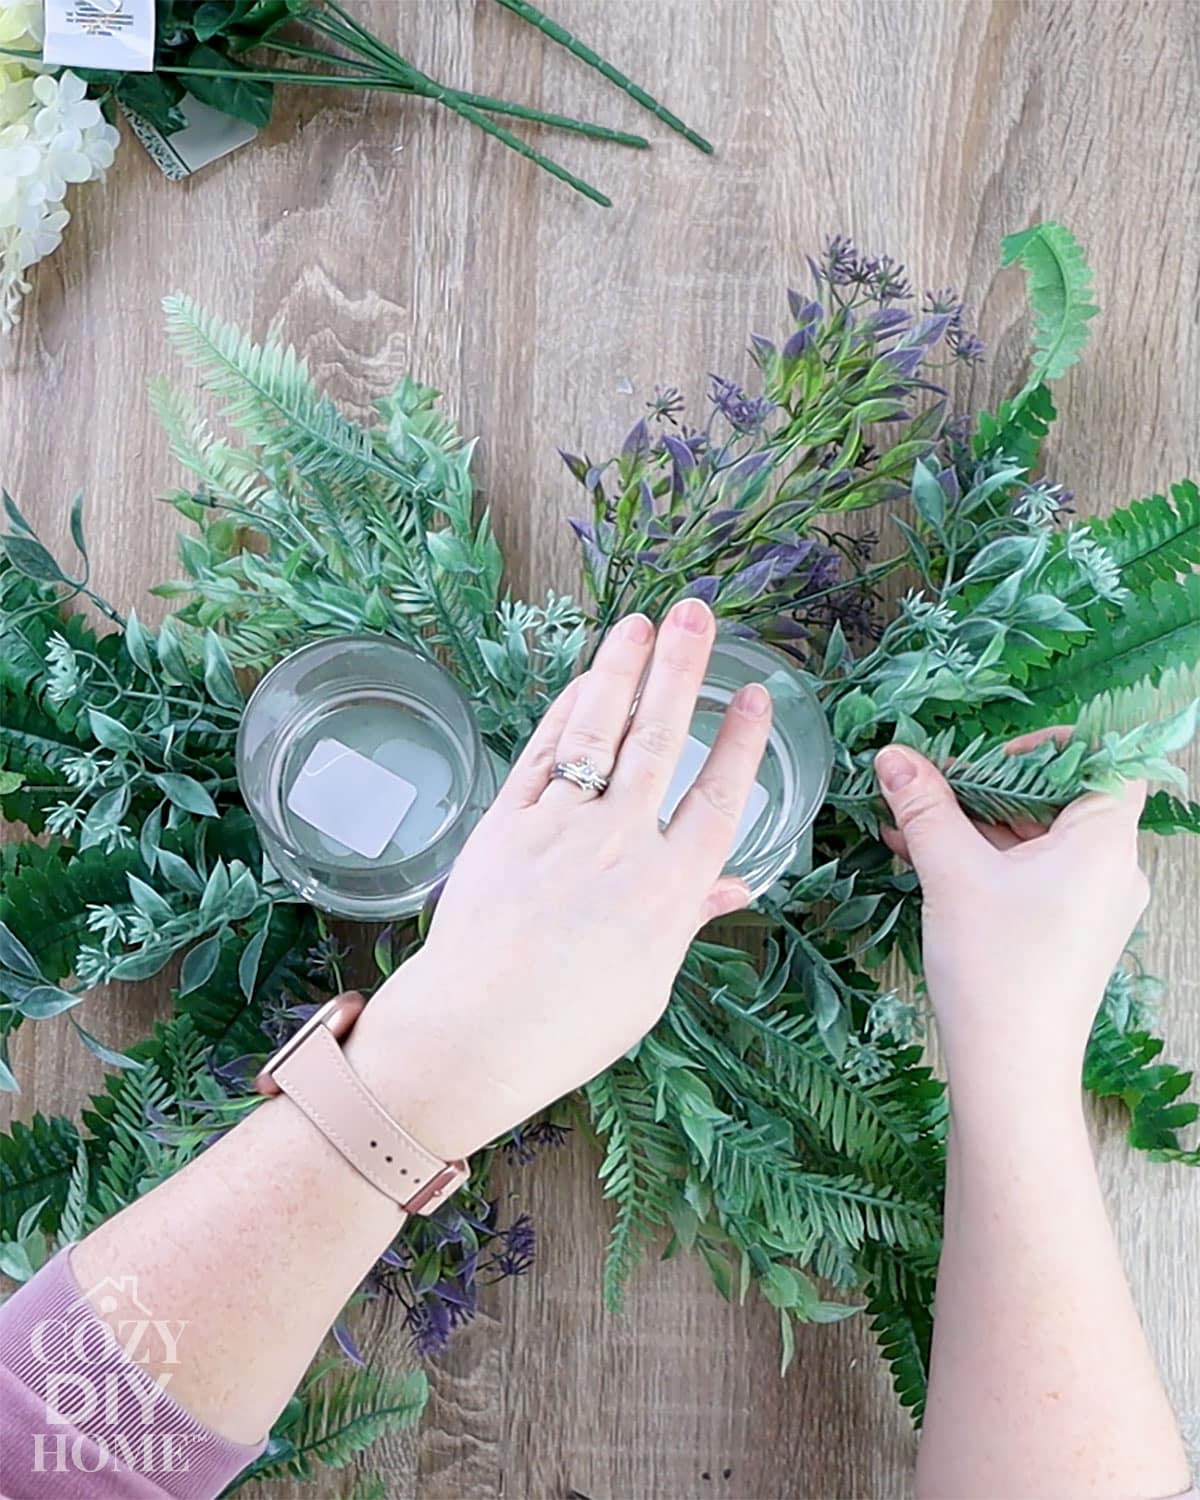
Step 6: Fill in the base until it looks full
Keep layering greenery until the floral foam is mostly hidden.
This is what creates that full designer look. A centerpiece like this looks best when it feels abundant, so do not be afraid to really fill it out.
Tip: Step back every few minutes and check the shape from different angles. That makes it easier to spot empty areas.
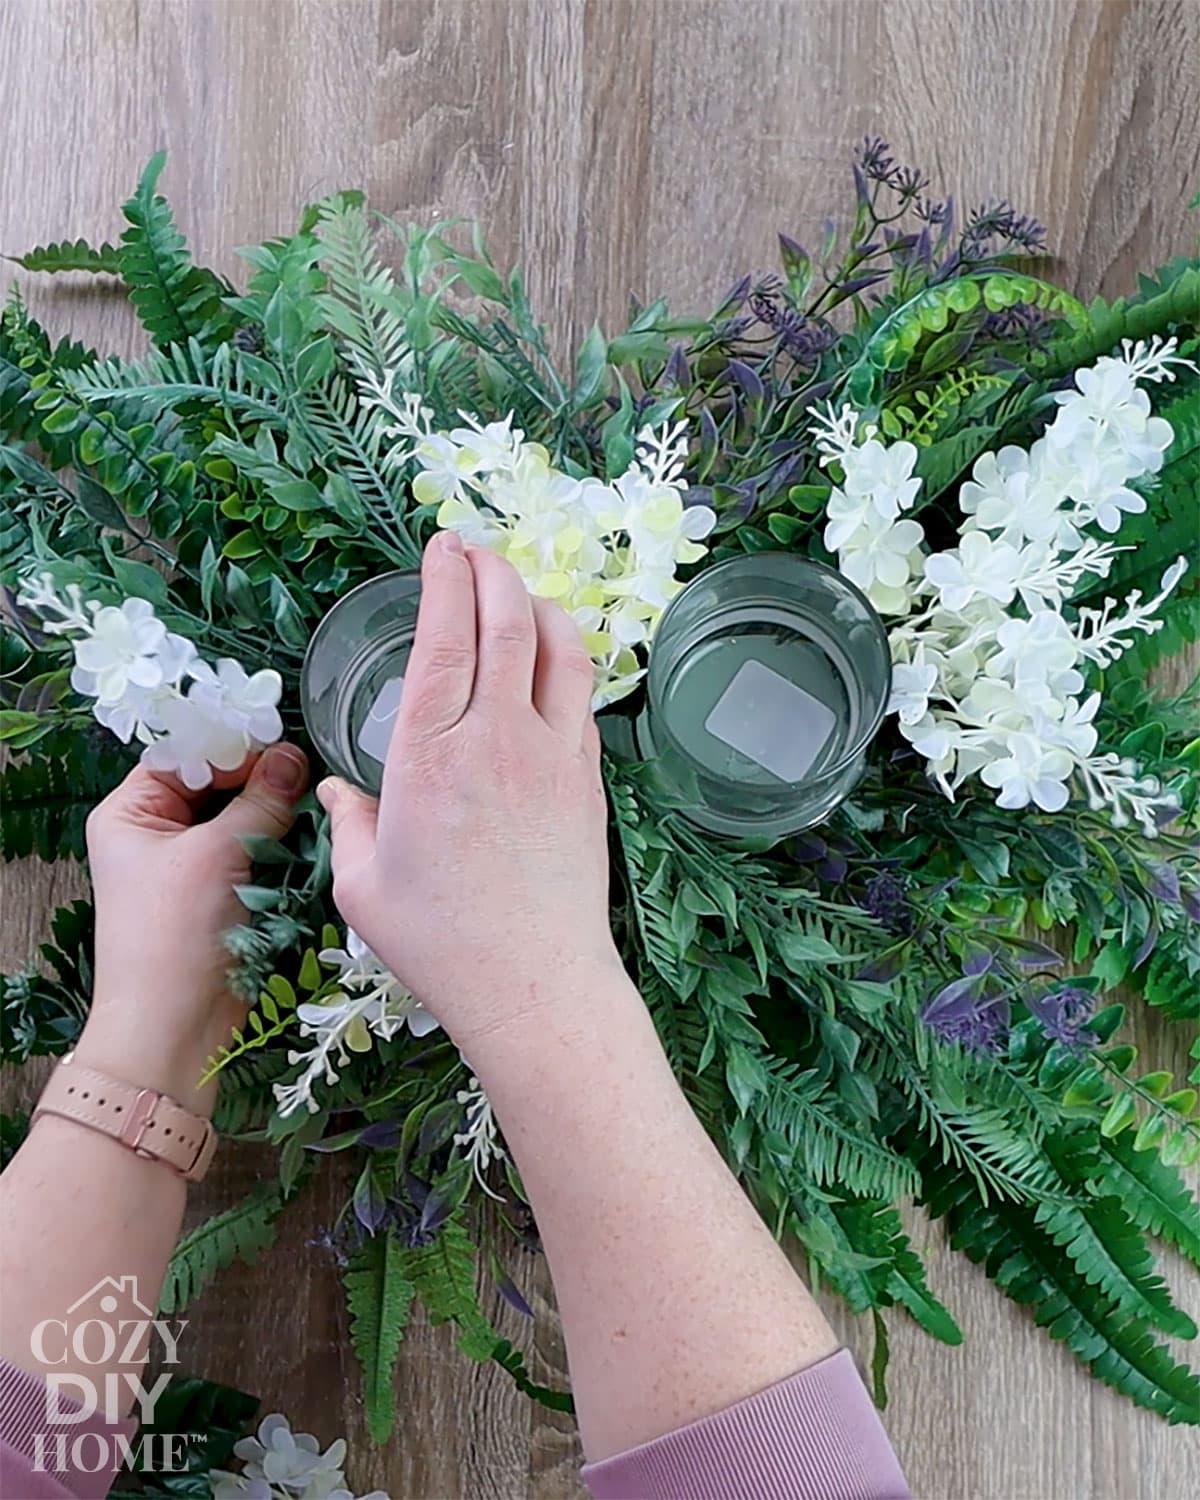
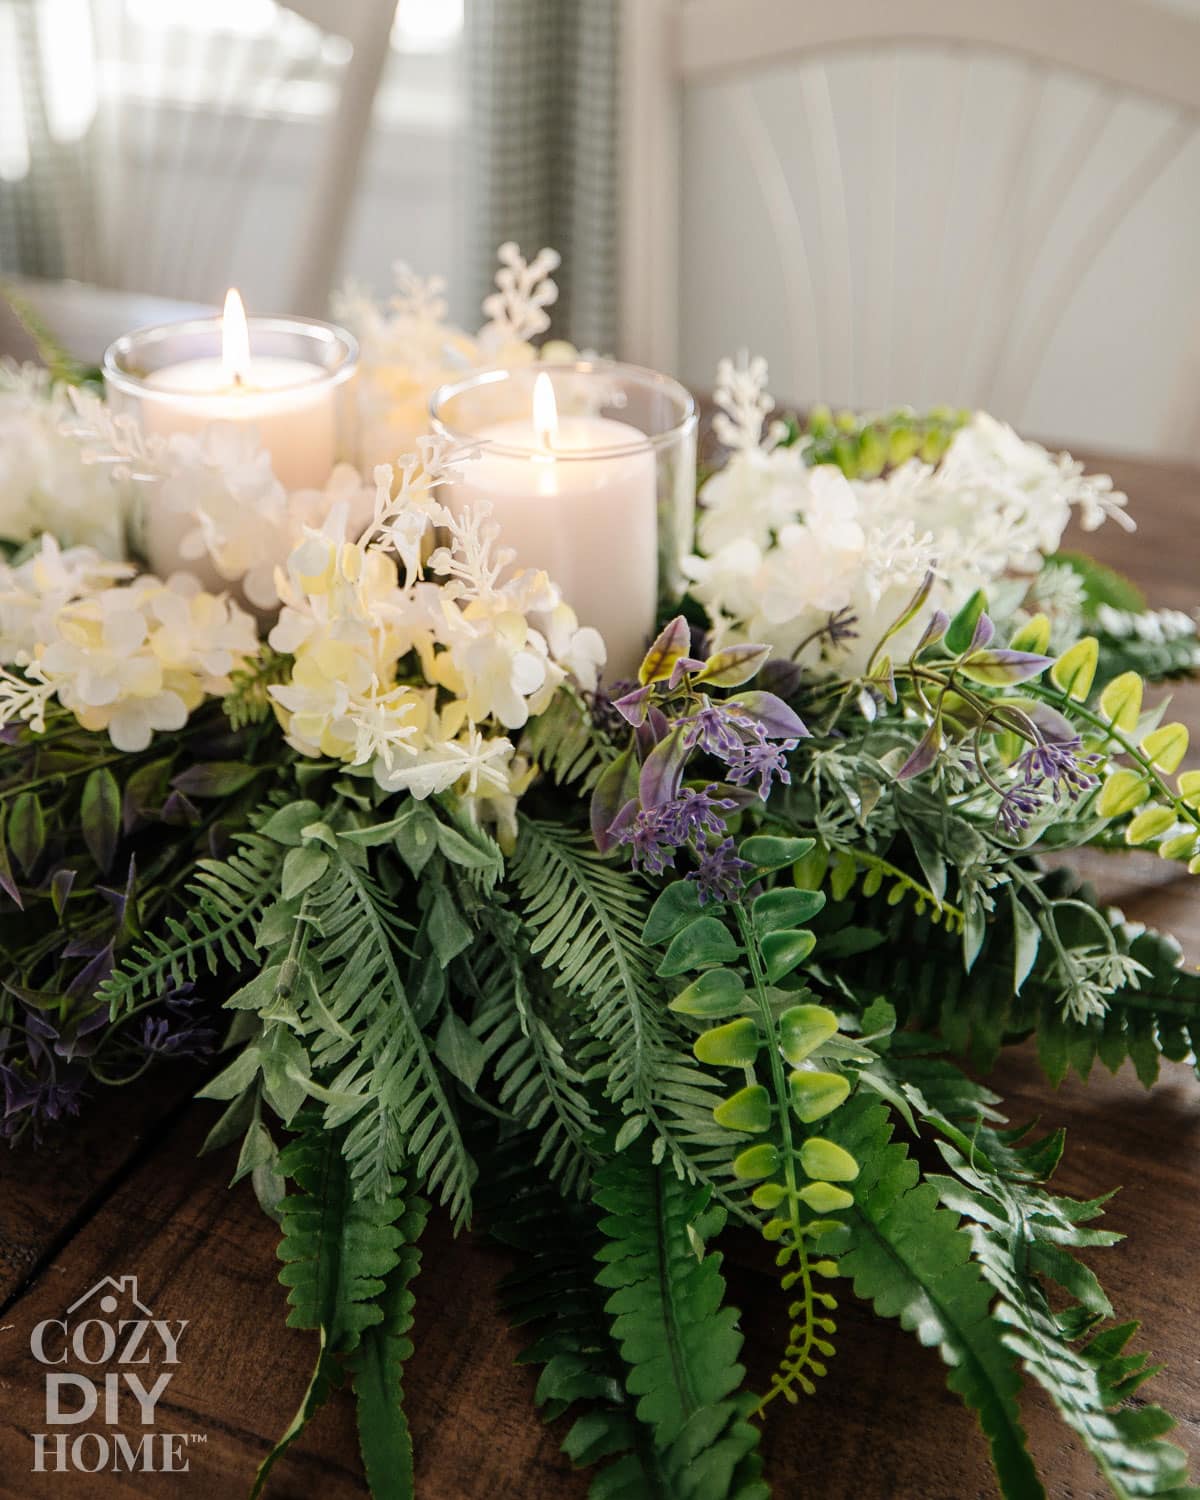
Step 7: Add the white lilacs around the top
Once the greenery base is in place, start adding the white lilacs around the top section of the arrangement.
These lighter blooms brighten everything up and give the centerpiece that fresh spring feel. They also add softness and contrast against the deeper green tones.
Tip: Keep the blooms slightly higher than the greenery, but not so tall that they block conversation across the table.
Step 8: Cluster the flowers for a fuller look
Instead of spacing the white lilacs evenly, cluster them together in small groupings.
This trick helps them look more like hydrangea-style floral bunches, which makes the arrangement feel fuller and more high end. Grouping flowers usually looks more natural and intentional than spreading them out one by one.
Tip: Work in odd-numbered clusters when possible for a softer, more styled look.
Tips for the Best Results
A few simple tricks can make this centerpiece look even better:
- Use more greenery than you think you need. A full base is what gives this DIY its expensive look.
- Mix different shades of green for more depth and realism.
- Trim stems gradually instead of cutting too much at once.
- Fluff and shape each stem before placing it into the foam.
- Keep the arrangement low enough that it feels elegant, not bulky.
- If your Dollar Tree does not have white lilacs, use white hydrangeas, baby’s breath, or soft cream florals for a similar effect.
- For an even more realistic finish, hide any visible foam with extra greenery pieces.
Styling or Usage Ideas
One of the best things about this DIY is how versatile it is. It works in so many spots around the home, especially during spring gatherings.
Try styling it:
- On a spring dining table as the main centerpiece
- On a console table in the entryway
- On a sideboard for Easter or brunch gatherings
- On a coffee table with a stack of books and a small vase
- On a mantel with faux tulips or pastel accents nearby
Because it has such a soft neutral look, it also blends beautifully with farmhouse, cottage, traditional, and cozy minimalist decor.
Frequently Asked Questions
You can, but flameless candles are the safer choice, especially with faux greenery nearby.
White hydrangeas, cream roses, or baby’s breath can create a similar soft spring look.
Use extra greenery, cut stems into smaller pieces, and layer them in different directions to hide the foam.
Yes. Just use a longer floral foam base and add more greenery and flowers to keep the proportions balanced. You can even hot glue two Dollar Tree foam bases together.
Yes. This is a very beginner-friendly floral DIY because the arrangement style is loose and forgiving.
Related Projects
If you enjoyed this project, you might also like:
- How to Make a Faux Stone Vase (Dollar Tree DIY)
- Porch Decor Ideas for a Warm & Welcoming Home this Spring
- From Fabric Scraps to Boho Chic: DIY Rope Flower Pot
- Spring into Creativity: 10 DIY Wreaths to Welcome the Season
This easy Spring centerpiece on a budget is proof that you do not need to spend a fortune to create something beautiful for your home. With a few Dollar Tree supplies and a little layering, you can make a centerpiece that looks lush, polished, and perfect for Spring!
If you make this, make sure to share it with me on social – tag @cozydiyhome!
Pin Me: