How to Make a Faux Stone Vase (Dollar Tree DIY)
This post may contain affiliate links · This blog generates income via ads
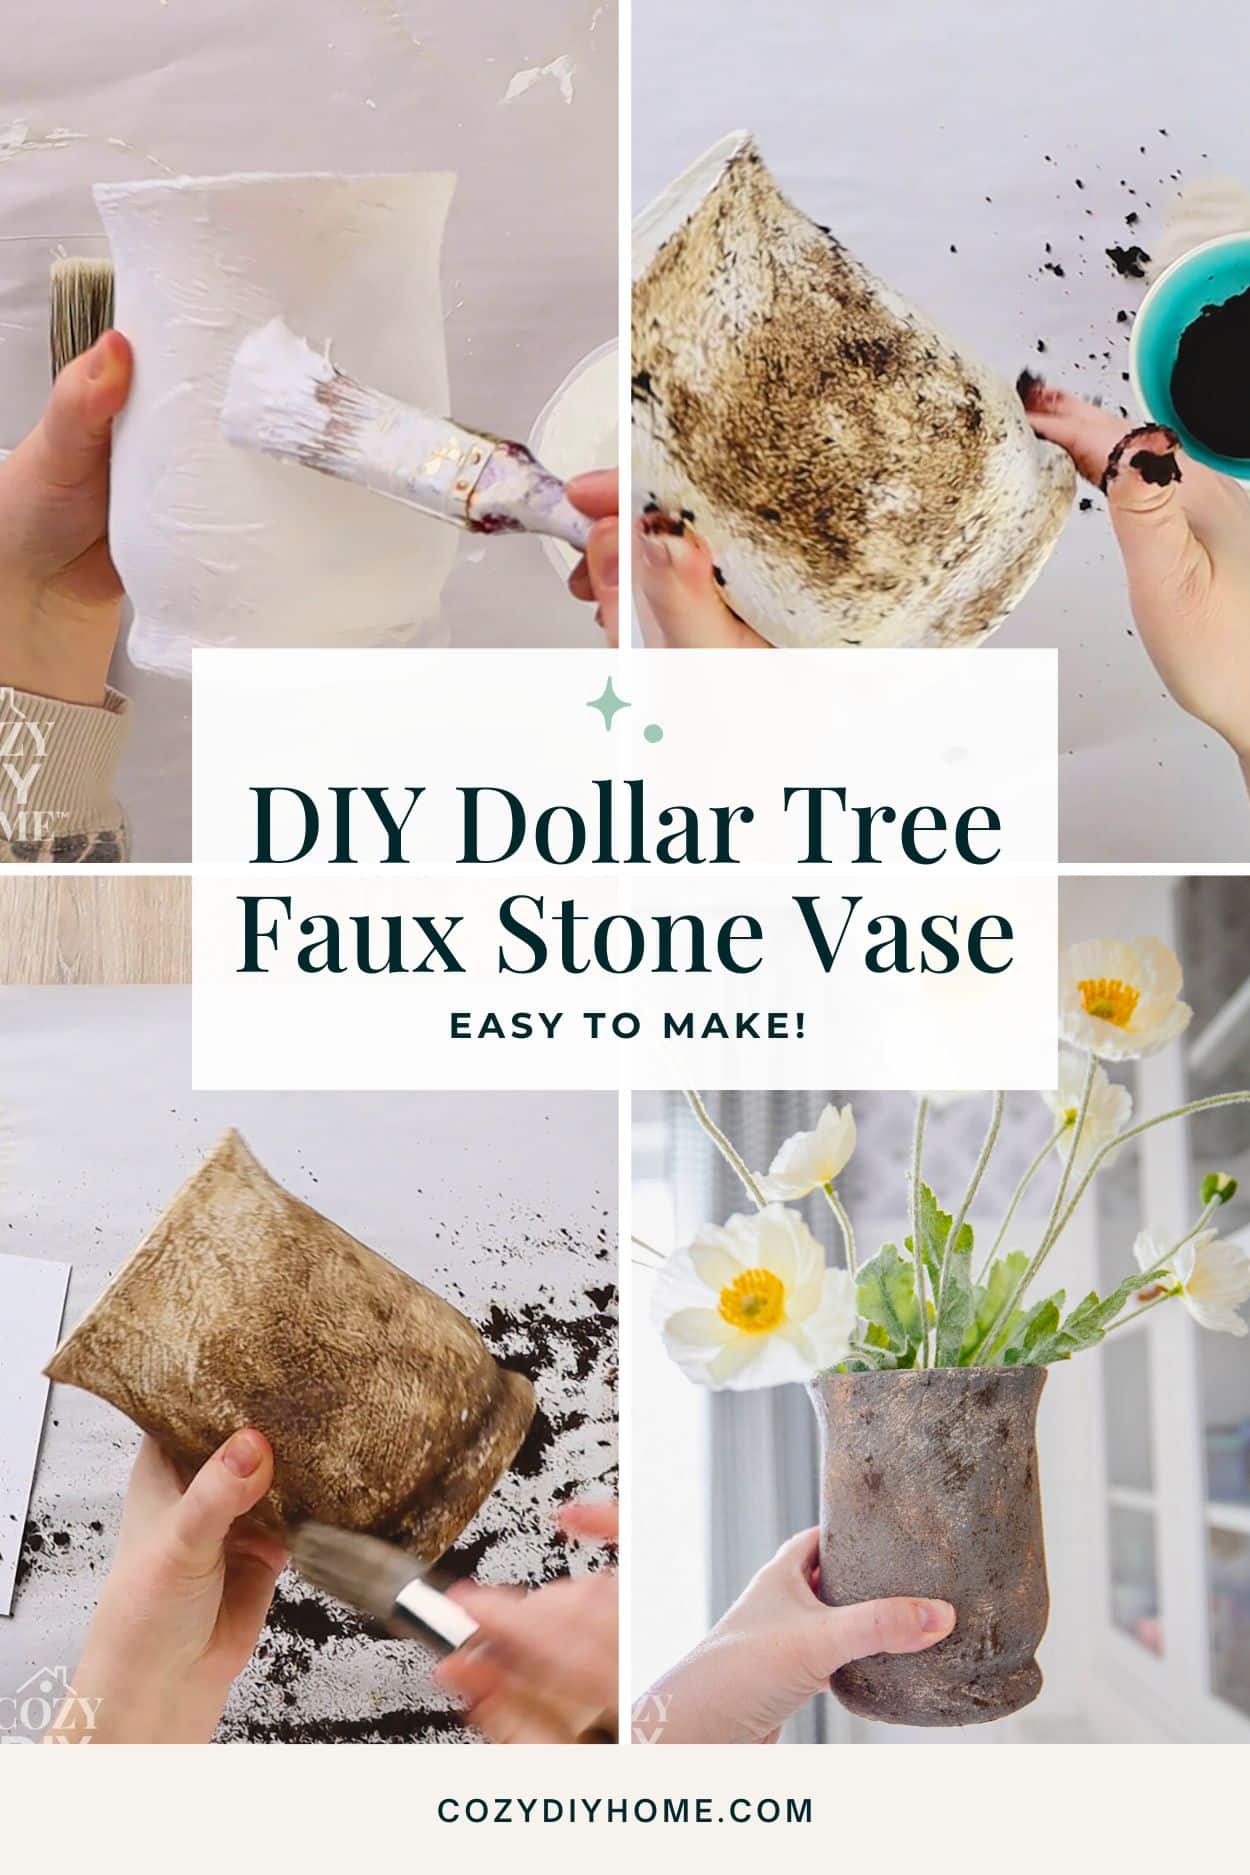
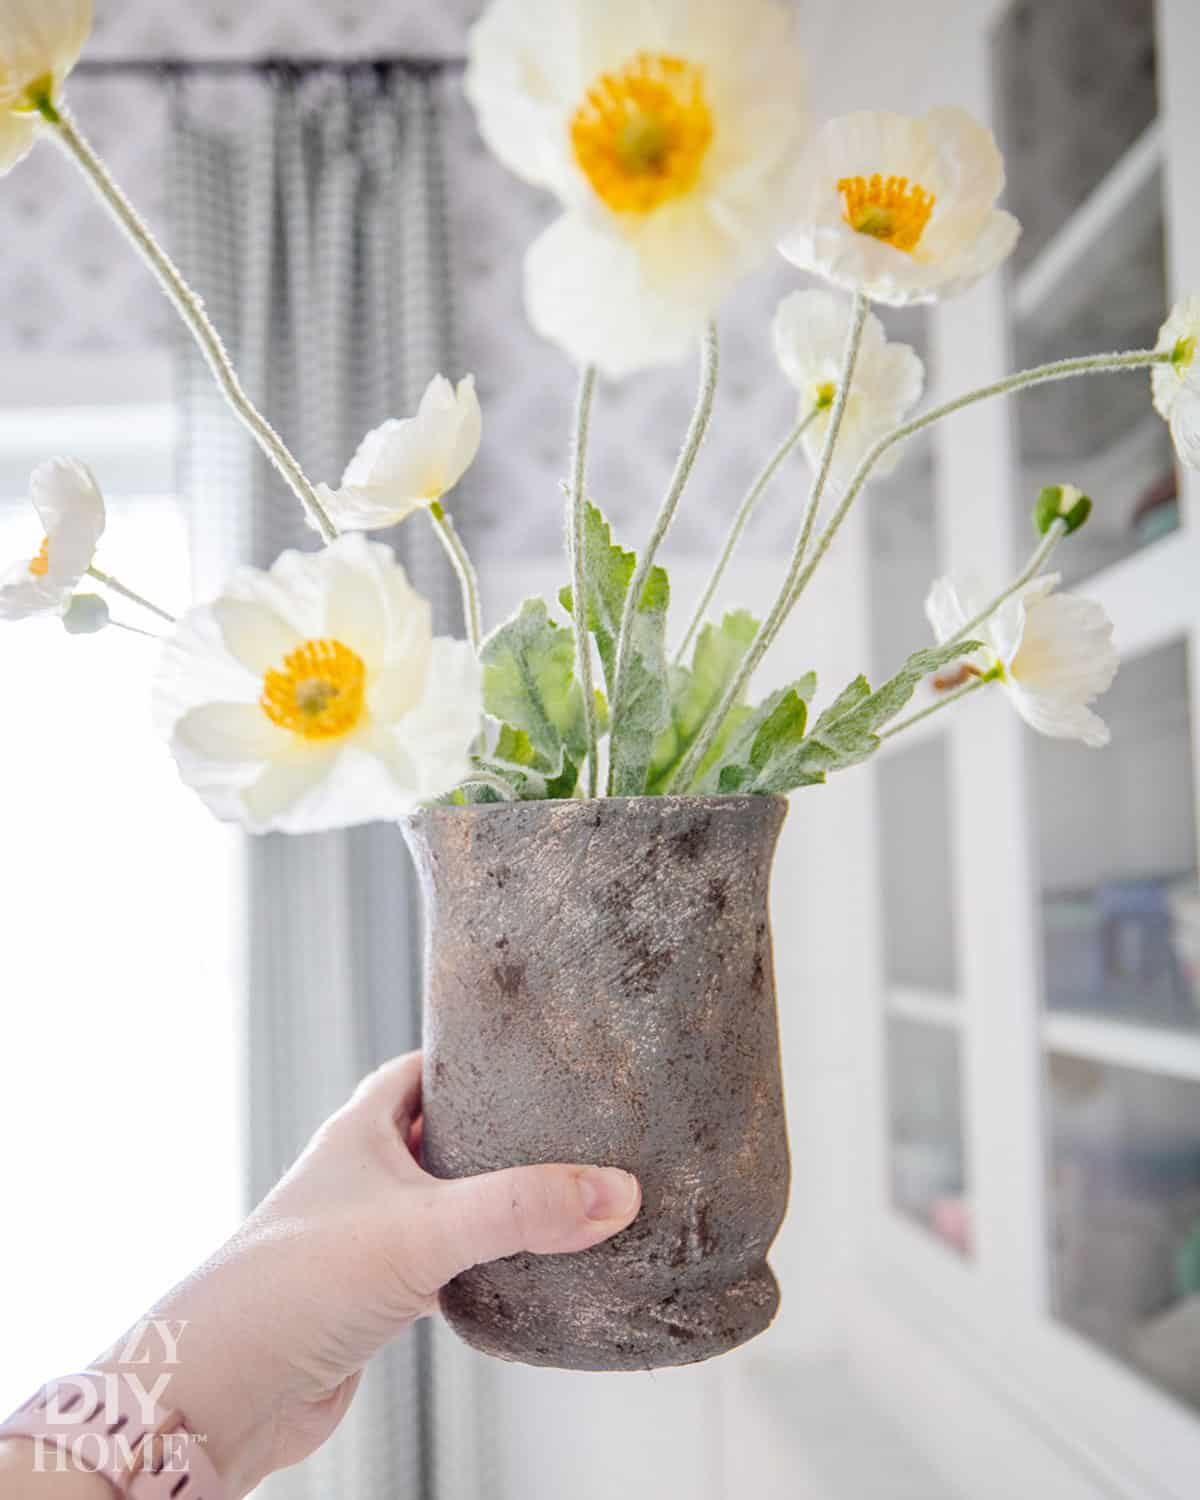
Have you ever seen those beautiful stone or ceramic vases in home decor stores and loved the look… but not the price? Stone-style decor is everywhere right now. The soft texture and natural feel instantly make a space look calm, cozy, and high-end. The problem is that these vases can easily cost $30–$60 or more!! The good news is you can create the same look with a simple glass vase and a few inexpensive supplies. In this tutorial, I’ll show you how to turn a plain Dollar Tree vase into a beautiful faux stone vase using baking soda paint and a little coffee grounds for natural texture. It’s a fun, beginner-friendly project that costs just a few dollars but looks like something from a boutique home store.
Quick Overview
Time: About 45 minutes (plus drying time)
Cost: Under $5
Skill level: Beginner
Tools: Small paintbrush, paper towel, small bowl for mixing paint
Materials List
Materials used in this project:
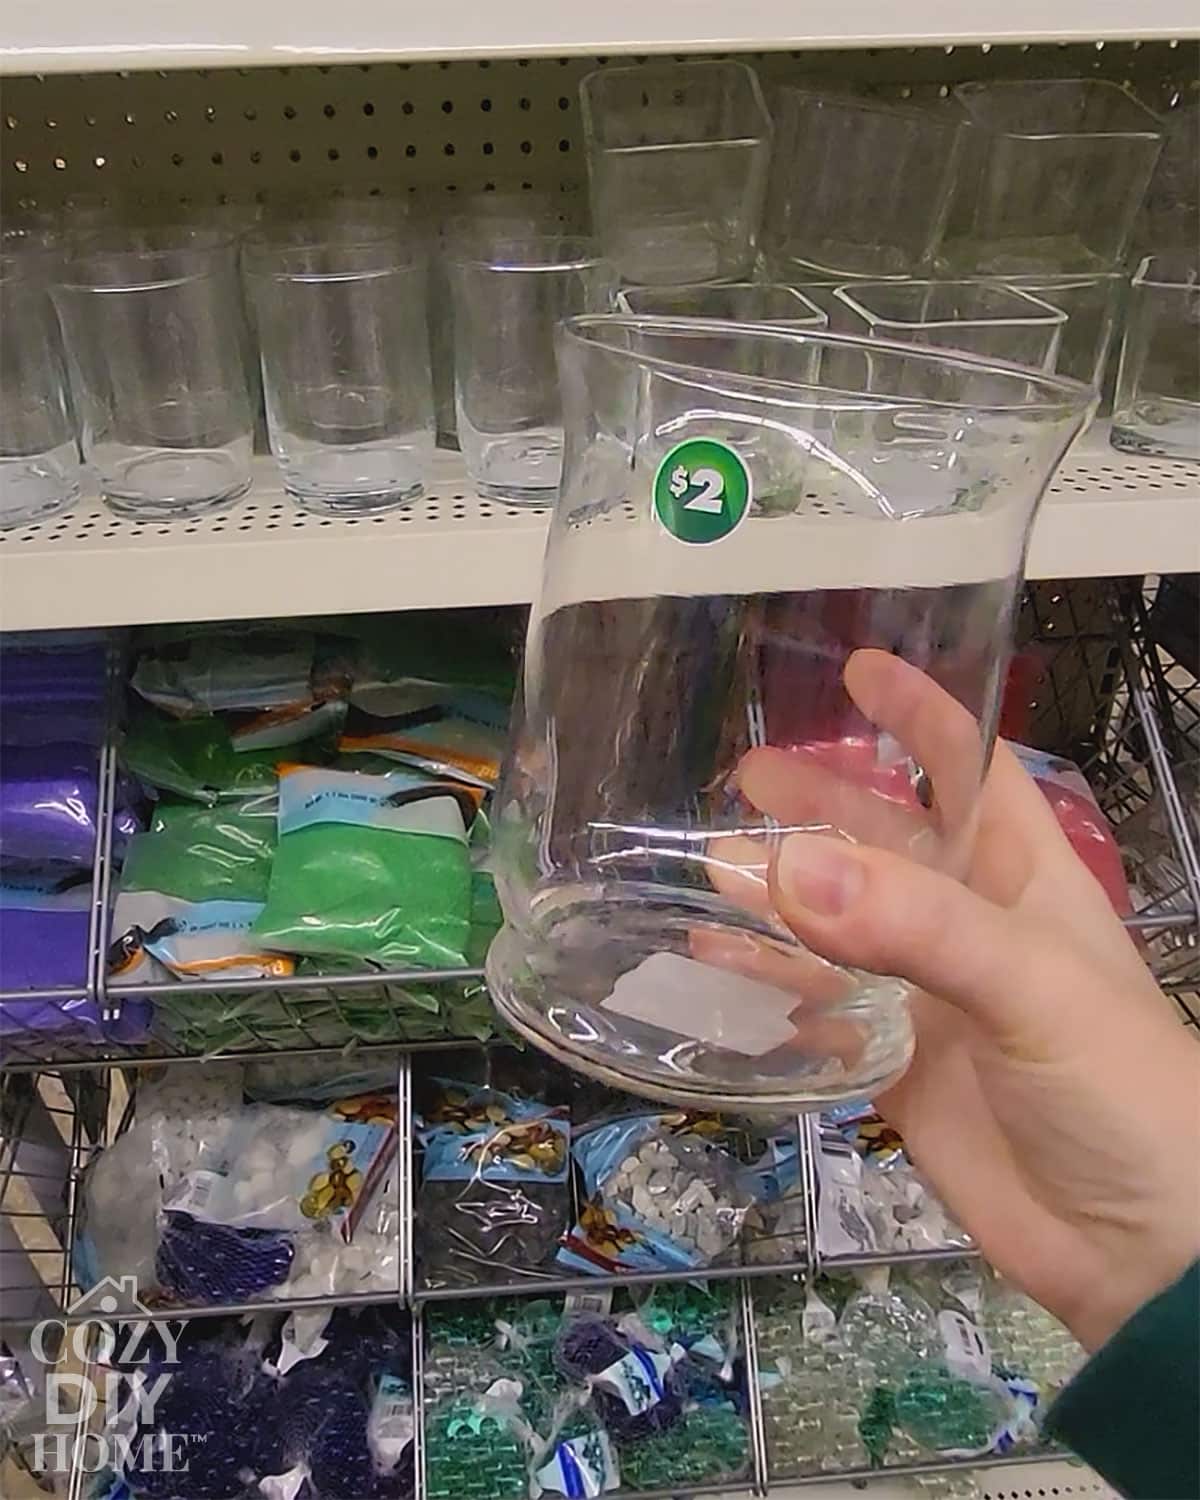
- Plain glass vase (Dollar Tree or thrift store)
- White acrylic paint
- Baking soda
- Light grey or brown acrylic paint
- Used coffee grounds (slightly damp)
- Small paintbrush
- Paper towel or rag
Optional:
- Clear matte sealer (for durability)
Most of these supplies can be found at Dollar Tree, craft stores, or even in your kitchen.
Step-by-Step Tutorial
Step 1: Clean the Vase
Start by wiping the glass vase clean.
Any dust, fingerprints, or oils on the surface can prevent paint from sticking well. A quick wipe with warm soapy water or rubbing alcohol works great.
Make sure the vase is fully dry before painting.
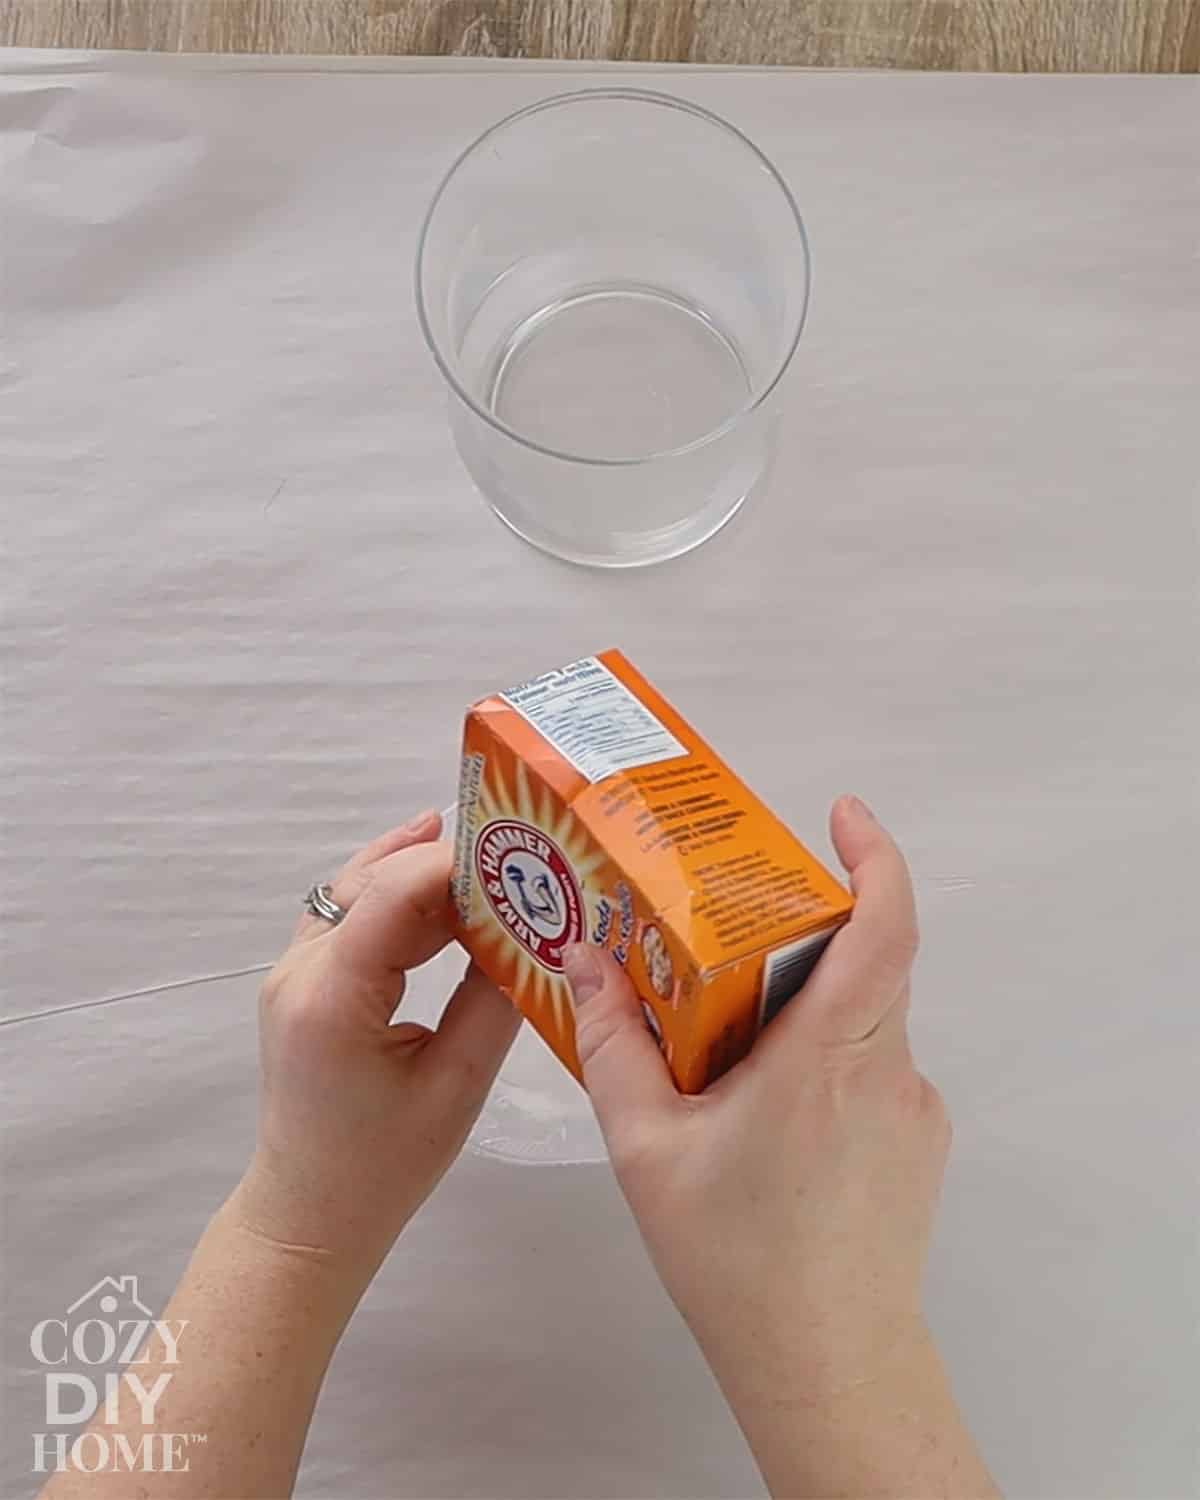
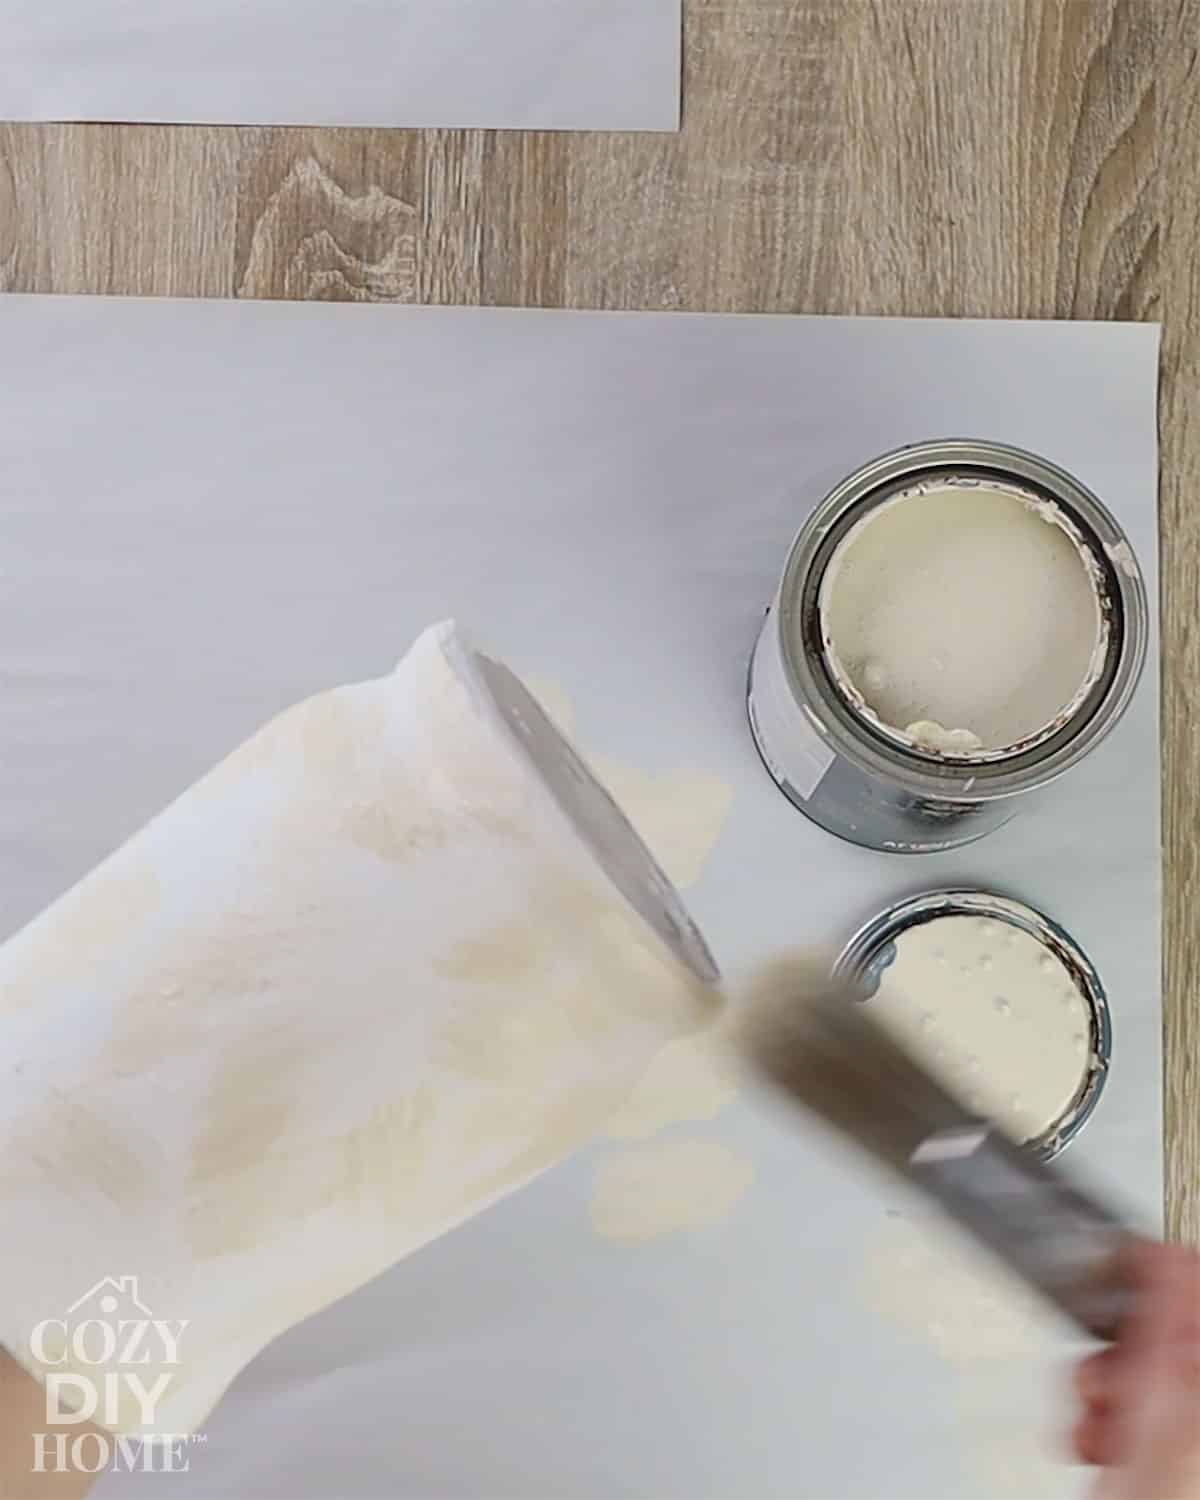
Step 2: Make the Baking Soda Paint
In a small bowl, mix:
- 1 part acrylic paint
- 1 part baking soda
Stir the mixture well until it forms a thick, slightly gritty paint.
This baking soda mixture is what creates the stone-like texture. It gives the vase that chalky, natural finish instead of looking like smooth painted glass.
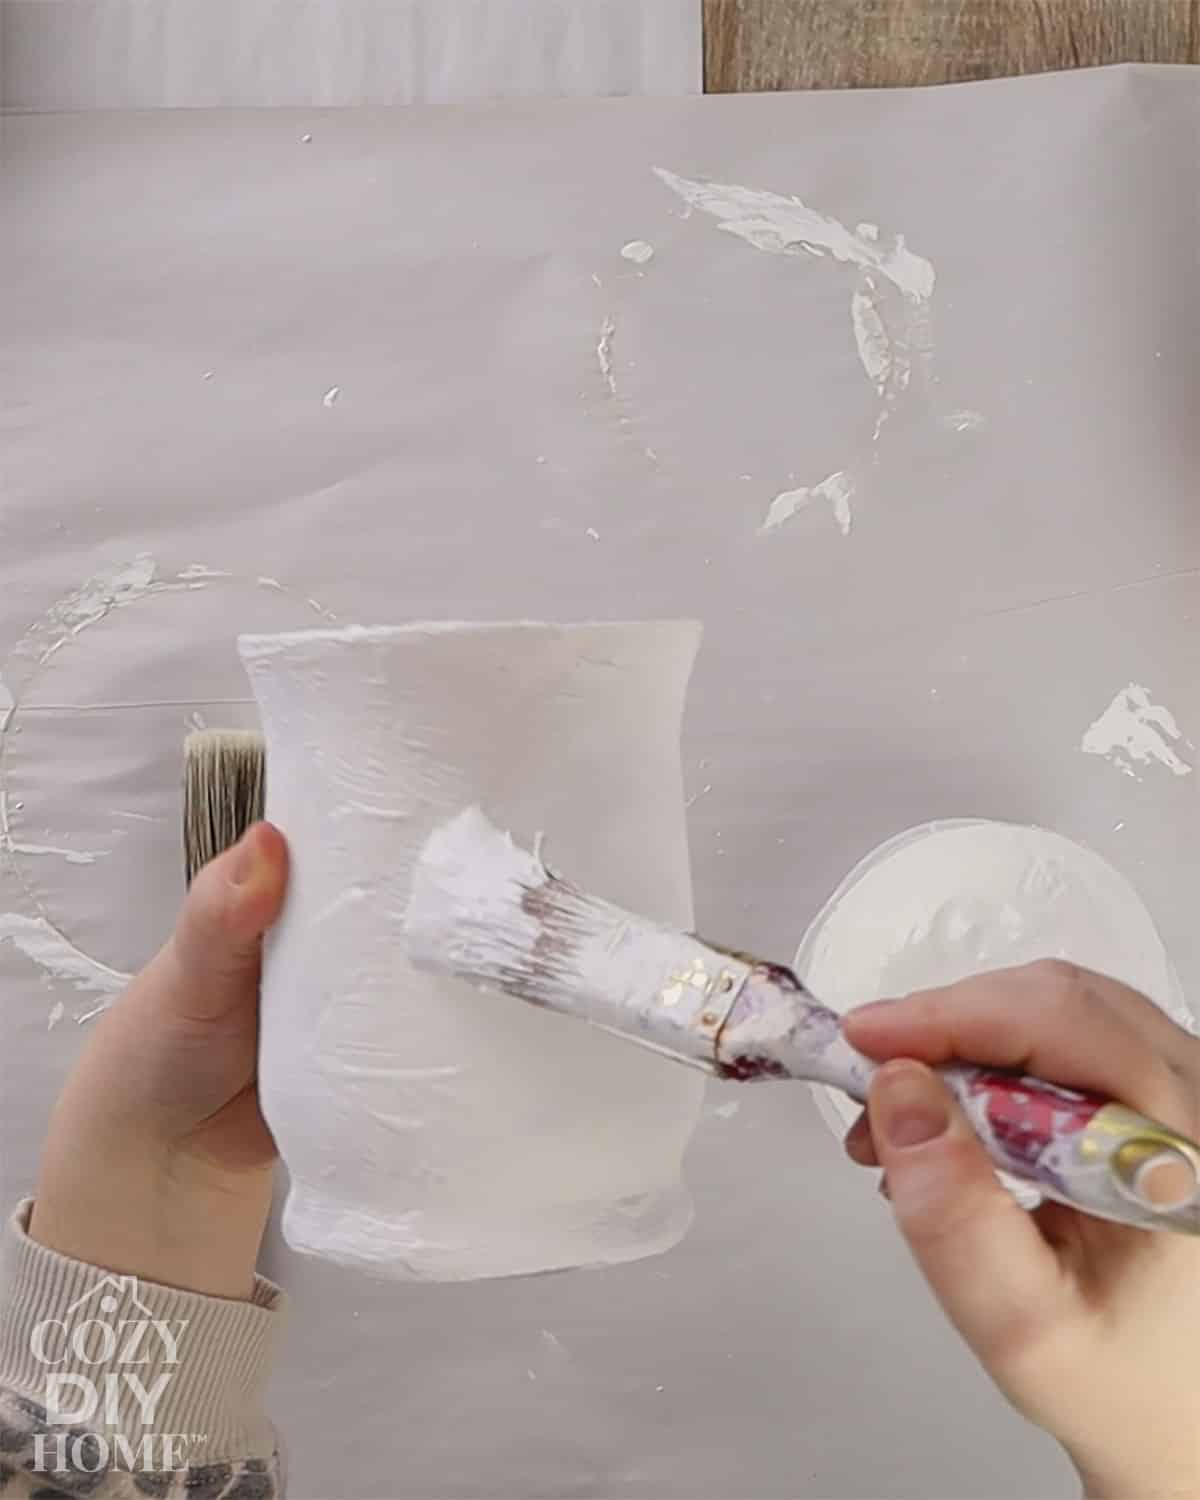
Step 3: Apply the First Coat
Use a paintbrush to apply the baking soda paint mixture to the vase.
Brush it on evenly, but don’t worry about making it perfectly smooth. A little texture actually helps the stone look more natural.
Let the first coat dry completely before moving on.
Tip: If the glass still shows through in some areas, add a second coat.
Step 4: Dry Brush Color for Depth
Once the base layer is dry, dip your brush lightly into grey or brown acrylic paint.
Wipe most of the paint off on a paper towel. Then lightly brush over the vase.
This technique is called dry brushing. It adds soft shadows and natural variation that helps the vase look more like real stone.

Step 5: Add Natural Speckling with Coffee Grounds
Take a small amount of slightly damp coffee grounds and gently rub them onto the surface of the vase.
This creates tiny speckles and irregular texture that mimics natural stone.
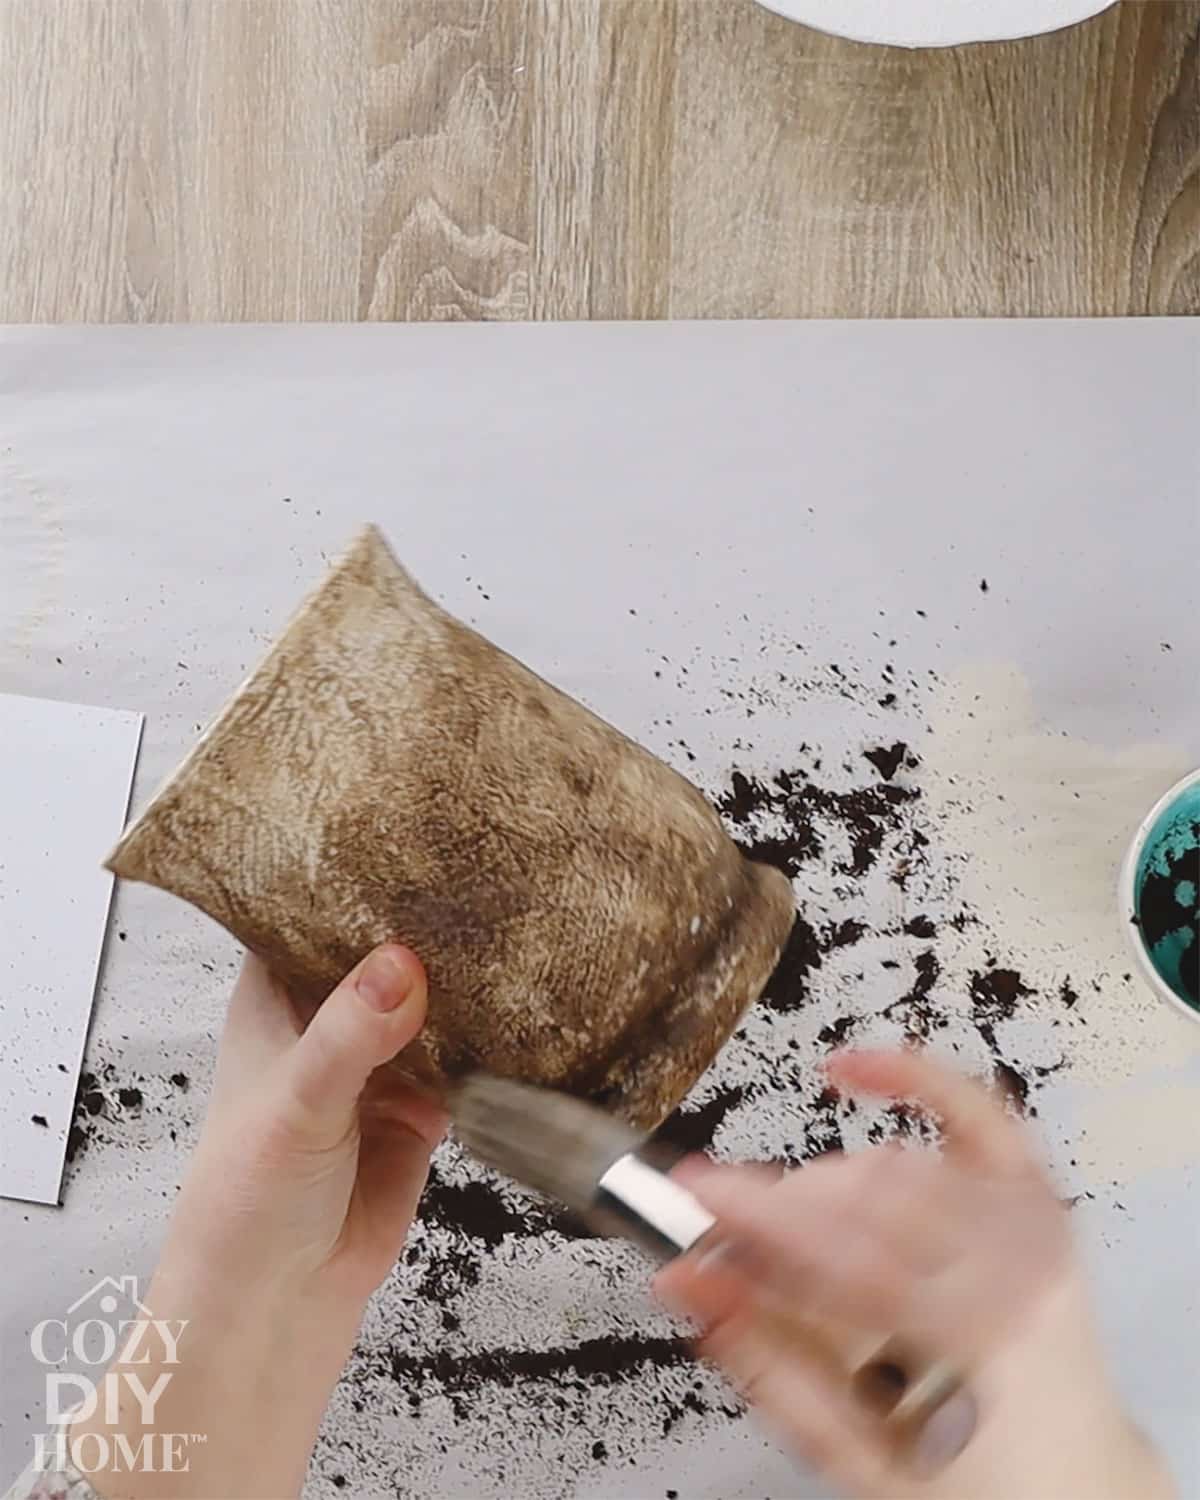
If you want more texture:
- Add more coffee grounds
- Lightly dry brush another layer of paint over them
- Repeat until you like the look
There’s no exact formula here. The beauty of this project is that each vase will turn out a little different.
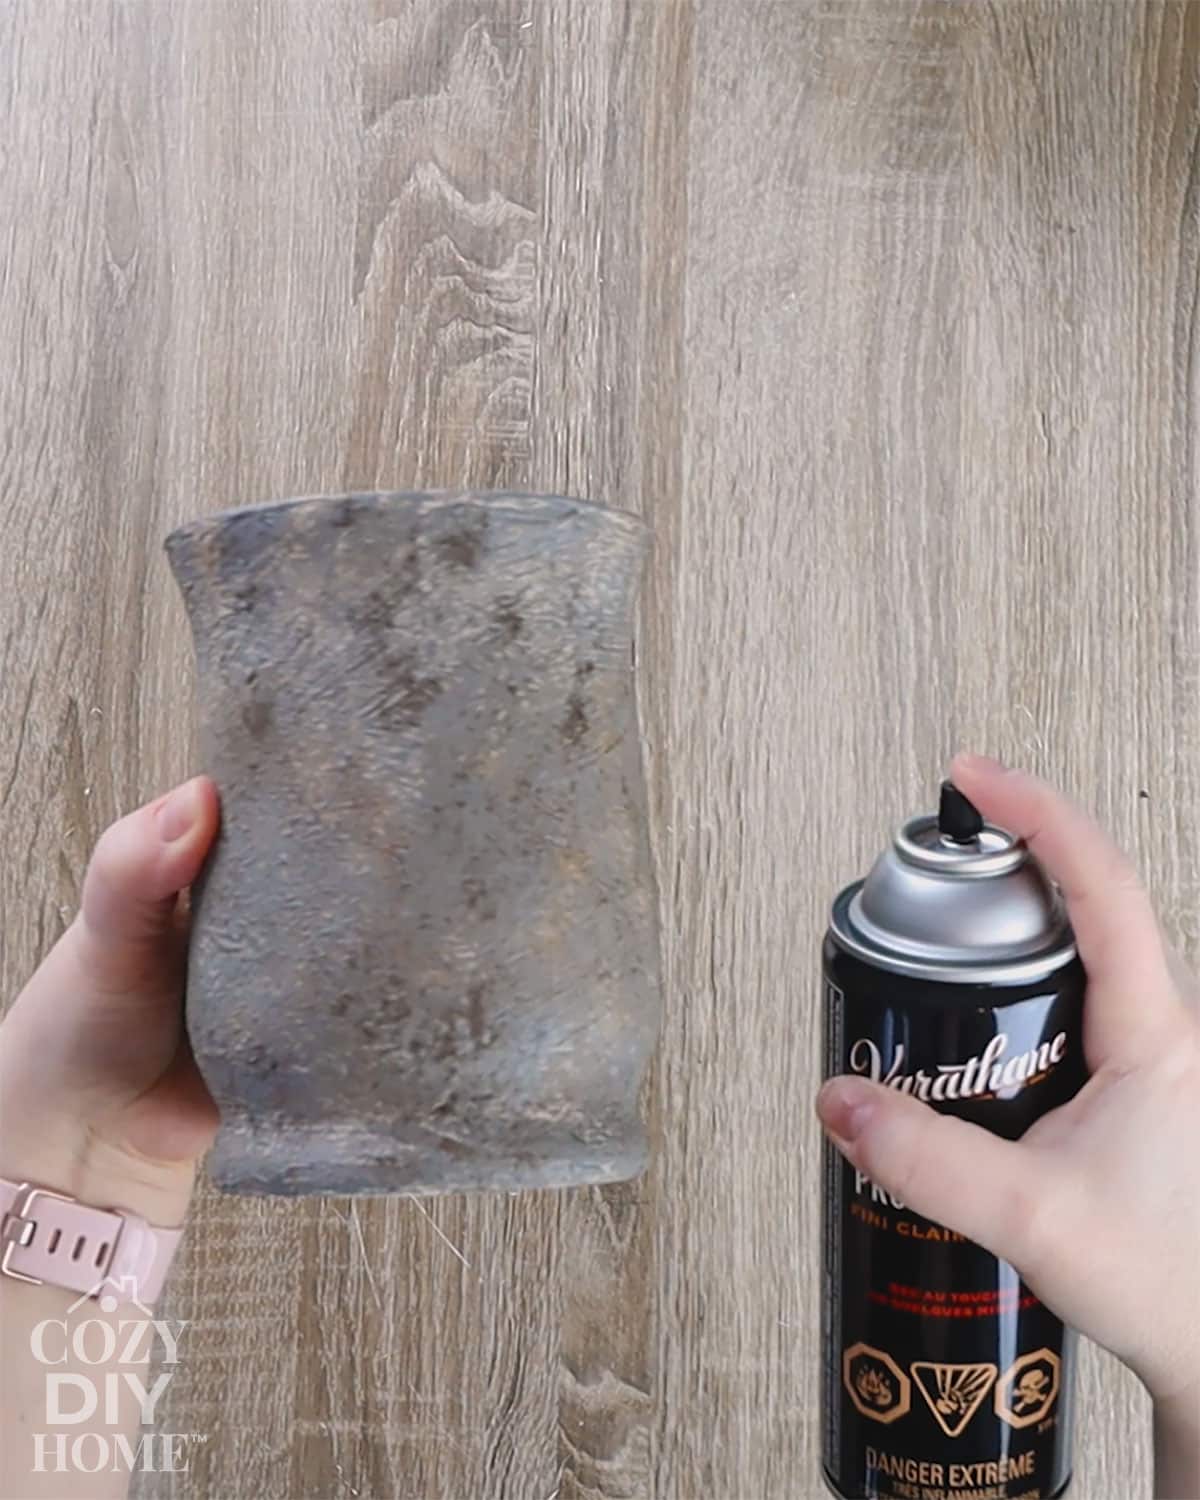
Step 6: Seal (Optional)
You can leave the vase raw for a more organic, matte look.
Or, if you want extra durability, apply a clear matte sealer once everything is fully dry.
Sealing helps protect the finish if the vase will be handled often.
Tips for the Best Results
Here are few simple tricks can make this DIY look even more realistic:
- Use thicker paint. If the baking soda mixture feels too thin, add a little more baking soda to increase the texture.
- Don’t over-blend the colors. Real stone has natural variation, so uneven brushing actually makes the finish look more authentic.
- Try layering colors. A light grey, soft beige, or taupe dry brush can add depth.
- Use used coffee grounds. They work best when slightly damp but not dripping wet.
- Experiment with different vases. Bottles, jars, and thrift store vases all work great for this technique.
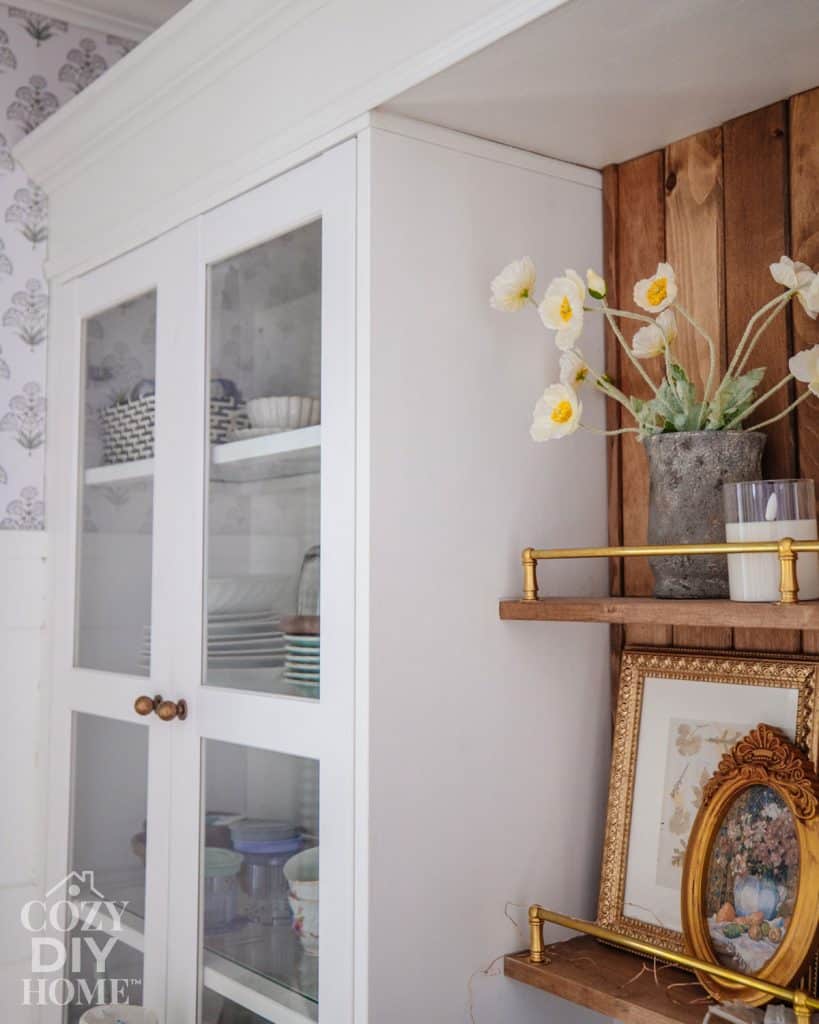
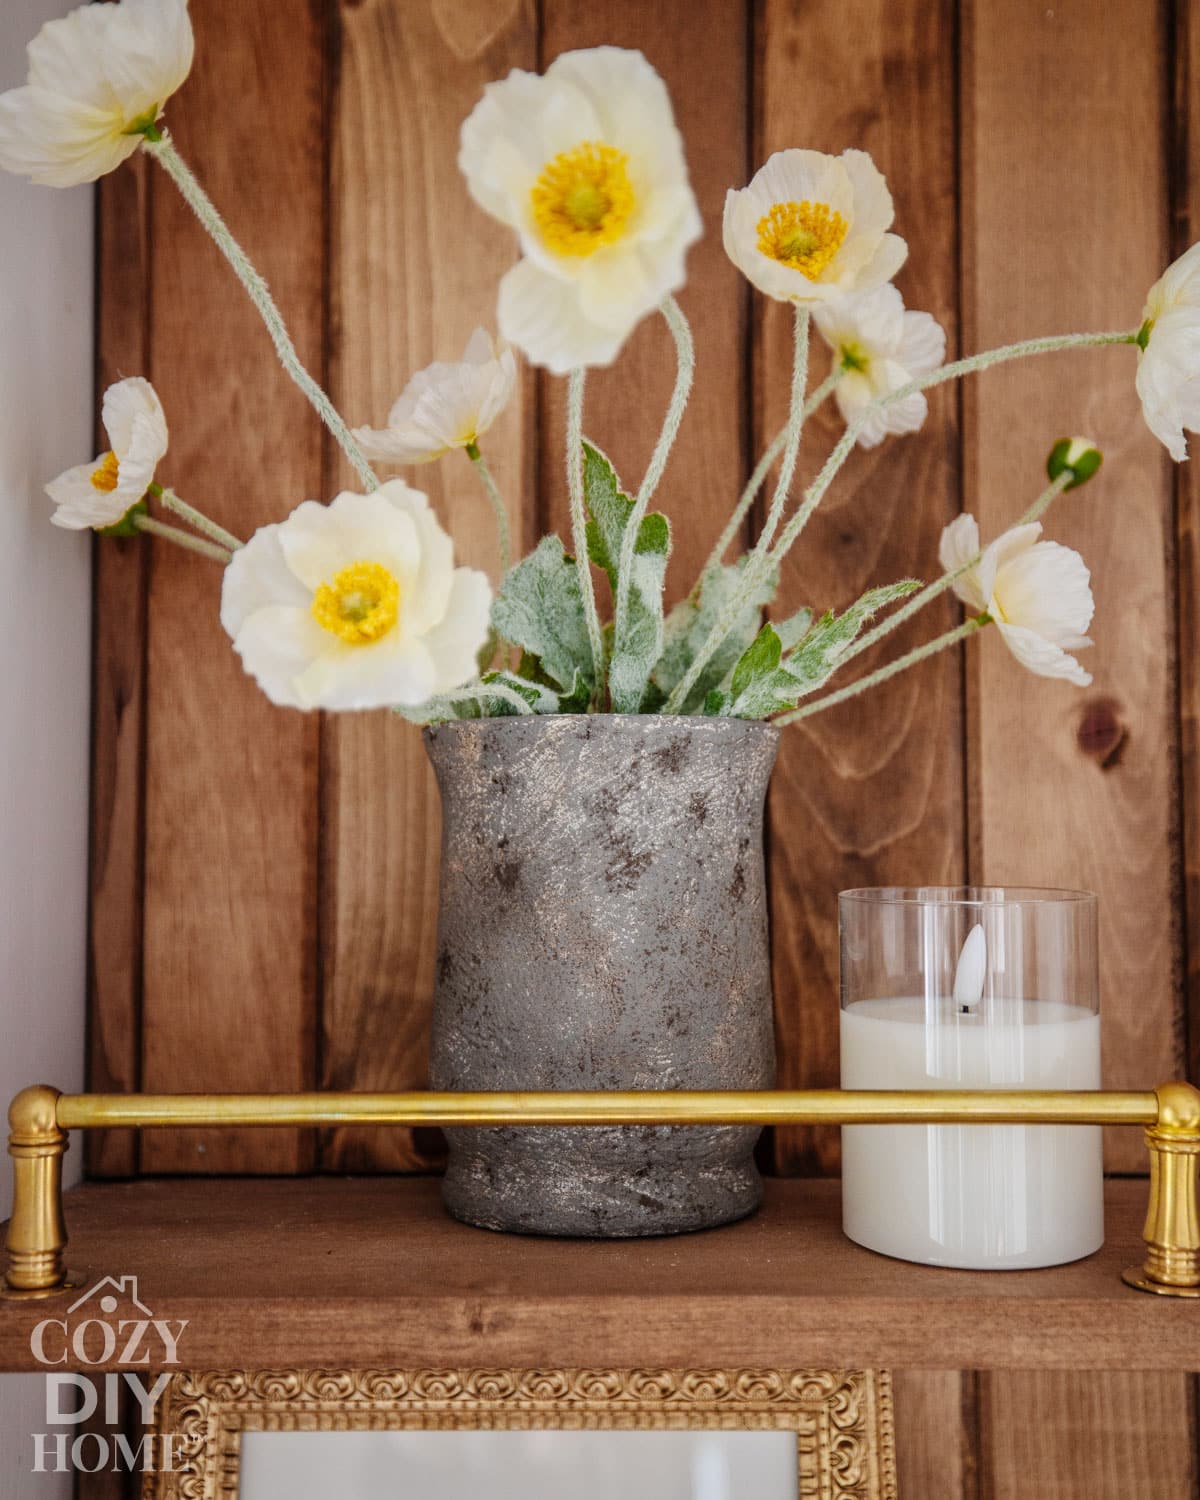
Styling Ideas for Your Faux Stone Vase
Once your vase is finished, there are so many cozy ways to style it around your home.
Try placing it:
- On a coffee table with a stack of books
- On a shelf with small candles and greenery
- On a mantel for a soft neutral look
- On a bedside table with dried flowers
- As a centerpiece on a dining table
Dried eucalyptus, pampas grass, or simple faux stems look especially beautiful in these textured vases.
Because the finish is neutral and natural, it works with farmhouse, modern, rustic, and minimalist decor styles.
Frequently Asked Questions
Yes. Basic craft acrylic paint works perfectly for this project.
White is great for a classic stone look, but you can also use beige, cream, or light grey.
Once they dry, the smell is very minimal. If you are sealing the vase, the scent disappears completely.
Yes. The vase will still look great with just the baking soda paint and dry brushing.
The coffee grounds simply add extra natural speckling.
Yes! The glass vase from Dollar Tree is originally designed to be able to hold water.
You can lightly sand the surface once it dries or apply another thin coat of paint to soften the texture.
Related Projects
If you enjoyed this project, you might also like:
- 19 Stunning Dollar Tree Fall Decor DIYs That Look Expensive for 2026
- DIY Dollar Tree Coastal Decor: 6 Beautiful & Budget-Friendly Projects for a Breezy Summer Home
- 10 Dollar Tree Garden DIYs That Look Expensive (But They’re So Affordable!)
- Budget-Friendly DIYs: 20 Dollar Tree Crafts for Every Season!
- 6 DIY Dollar Tree Kitchen Organizers That Look Expensive (But Aren’t!)
With just a glass vase, baking soda paint, and a little creativity, you can create a beautiful faux stone vase for only a few dollars! This simple Dollar Tree DIY adds natural texture and cozy style to any room, and it’s a fun project even if you’re completely new to DIY. Give it a try, experiment with textures and colors, and make it your own. Handmade decor always makes a home feel a little more personal and inviting.
And if you make one, I’d love to hear how it turned out! – Christina 🙂
Pin Me