One Knot Wonder: Make a Beautiful Macrame Plant Hanger for a Thrifted Globe Vase
This post may contain affiliate links · This blog generates income via ads
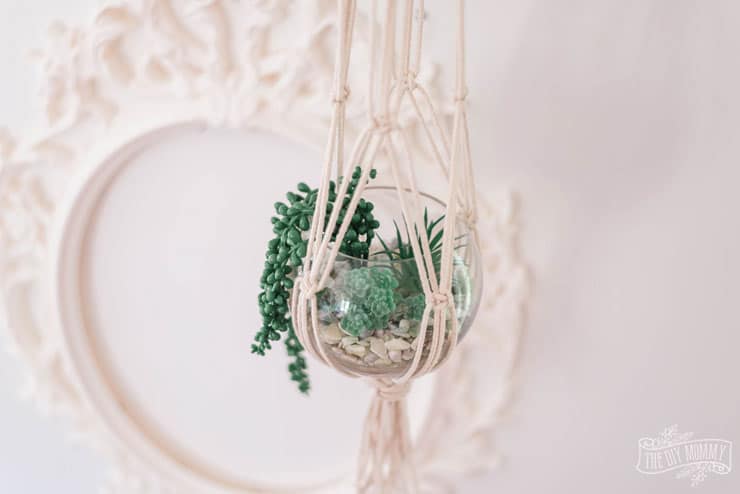
Come see how I turned a set of thrifted globe vases into some chic decor for my studio. One made a beautiful table centerpiece and the other a stunning macrame plant hanger! Get the full tutorial on how to DIY a macrame plant hanger for your own home this season.
When I stumbled across a couple of vintage globe vases at my local thrift store, I knew they would be perfect for my next DIY plan. I had been meaning to create a macrame hanger to hold a plant pot or two. These vases were just what I needed to make that plan happen. For only $6 total, I brought the vases home and got to work to create a plant holder that was Etsy or Insta-worthy, and I think I succeeded!
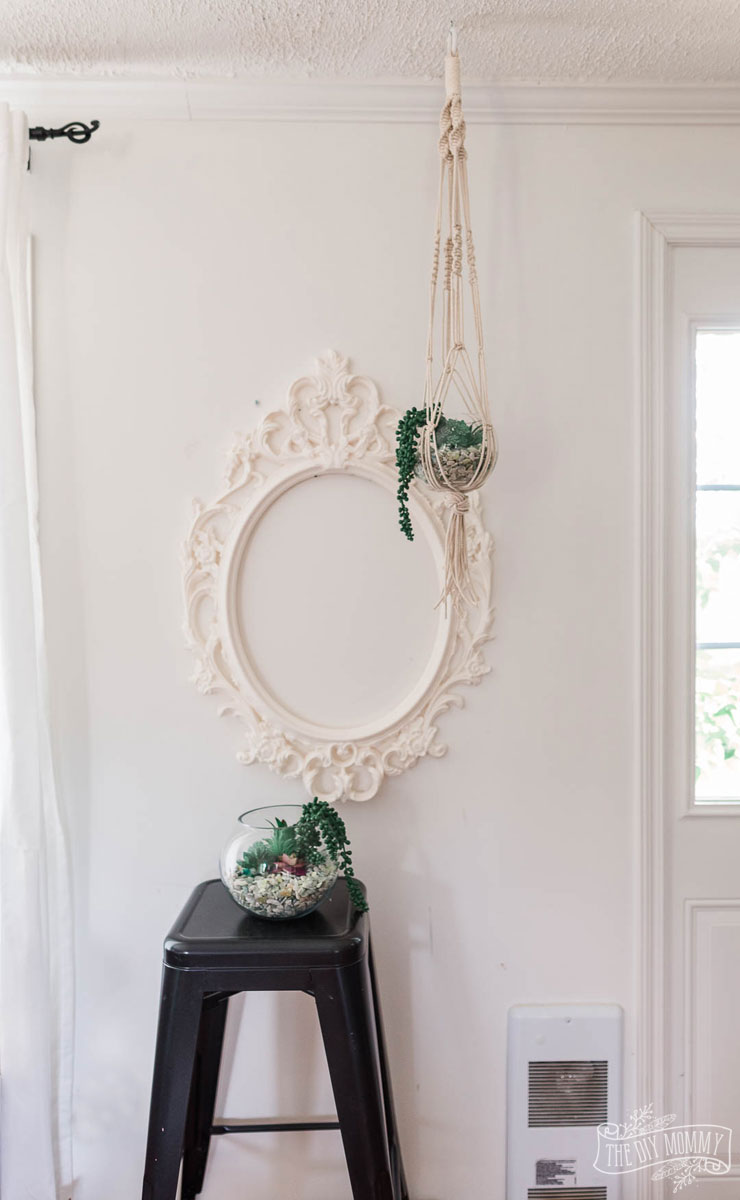
Table of contents
Creating the planters
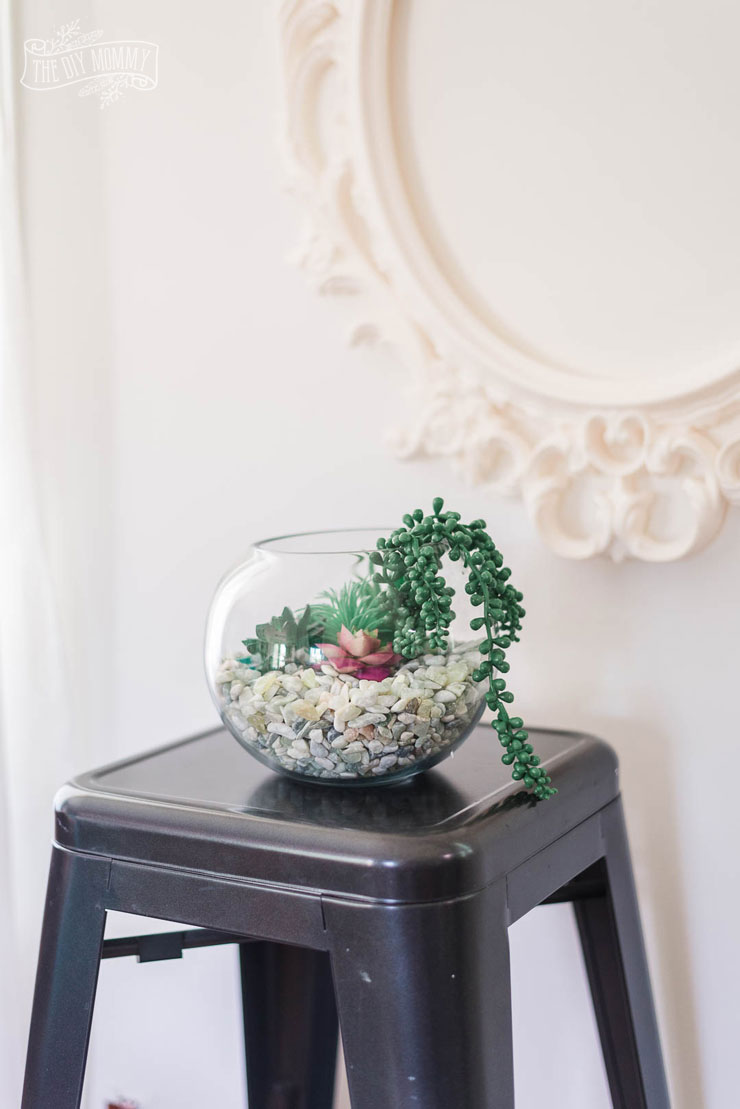
The first thing I did was fill my planters. This is such an easy little craft! I bought some pebbles at my local dollar store in beautiful sea glass colors. This was an extra cost but I just loved them and they were still affordable! I used the pebbles to fill both vases halfway. If you don’t want to purchase rocks, you could use some from your garden pathway or gather small river rocks or washed-up stones from the beach too.
Next, I found some faux succulents on Amazon. These are sometimes available at the dollar store as well, so shop around for local options if you wish. Of course, real plants would be the best thing to use. But I was creating these planters for my studio, and I don’t spend much time there every day. I knew I would forget to look after these plants if they were real, so I used faux instead for zero maintenance.
The plants were arranged in the vases using different textures until I was happy with the result. I used the long-hanging succulents and combined them with spiky and round leaves and different shades of green too, all to create interest. I used 5-6 succulents per vase.
At this point, I realized that the large vase would make good tabletop home decor and decided to leave it as-is with no hanger. When planning macrame projects like a hanging planter, you need to think about weight. I did not want to try and hang the larger vase because I felt it was too heavy for the design I had in mind.
Creating the DIY macrame plant hanger
I love to share craft tutorials and this is one of my absolute faves because it’s just so easy and fun. In this post, I’m including both a video showing you how I made this in real time AND the written instructions for basic knots and for the project itself. I know some of us learn better from written instructions than from visual tutorials, so I’ve included both!
These macrame plant hanger DIYs are a fantastic project for beginners! You only need to know one basic macrame knot and the design is very simple. Of course, you can just use my project as a guide and create your own design too. That’s the beauty of macrame, there’s so much room for creative license!
Watch my YouTube video below for the step by step macrame plant hanger DIY, and find my guide to basic macrame knots used in this project below:
(Visit Hilary of Old World Home’s YouTube Channel referenced in the video here!)
Basic Macrame Knots
Before we get right into the project, let’s talk a little bit about knots. The best way to feel confident about your first macrame project is to practice your basic knots before you begin! Then you can put more energy into the big picture design as you work.
Larks head knot
(You won’t use this one to make these macrame plant hangers, but you’ll need it for most macrame wall hangings and my hoop wreath tutorial here.)

Fold the macrame cord in half and hold it over your base (hoop, pipe, driftwood, etc.) with the loop on top.

Pull the ends of your cord behind, up, and through the loop.
Pull the ends of the cord all the way through the loop to tighten.

Square knot
Start with a group of 4 cords and place the rightmost cord over the two center cords in a backward “C” shape.
Take the leftmost cord, bring it under the two center cords, and then bring it up and through the rightmost cord.
Pull gently to tighten. Congratulations, you’ve just made a half square knot! Note: You can create a spiral knot pattern by continuing to make half square knots down the length of your cords.
To create a full square knot, reverse the pattern to create the second half of the square knot. Take the leftmost cord and place it over the two middle cords in a “C” shape.
Take the rightmost cord and pull it under all of the cords and up and through the “C” of the left cord.
Pull to tighten. You’ve now created a square knot.
Let’s macrame!
Now that we have the square knot under our belts, let’s create a beautiful (yet simple) macrame plant hanger together.
I like to use traditional macrame cord, but you could also use:
- Hemp
- Jute
- Twine
- Crochet yarn
- Cotton rope
- Embroidery floss
It really just depends on the effect you are going for and the weight you need your holder to bear. There’s no “right cord” for this project! I found my cord at Michaels but Amazon is also a good source.
You need to cut your cord to the following lengths:
- 8 pieces of cord 12 feet long (My finished product was about 3 feet long, so if you want your hanger to be longer or shorter than this, adjust the initial lengths of each cord as you see fit.)
- 1 piece of cord 3 feet long

You only need a few other supplies:
- 1 small macrame hoop (I purchased mine at the dollar store but any of your local craft stores will carry them too.)
- Painter’s tape
- Scissors
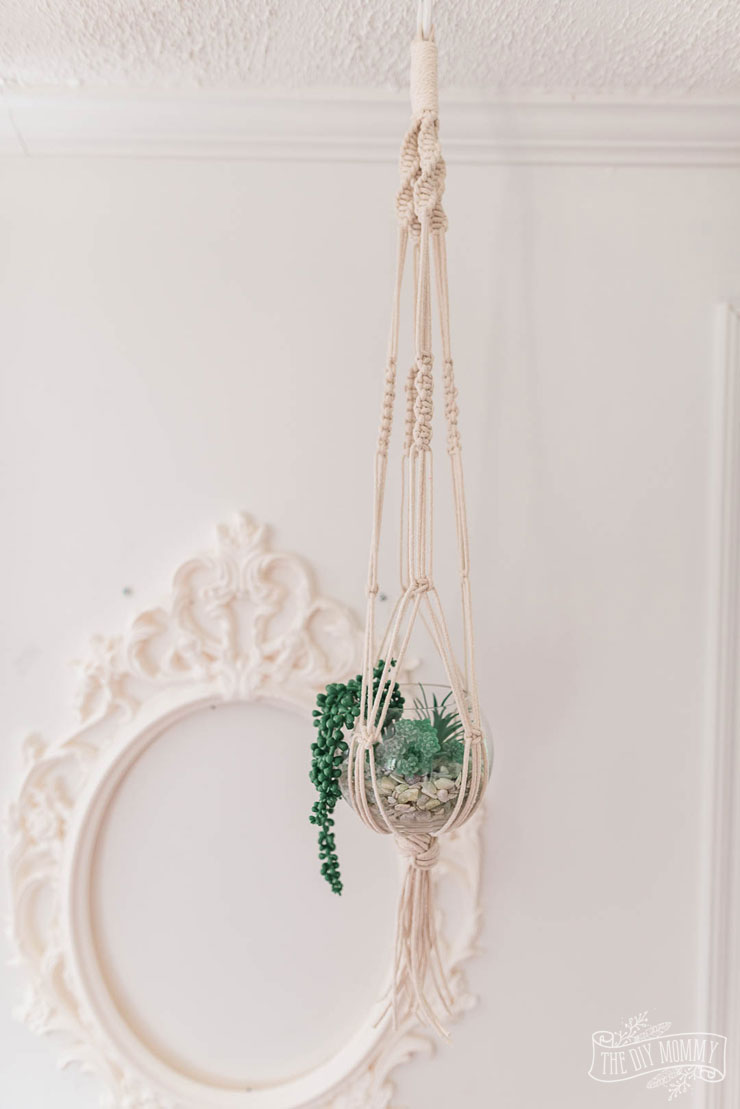
Knot your way to a macrame plant holder
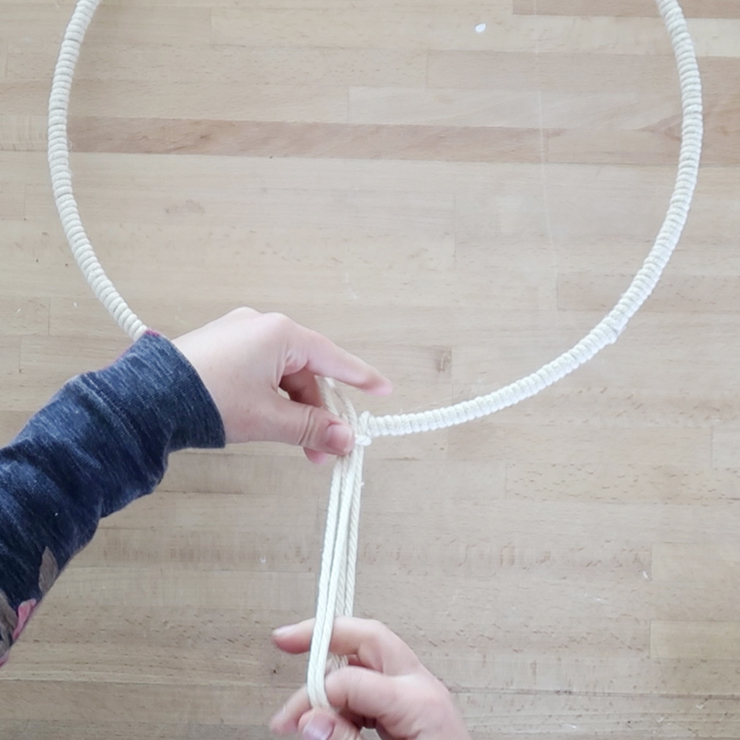
Thread your 8 long lengths of cord through the hoop. You want the hoop ending up in the middle of your cords. Fold the cords in half and make sure they are even with each other (make sure the ends line up).

At this point, I used painter’s tape to tape my hoop to my table. This kept my hoop from sliding around and allowed me to work with both hands.
Grab your 3-foot length of cord. Create a “U” shape at one end that is about 2 inches long. Place it on top of your cords right under the hoop with the loop facing down and the open end up. Circle the long end of your cord around the back of your bundle of cords and start wrapping this length around the bundle, working your way down to the end of your loop. Make sure you leave the tail end free and clear, sticking out at the top.
When you reach the bottom of the loop, don’t cover it entirely! Pull the end of your cord through the loop and then pull the tail at the top until the loop disappears. The end is now hidden, and you can just take your scissors and trim the cord so there are no loose ends. Voila! A perfect gathering knot!

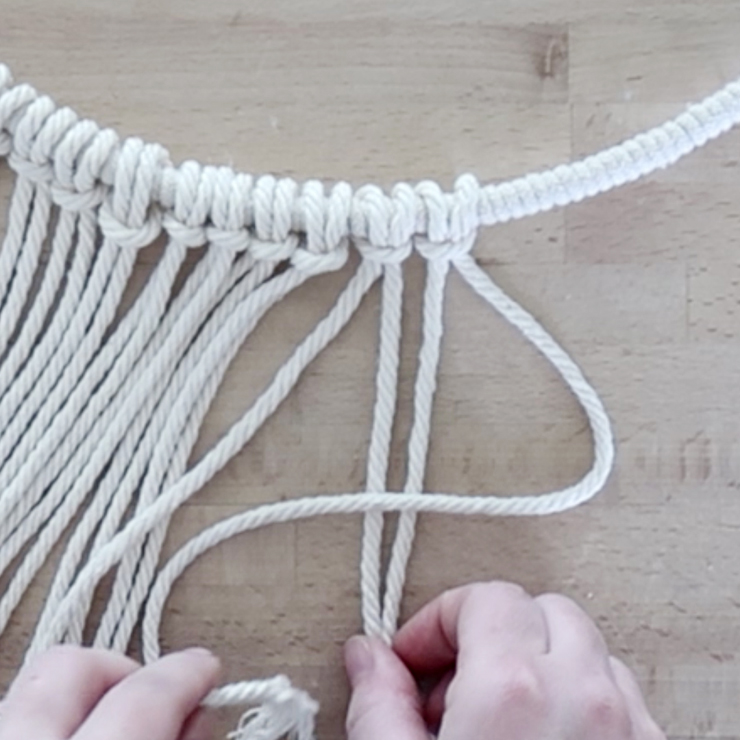
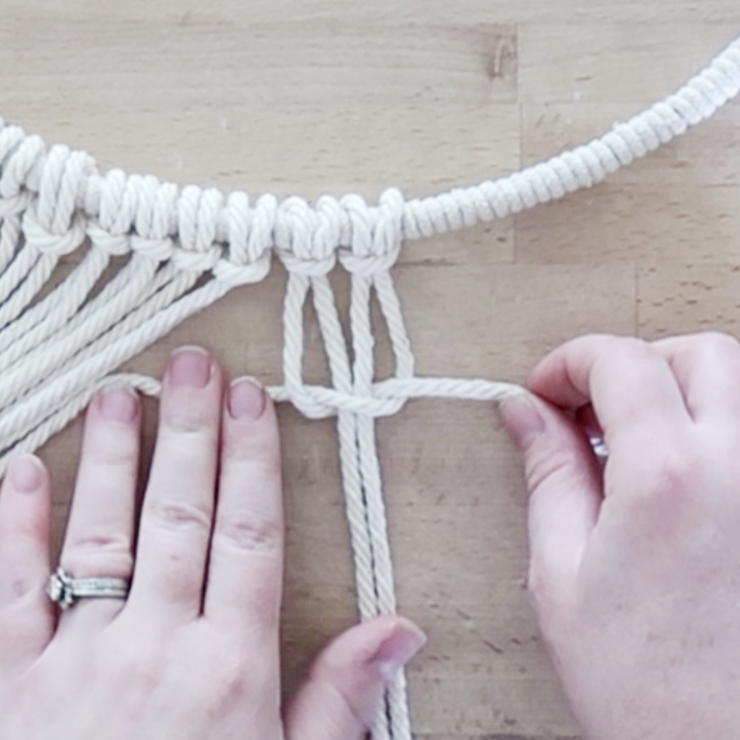
Next, divide your cords into 4 groups of 4 cords each.
We are going to use your first group of 4 cords to create a design a few inches long using a square knot (which you’ve already practiced!).
Creating the spiral effect
Start on the group of cords farthest to your right. Follow the instructions above to create a half square knot. Keep doing this to create a spiral pattern and make it as long as you want! If you want to create the same hanger I did, make this half square knot pattern about 3.5 inches long.
Do the exact same thing for the other 3 groups of 4 cords.
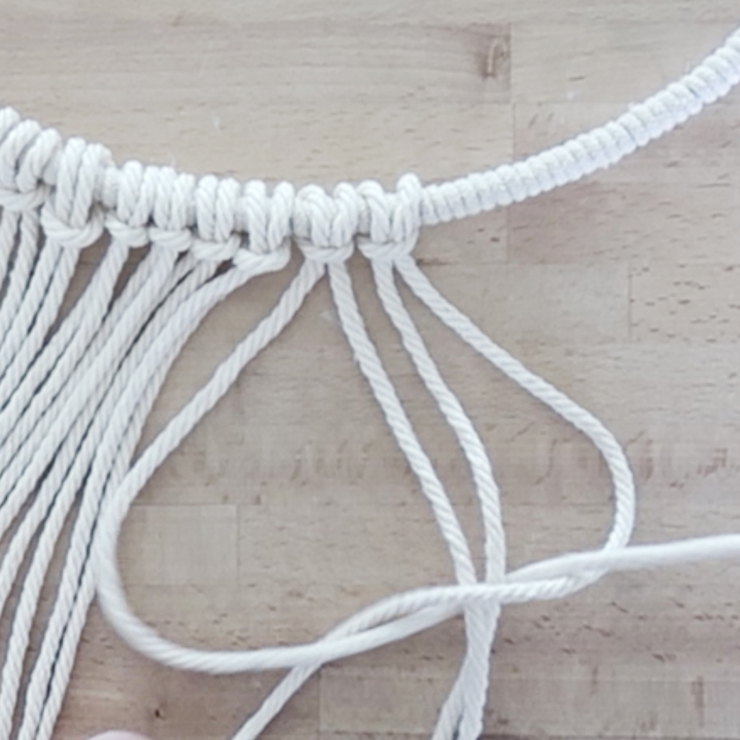
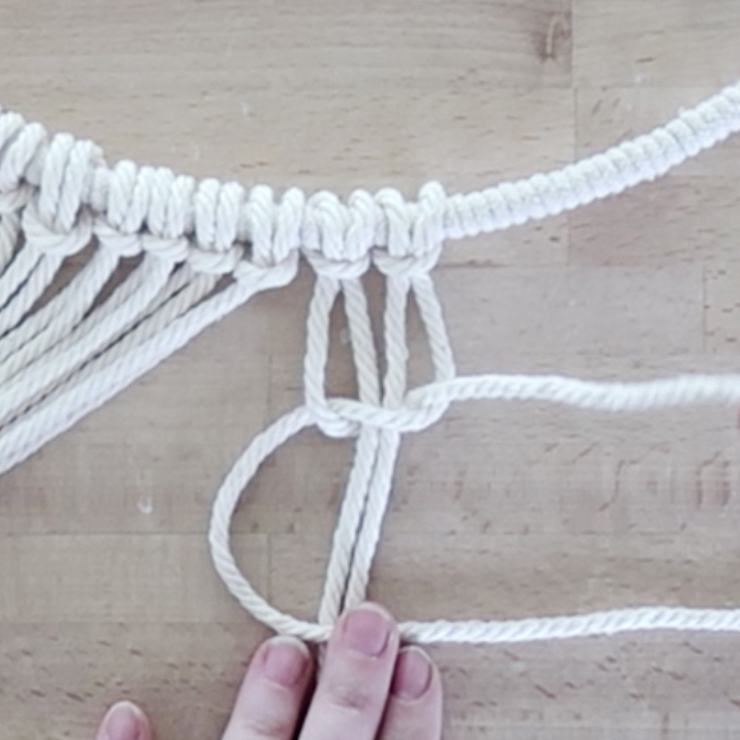
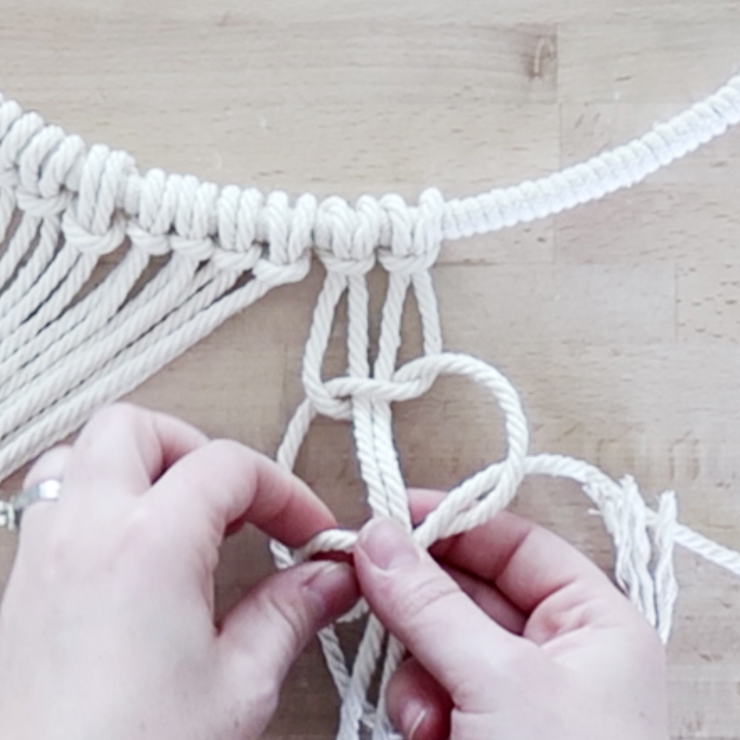
Once this is done, go back to the group of cords on the far right of your hanger. Make a half square knot 5 inches (if you want to do it like I did) below the square knot design you just created. Then do the same thing in reverse using the leftmost cord and create a FULL square knot (see instructions above).
Continue making square knots by alternating half square knots: right, left, right, left, etc. You will know if you’ve done it right if you get a flat pattern instead of the spiral pattern your half knot design created. To get a hanger like mine, make this design 4 inches long.

Do the exact same thing for the other 3 groups of 4 cords.
Hang Up the Macrame Plant Holder
I chose to hang my DIY macrame plant hanger from a hook in the ceiling to do the next set of designs. It is much easier to visualize this way, as you will soon see!
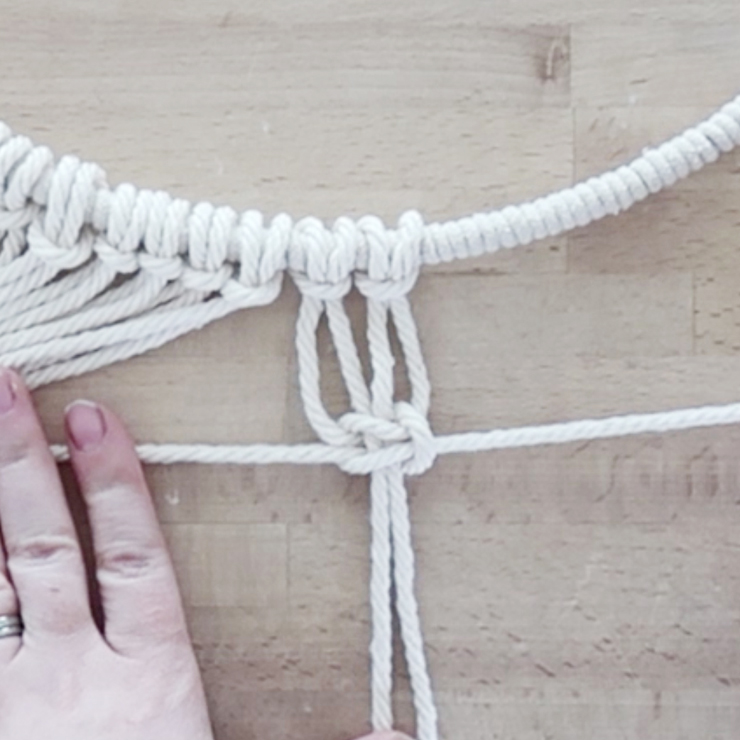
Choose one set of cords (it doesn’t matter which ones now) and create a square knot another 5 inches down below the last design.
Make one square knot in the other 3 groups of 4 cords.

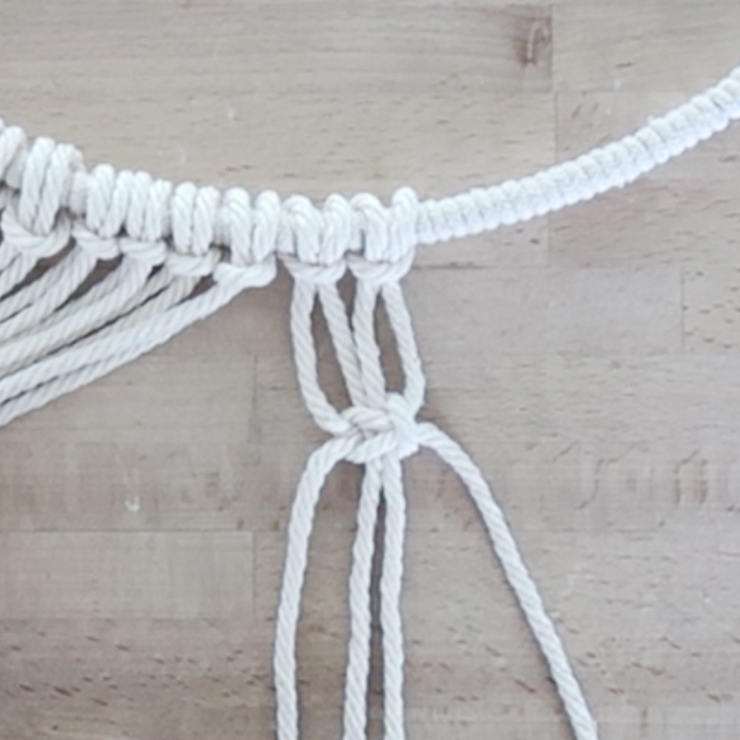
Creating the basket
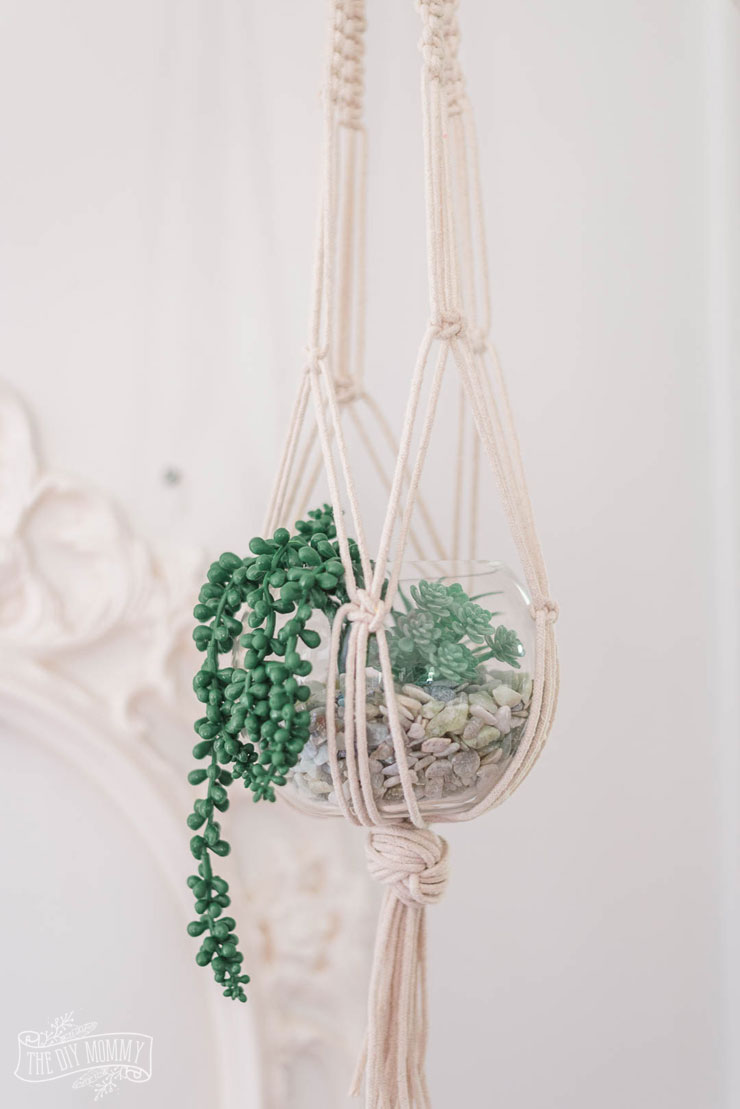
Now, it’s time to really pay attention because we are doing something different! Take 2 cord strands from one group of cords and 2 cord strands from the group of cords directly next to it. Then, use the outside strands from your new group of 4 to make a square knot. This will create a diamond shape and is the start of the basket where your vase will sit.

Then, work your way around the rest of the cords and finish the design. Take the 2 cords on the right of the last group of 4 that were not used in the square knot and use them to make a square knot with 2 cords from the next group of 4 and so on until you have 4 square knots and all the groups of cords are now connected.
The next step is to gather ALL the cords together about 5 inches below the latest square knot design and loop them into a giant knot. Make sure all the cords are evenly distributed in the knot, pulling on and adjusting individual cords as necessary.
You can use scissors to trim the cords underneath the knot to the length you desire. This is totally a personal preference.
Add your plant and enjoy!
You should now be able to open your “basket” up and place your globe vase inside! It should nestle down against the giant knot at the bottom and be held by the diamond-patterned square-knotted section above it.
And that’s it: you’ve learned to make gorgeous macramé plant hangers with just a square knot pattern! It’s not often that the perfect project for a beginner turns out Pinterest and Instagram worthy, but that’s definitely the case here. I would love to see the plant holder you create and the vase arrangement you put in it! Tag me @thediymommy with your finished results.
Happy knotting!
Pin Me!

This project is part of a summer themed blog hop I’m taking part in with some of my blogging friends, so make sure to check out all of the beautiful summer DIY & decor ideas linked at the bottom of this post!
Simple & Stunning Summer Style Guides
Grace In My Space | Jenna Kate At Home | Thistlewood Farms
Zevy Joy | The DIY Mommy | Seeking Lavender Lane


This is the perfect summer project! I think I’m going to try it! I’ve always wanted to try macrame!
Happy Friday friend!
KariAnne
Wow i’m impressed you make your own macrame, Christina. Love it!
Oh so fun! I love this project, Christina!! I’m definitely going to try make one!
xo Jenna
Are they real plants? I really like the idea of the glass pot
I used faux succulents for this tutorial. You could use any small plant you prefer.