How to Build DIY Porch Posts (Wrapped Wood Columns)
This post may contain affiliate links · This blog generates income via ads
Transforming your porch into a cozy & beautiful retreat starts with the perfect details, and nothing says timeless curb appeal like traditional wrapped porch columns. If you’re dreaming of enhancing your porch with a touch of DIY, building your own DIY porch posts is an ideal project. With a few tools, some basic materials, and a bit of creativity, you can create stunning wood columns that elevate the aesthetic of your home’s exterior. Let me show you how to do this satisfying and budget-friendly DIY project that will have your porch looking picture-perfect in no time!

We built our home ourselves in 2013, and when we finally had the budget 2015 was the summer of “let’s work on curb appeal“. In my head I’d skip outside, dig up the perfect little flower beds in a day (maybe two days?), Sean would slap up the simple porch columns in an afternoon, and I’d have everything painted and ready for the following weekend. HA HA HA. Like all things home building / renovating related – everything takes 10 times longer than you dream. In this case, it was totally worth all of the literal blood, sweat and tears we shed to make Our DIY House look more complete from the outside this summer. Here’s what we did to transform our home’s curb appeal, and how we built our DIY porch posts.
Creating Easy-Care Front Flower Beds
The first thing we did to make our home’s exterior look more appealing is create low-maintenance flower beds. In case you missed the post about the front flower beds, you can read all about them here. They’ve filled in magnificently, and they’re so easy to maintain!
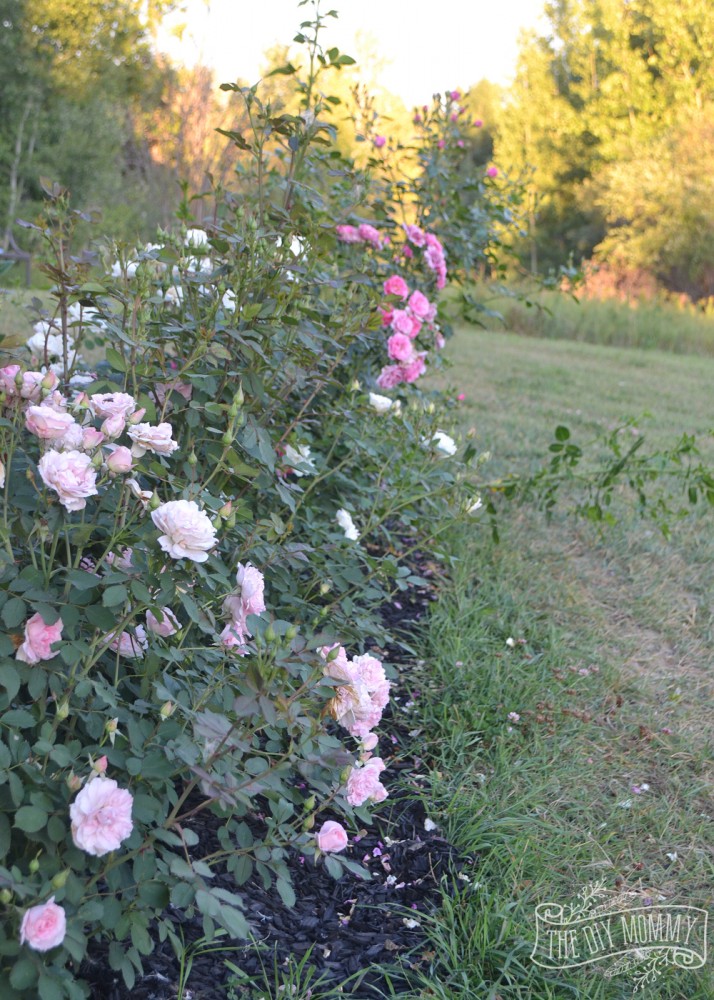
I’d highly recommend planting hardy roses in the Morden varieties if you live in gardening Zone 2/3 like we do. They are simply gorgeous and bloom, bloom, bloom!
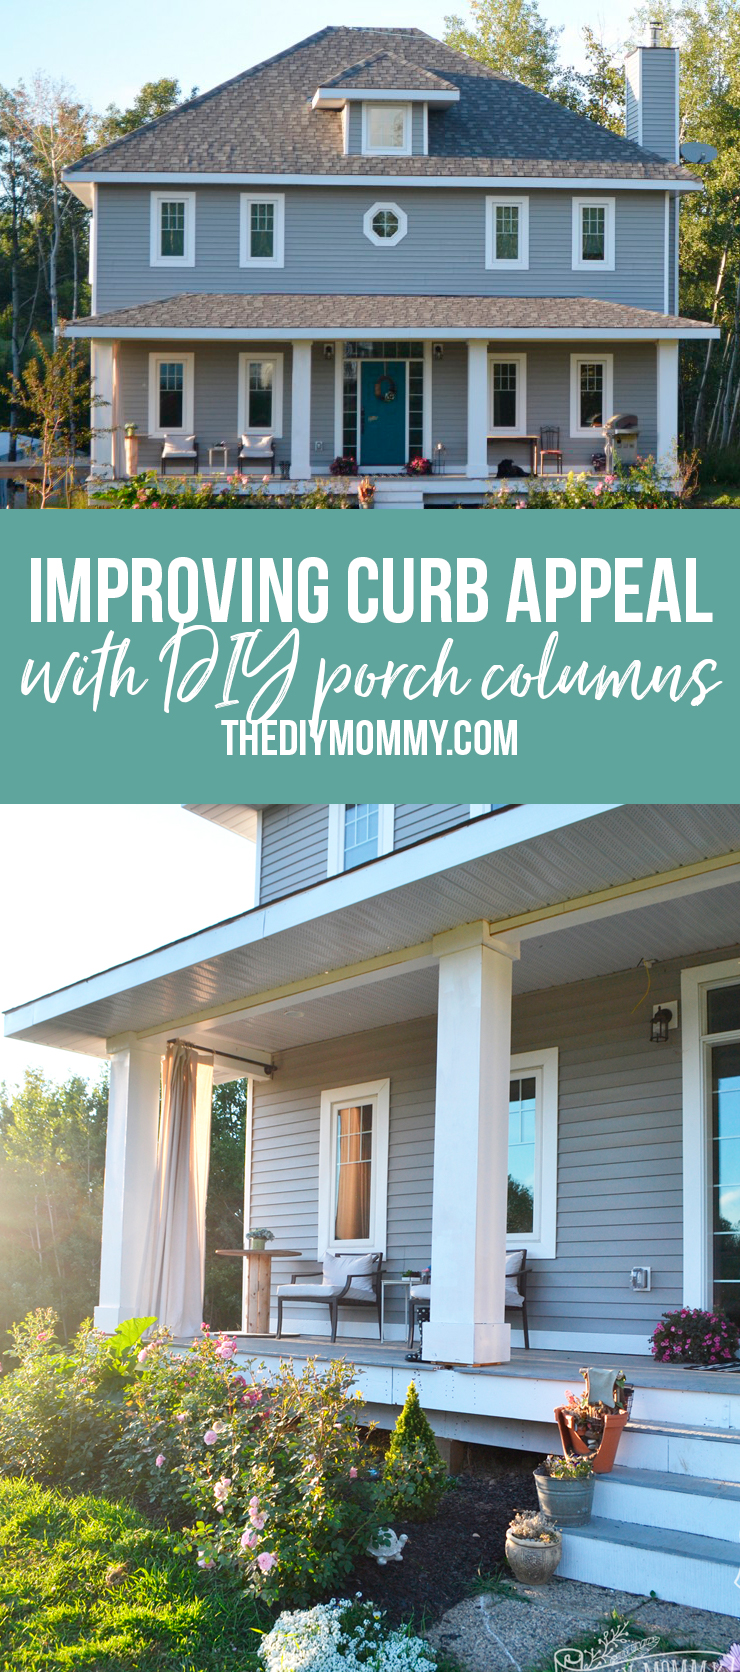
Creating Beautiful DIY Porch Posts
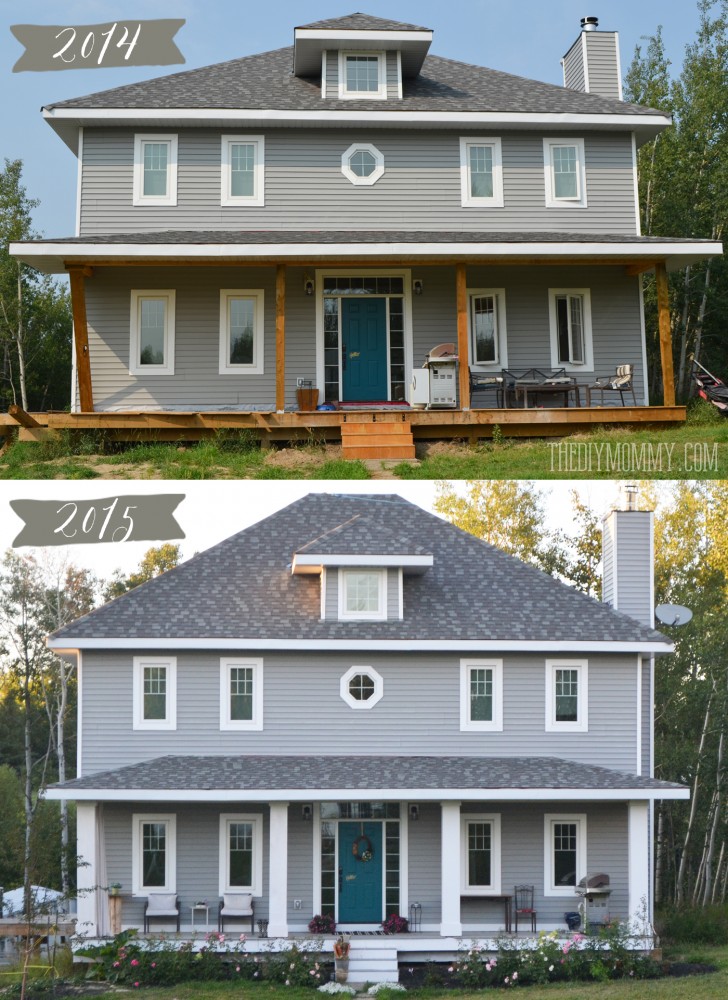
Look at the difference a year – and some VERY hard work – can make! These photos of our home’s exterior were taken exactly one year apart. I simply can’t believe how different our home looks with the porch columns we built and all of the painting I did.
Here’s how we made the DIY craftsman style porch posts
Supplies & Tools You Will Need
- 2×4 lumber (for the frame)
- 2×6 lumber (for the top trim)
- 2×10 lumber (for the bottom trim)
- plywood sheets (for the wrapping)
- exterior paint (I used white)
- miter saw
- nail gun & nails
- finishing brad nailer & brad nails
- caulk
The amount of material you’ll need will be dependent on the number & size of porch posts you want to make. Take careful measurements, and I recommend purchasing at least 10% extra material.

Sean framed out the existing structural columns with pieces of 2×4’s. He designed the frame to use as little wood as possible so that we could save some money, and he used a nail gun to hold everything in place. We made the columns 1 foot in width.

After framing out the columns, we cut some 2 x 6’s (for the tops) and 2 x 10’s (for the bottoms) to use as simple trim pieces to cap the the columns. Sean mitered all of the corners nicely and nailed the 2×10 pieces to the base of the column and the 2×6 pieces to the top of the column.

Finally, we cut some plywood to cover the framed columns between the top and bottom trim. We attached them to the DIY frame with finishing nails.

To finish the front porch columns, I filled all of the nail holes and seams with paintable caulk. Once that was dry, I painted the columns with durable white outdoor paint. I love how simple these look, and they certainly made a difference in the curb appeal of our home!
Final Exterior Touches
We also filled in an unsightly gap between the bottom of our siding and our porch with a piece of trim that we painted white. What a difference!
Originally, I painted our plywood porch flooring and stairs with some extra grey paint I had on hand. I sealed it with some polyurethane so that it lasted until we could afford to tile the porch floor with slate.
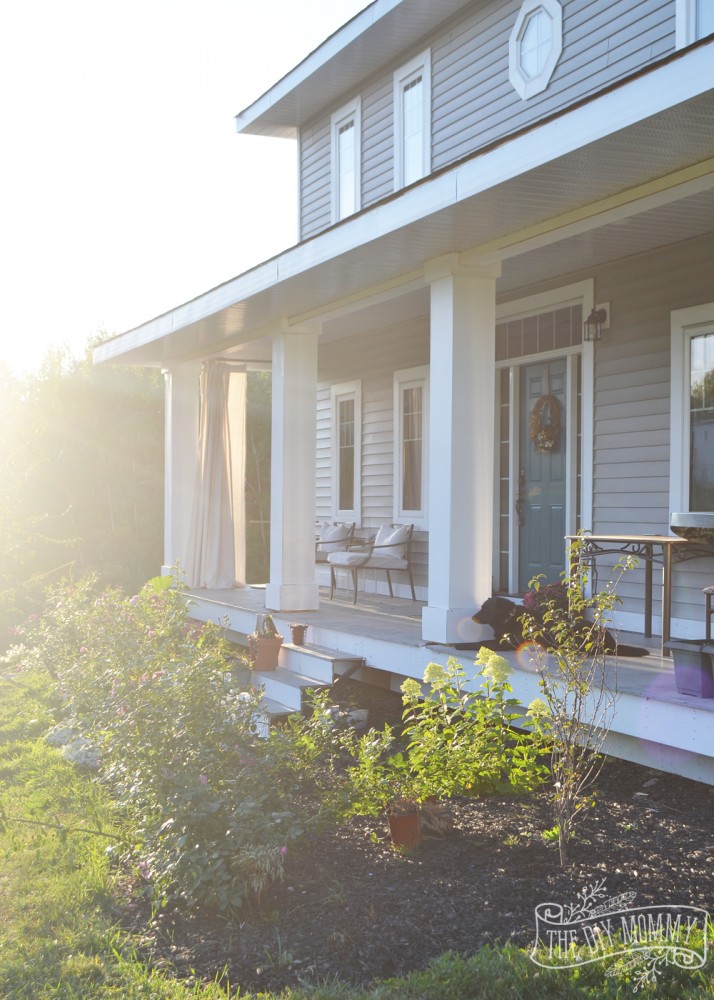
A few years ago, we scored some slate tile from Facebook Marketplace and tiled the porch floor. It looks beautiful with the DIY porch columns, and I’ve had so much fun decorating the steps and front door area for the seasons:

I’m so proud of all of the hard work we did on our home’s exterior, and I can say with confidence that it was 100% worth every bit of time we spent! We’re going to enjoy every last summer evening we can sitting on our porch and enjoying the gorgeous sunsets.
I hope you enjoyed this post about how we made our own porch posts, and happy DIYing!
Pin Me:


Holy smokes! It looks absolutely AHHHHMAZING Christina (and hubby)! LOVE the columns!
Thanks, Kristi! My hubby ROCKS. 🙂
I’ve heard that slate outdoors is a bad option for us Canadians. Slate is composed of layers, and porous to boot, so all of our freezing and thawing cycles just destroy it in a few years. So sad, because it’s so beautiful! Probably my favourite stone.
Thanks, I’ll have to pass that on to Sean! He thought slate would be OK, but we might have to look for a better option.
What a difference the columns have made. And of course the rambling roses finish it off. Great stuff Christina and we hope you don’t mind that we shared a taste of this over at ours.
http://www.renocompare.com/2015/09/front-porch-garden-design/
Regards Jamie
Thanks so much!
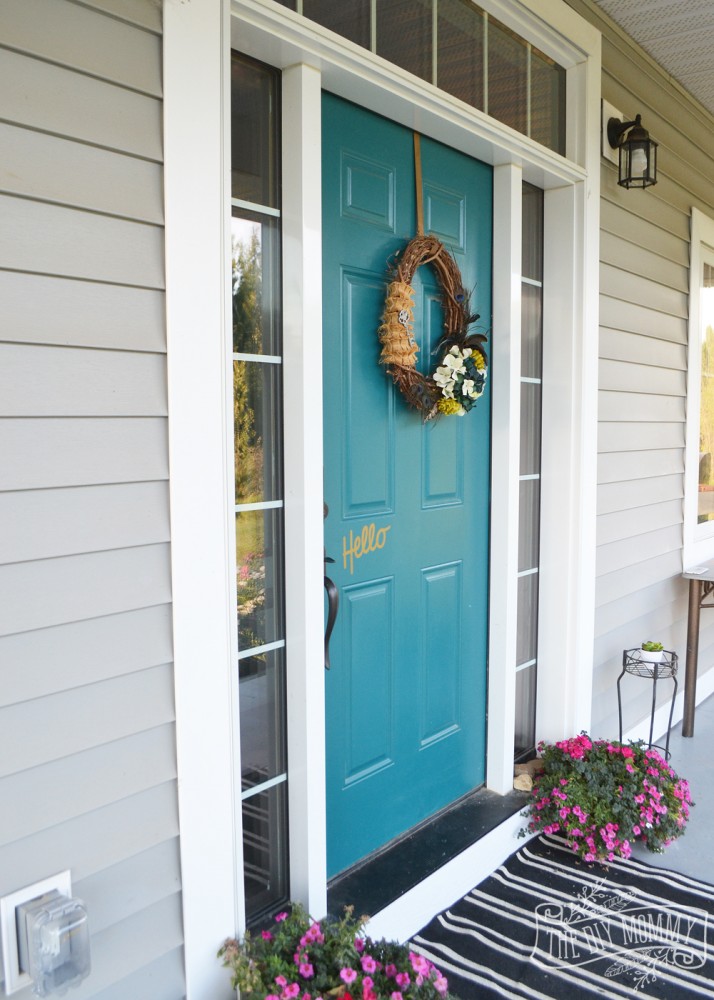
Love, love the door. I am stealing the idea.
I have been admiring your house and though this is a totally unrelated comment, I am interested to know if this is a custom design, or a stock plan? My sister is looking to build on farm land in Canada and this house would be perfect! May I be so bold as to ask for the design? Thank you and great job! I love it!
This was a stock plan that we customized. Here’s the plan we used as a starting point: https://www.pinterest.com/pin/95208979592594052/
What is the color of your door and what kind of paint did you use for it?
Hi, Christina. I absolutely love your house!! I was curious what type of siding you used. Thanks!!
This is so beautiful!11. One thing you might want to consider is wider steps up to the house. Can’t wait to see what you do next. Love how economical you are with your projects!
Amazing change to those columns! We’re thinking of doing something similar with our cheesy, stock colonial columns. How has the plywood held up in the weather? And how did you join the edges? did you miter them? Glue them? T
Wow! The glow-up your house got by painting and enhancing the columns is impressive! It looks gorgeous. I can’t stop admiring the outdoor chairs. I love sitting on my porch and enjoying nature from the comfort of my home, but I’m a big fan of wicker sofa seating because it’s so comfortable and cozy.