How to Build a Beautiful Custom DIY Kitchen Hood Cover
This post may contain affiliate links · This blog generates income via ads
If you’ve ever dreamed of giving your kitchen a stylish makeover without breaking the bank, you’re in for a treat! Today, I’m sharing how Sean and I built a stunning DIY kitchen hood cover.
I love how this project turned out, and I’m super excited to guide you through the steps of creating a beautiful and budget-friendly kitchen hood cover that not only serves its practical purpose but also becomes a statement piece in your space. Let’s get started!
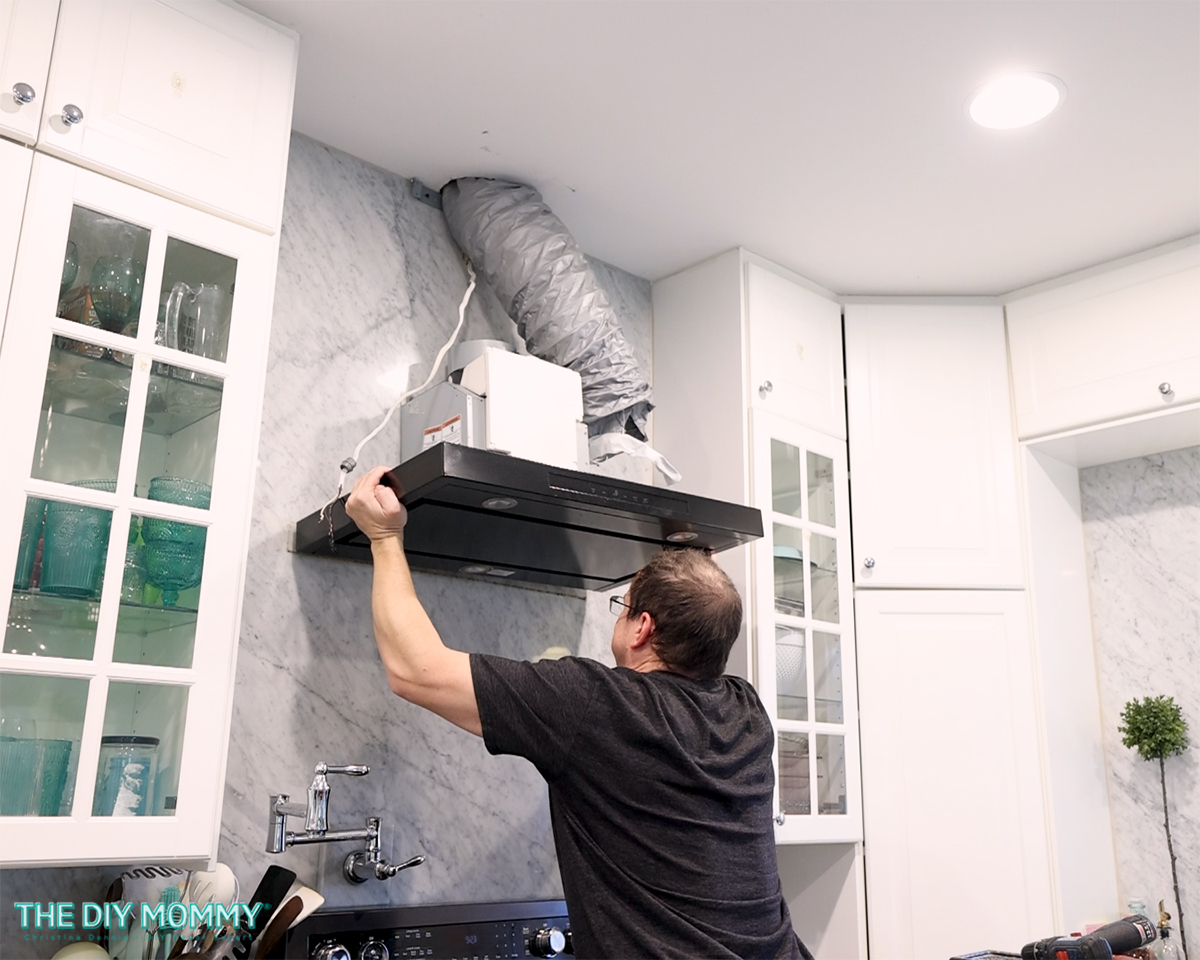
Step 1: Removing the Old Range Hood
First, we removed the old Euro-style range hood over our stove, and then I gave the area a good cleaning.
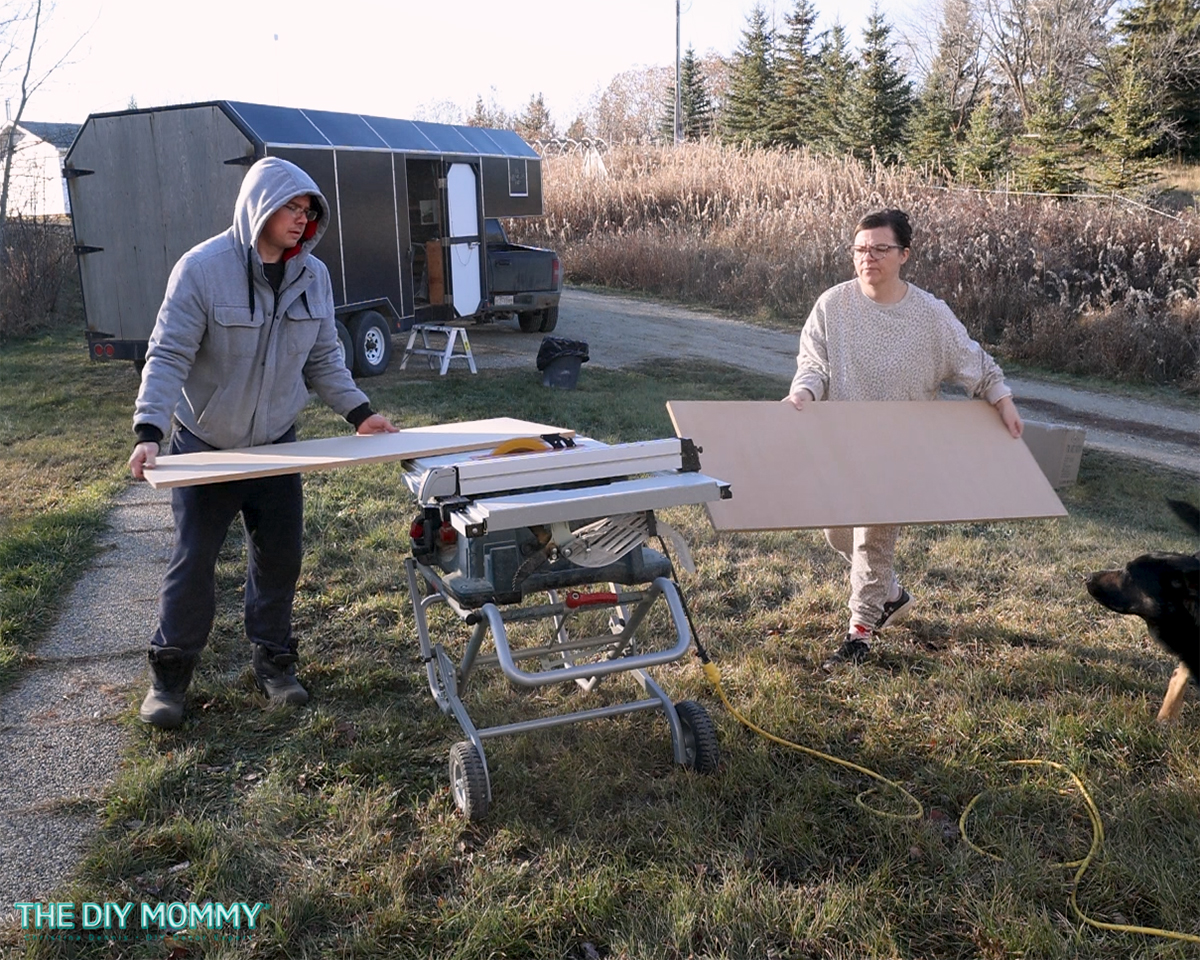
Step 2: Cutting the MDF & Wood Pieces
Then, we cut some scrap pieces of 1/2 inch MDF and wood to create a frame for the range hood cover. We used scrap pieces of MDF and lumber to keep this DIY kitchen hood cover build budget-friendly.
If you want to build a custom hood cover for your own space, your measurements will be unique to your home. For ours, I wanted the cover to be 3 feet tall, 30 inches deep, and span the entire width of the space between our two upper cabinets (about 49 inches wide). We cut pieces of 1×4 lumber and 1/2″ MDF to match these measurements.
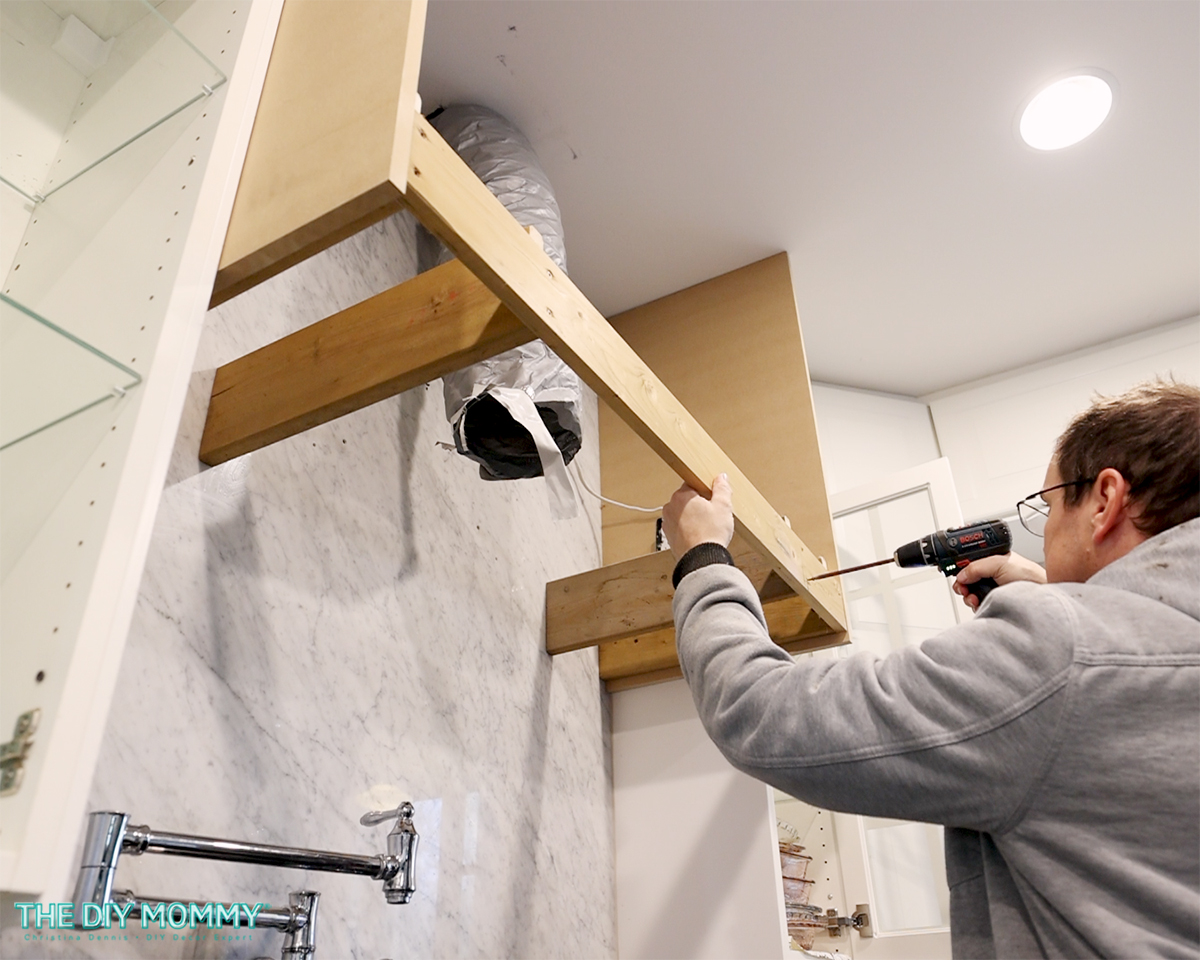
Step 3: Creating the Range Hood Cover Frame
Next, Sean mounted a couple of pieces of MDF to the sides of the upper cabinets on either side of the range hood area. Then, he took the scrap 1×4 that we cut, leveled it, and attached it to both of the MDF pieces with some wood screws.
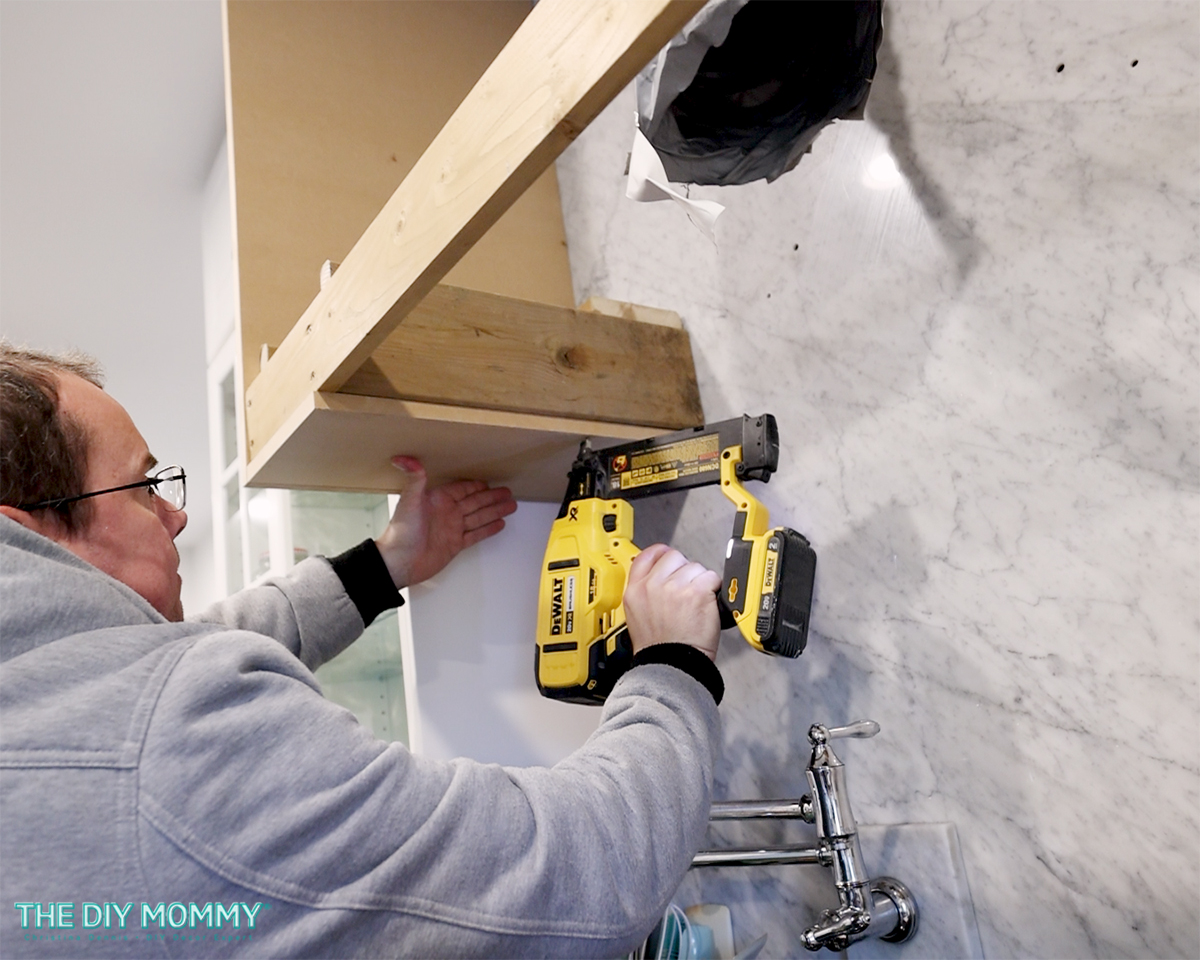
A couple of MDF rectangles were installed on the bottom of the frame to cover the areas on either side of the range hood insert.

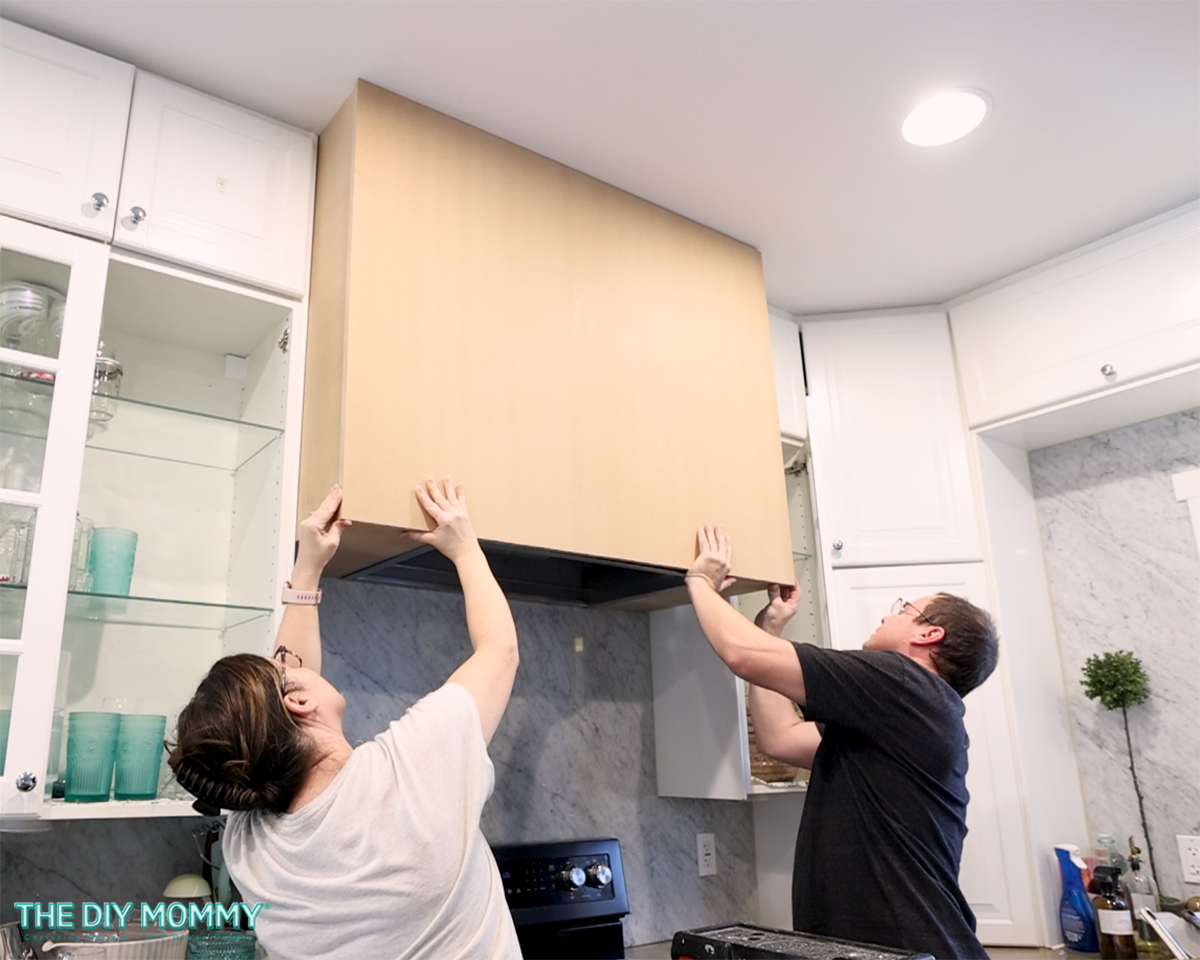
Step 4: Installing the Range Hood Insert
Then, we installed a range hood insert. We were sent this gorgeous, high quality insert from Victory Range Hoods (they sponsored my related YouTube video, here). Sean attached it to the ducting and screwed it firmly onto the frame he built. I truly love it! The knobs are ultra heavy-duty, and the fan is very quiet.
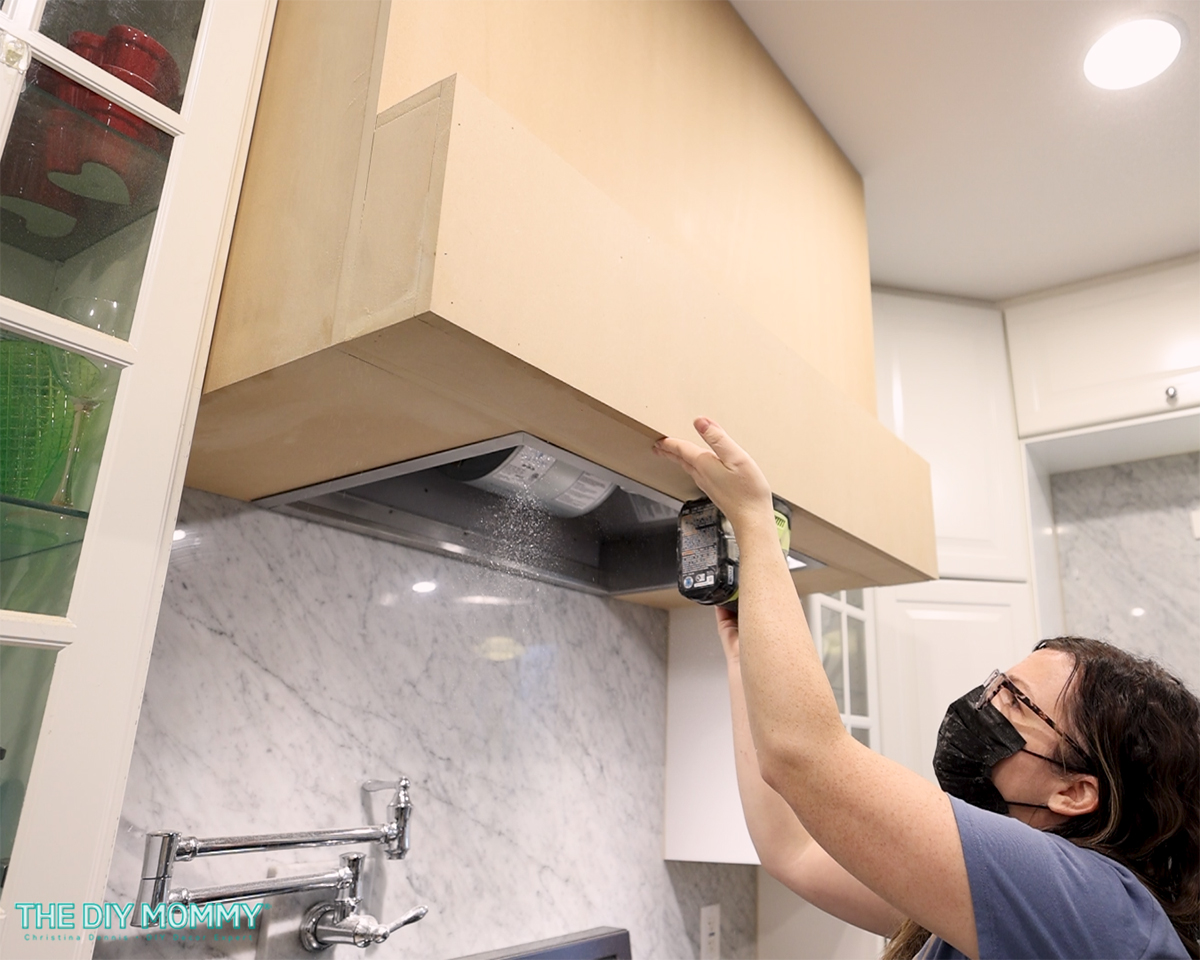
Step 5: Closing Off the Hood Cover
After that, we closed the DIY kitchen hood cover with some more MDF pieces and wood screws. Sean then created a bump-out with more scraps of lumber and MDF. I wanted a mantel-like piece on the front bottom of the range hood cover so that I could decorate it and add some charm to our kitchen.
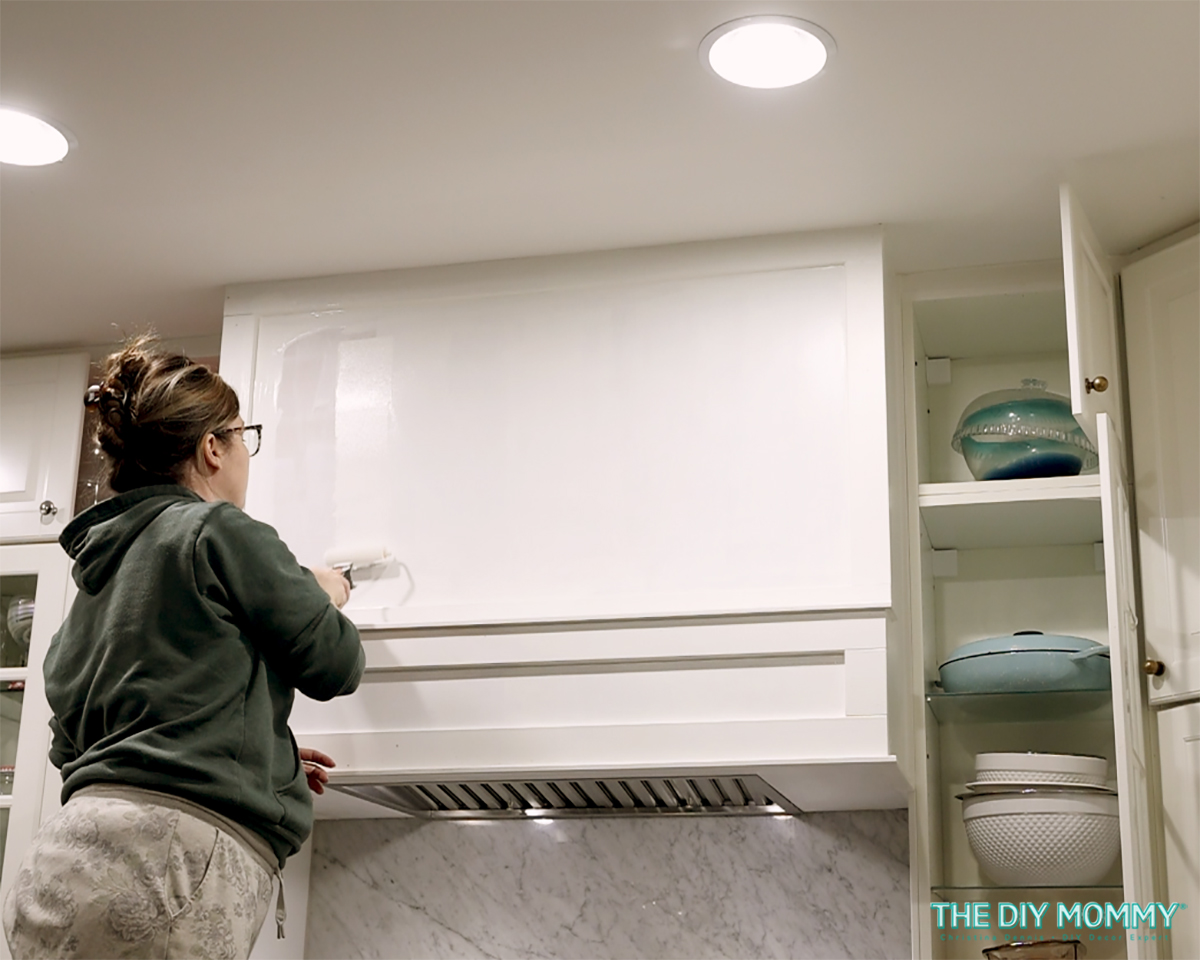
Step 6: Filling, Sanding & Priming
Next, I used wood filler and a battery operated sander to fill in all of the seams of the DIY kitchen hood cover and sand everything smooth.
I painted the whole cover with some kitchen & bath primer to make it water resistant and durable, and then I added some trim work to the hood.
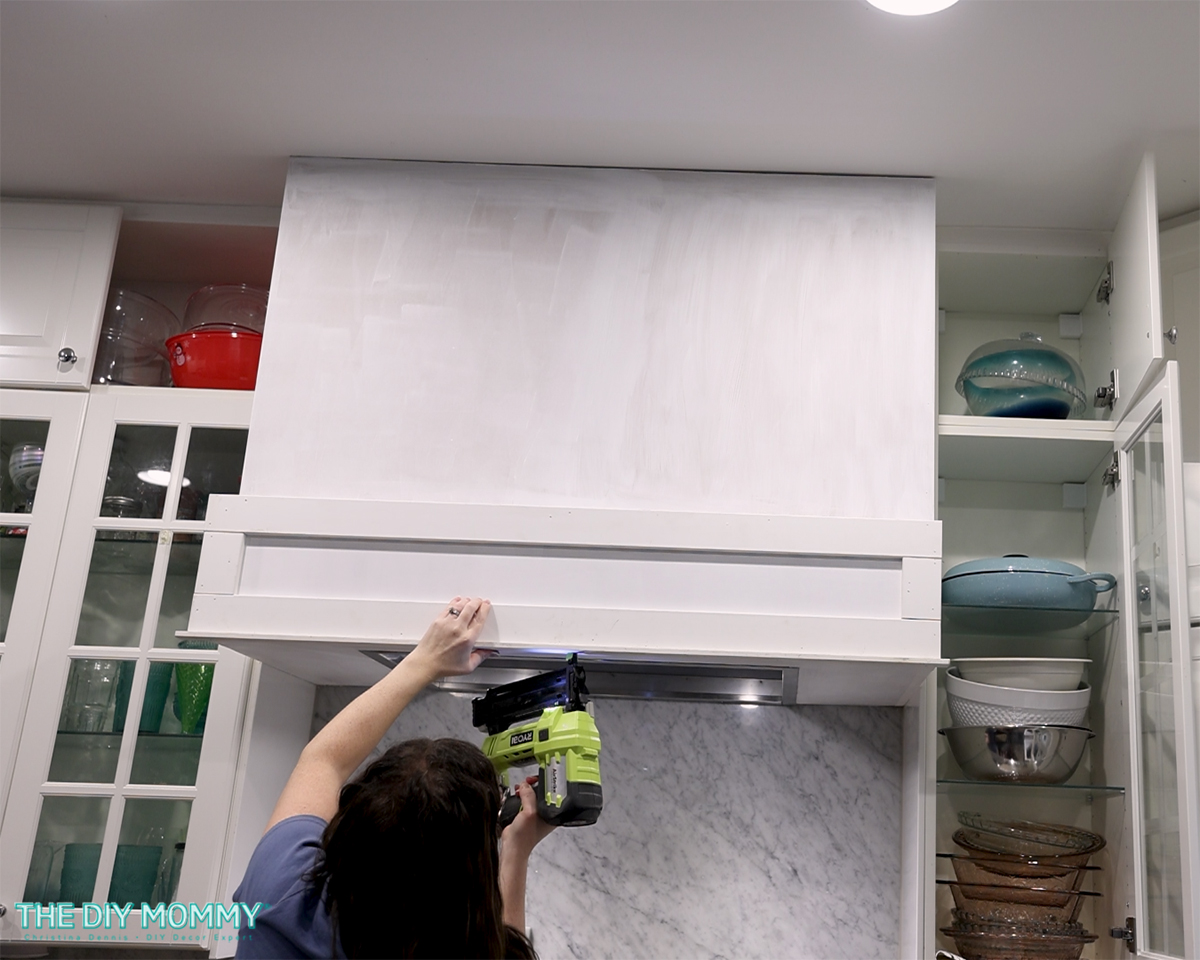
Step 7: Adding Trim & Painting
Because I wanted the hood cover to echo the silhouette of my shaker-style doors, I used some inexpensive MDF trim to frame out the main part of the hood. I used some scrap door stop trim to add some more detail around the bump-out section. After installing the trim, I caulked all of the seams with paintable caulk.
Then, I took one of my kitchen cabinet doors to Home Depot and had them colour match some paint to my current cabinets. I painted the entire range hood, and I love how it blends seamlessly into the kitchen.
Step 8: Finishing the Look with a Tipping Rail
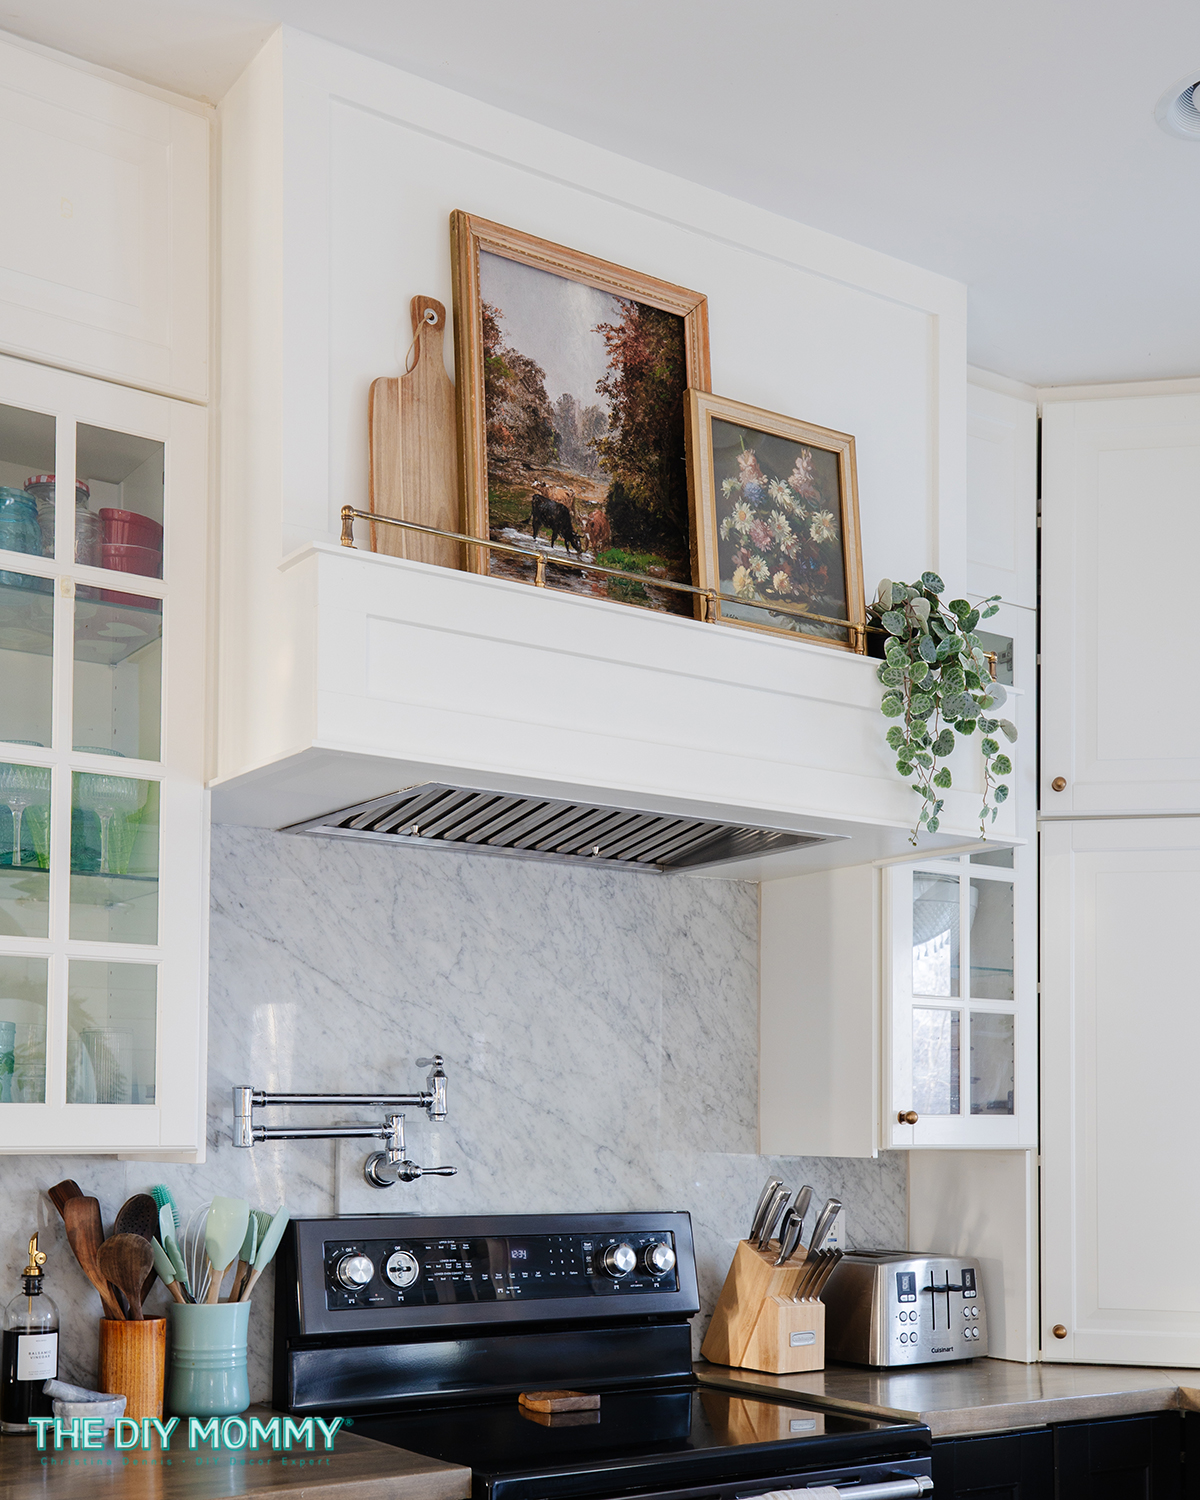
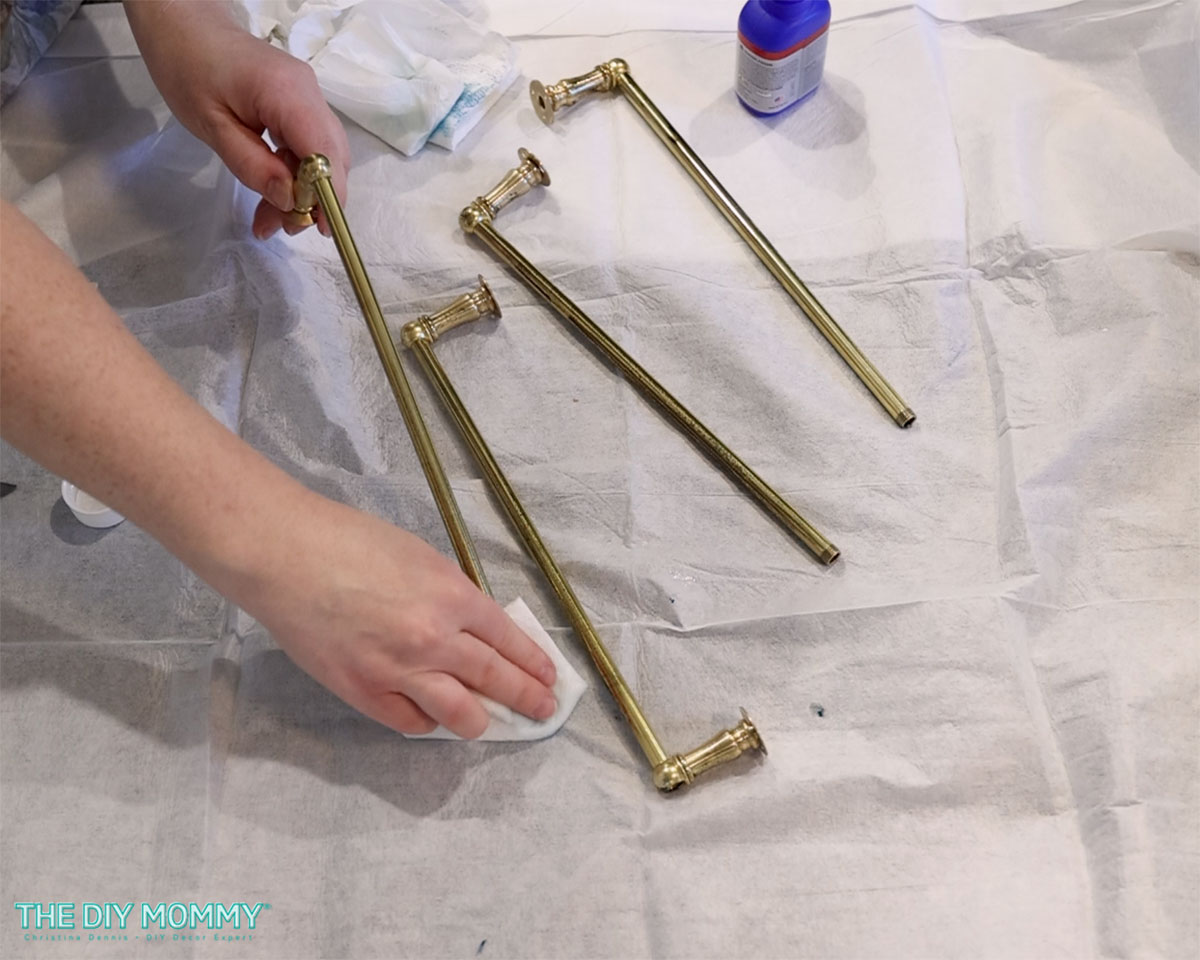
To add more detail to the hood cover, I found this gorgeous brass tipping rail on Etsy. I aged it with a brass aging solution and a cloth to make it less shiny and match my burnished brass knobs in the kitchen. The traditional look of a tipping rail is stunning, and it’s a practical way to keep things from sliding off shallow shelves.
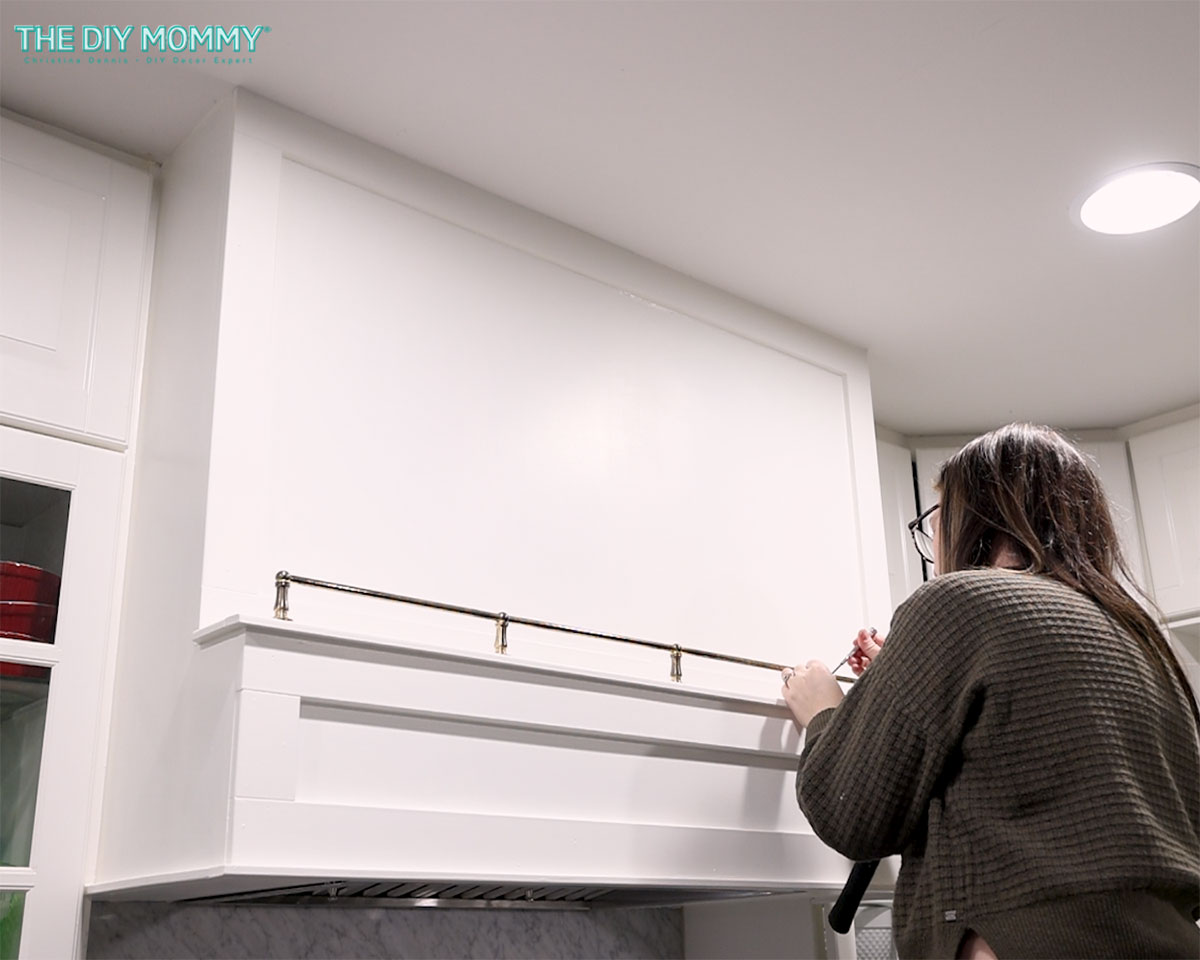
Next, I installed the tipping rail onto the edge of the mantel portion of the hood cover with some small wood screws. Some vintage art, a thrifted cutting board, and a faux plant add texture and interest to the range hood shelf:
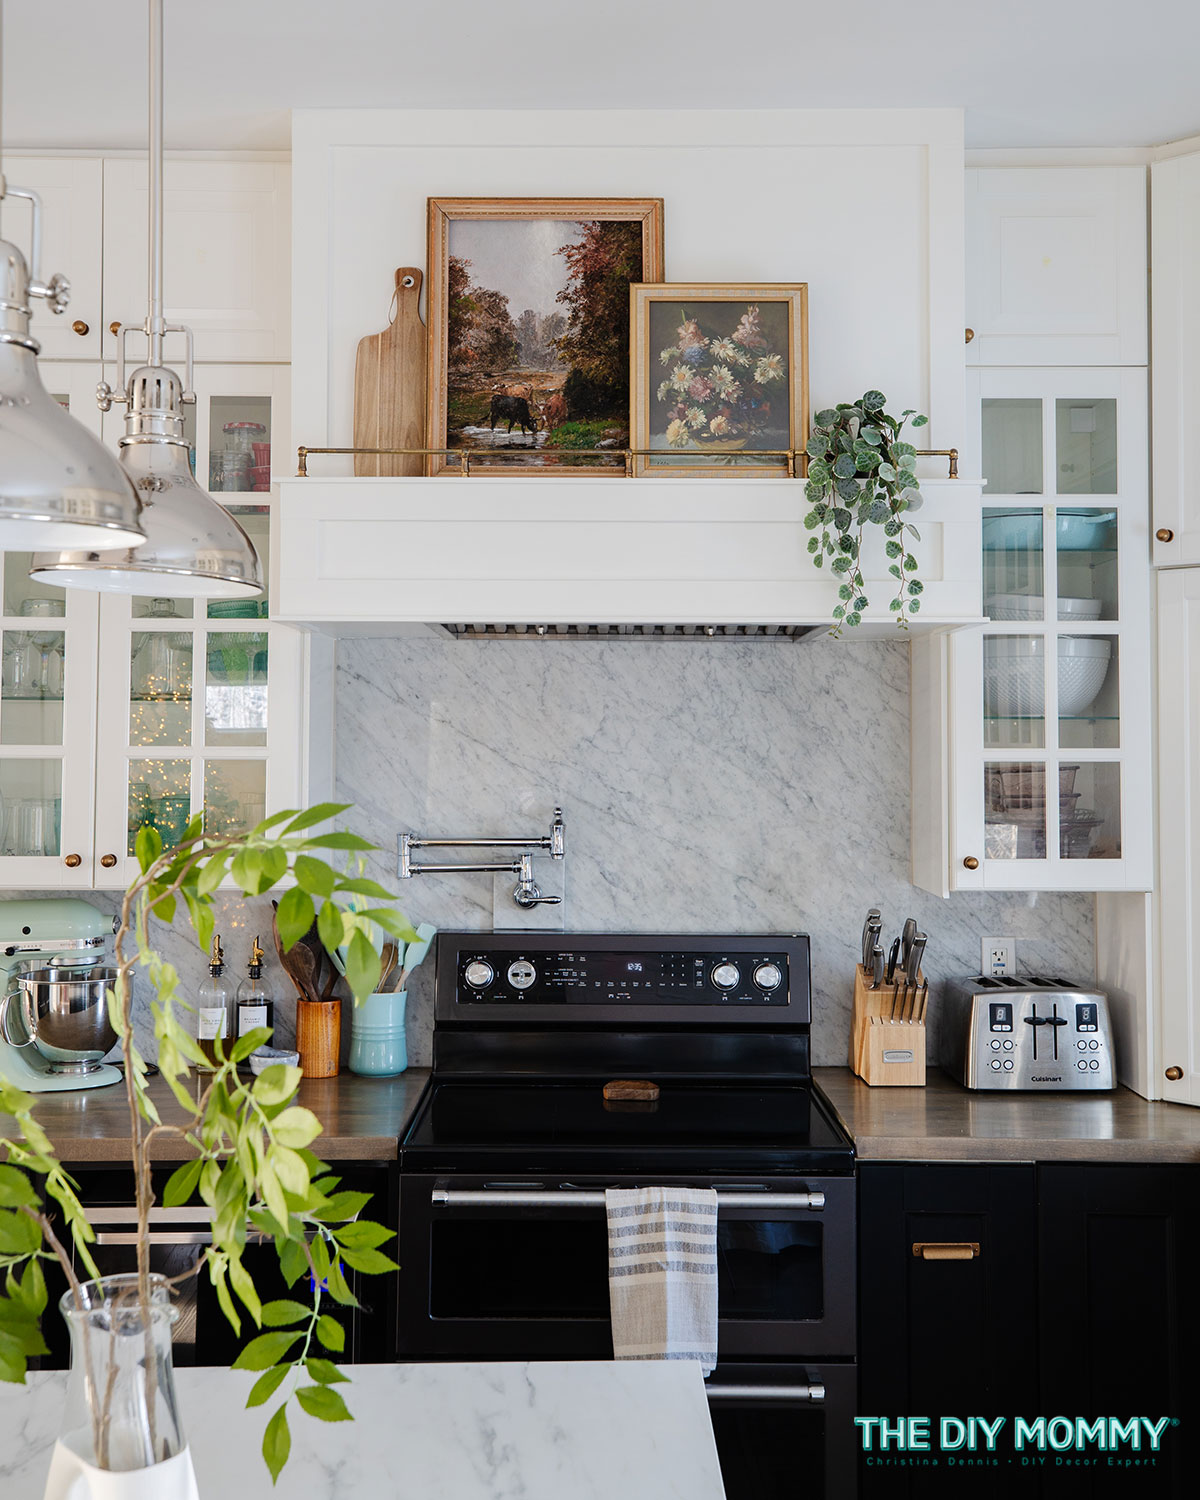
I’m absolutely in love with how this DIY kitchen hood cover turned out! I think it matches the existing style of our kitchen cabinets perfectly, and it adds such a high-end look to our space. I’m so happy we decided to do this project. What a difference it’s made in our home!
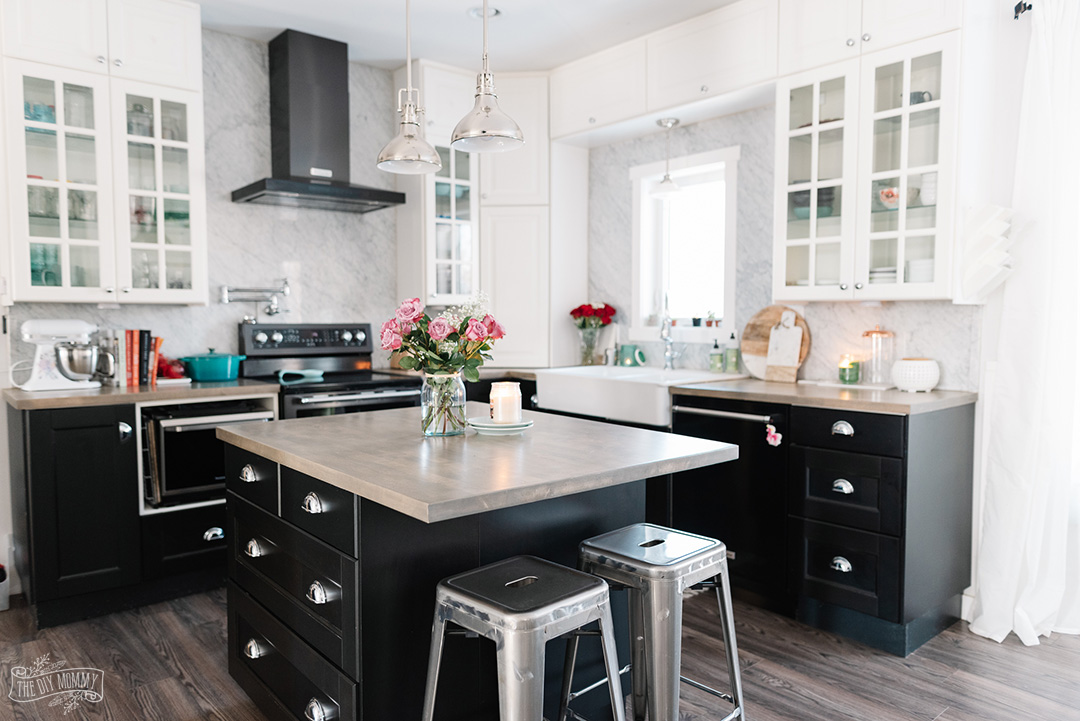
Our Kitchen Before:
Our Kitchen After:
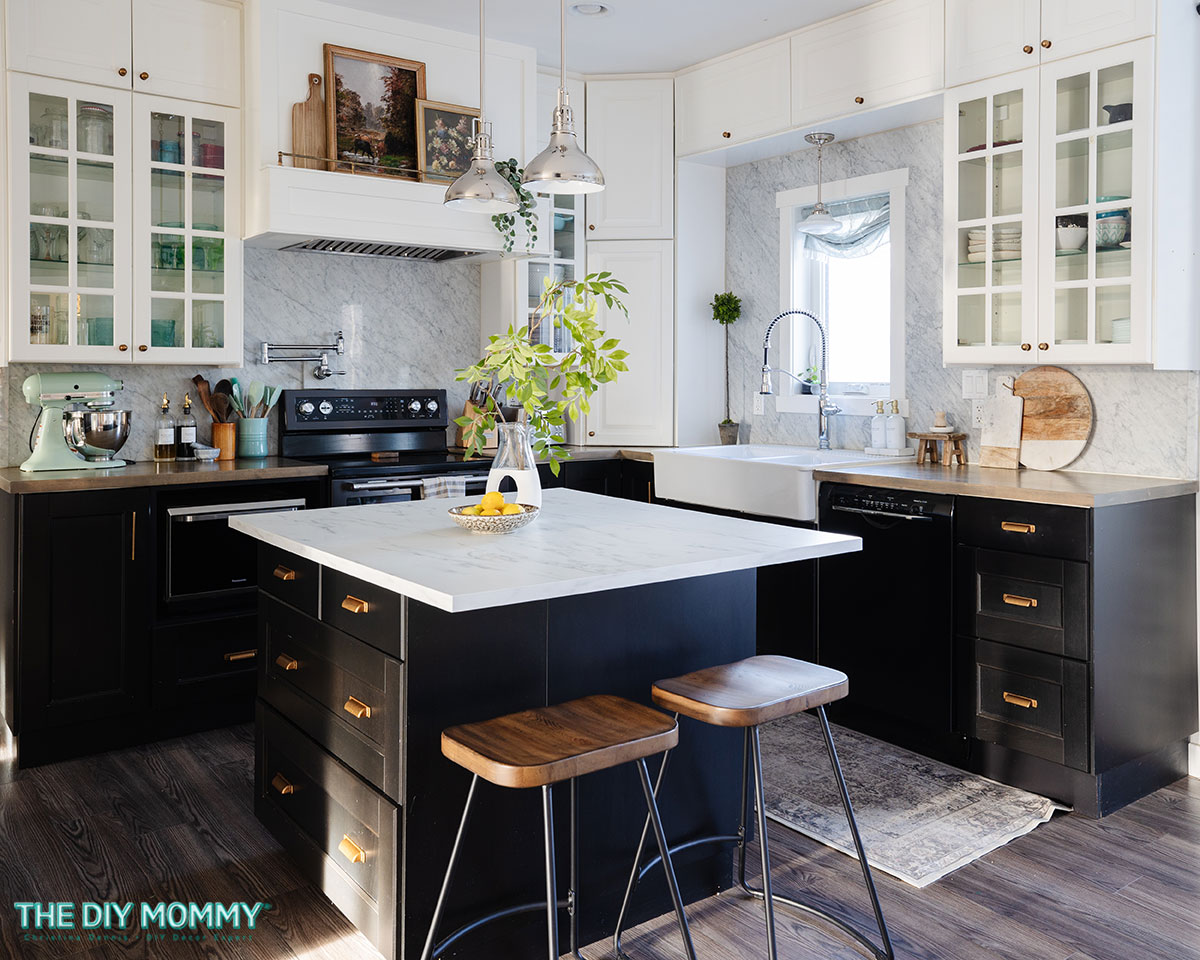
In addition to the DIY hood cover, I swapped out the hardware in our kitchen for some warm brass cupboard pulls. We also swapped our butcher block island counter to a marble-look countertop. Some warm wood & black metal counter stools added the warmth that our kitchen needed. You can see all of these updates in my video, below!
Watch my kitchen update YouTube video to see how we made this DIY range hood cover:
Want to hear how our IKEA kitchen has fared over the last 10 years? I share my full IKEA kitchen review (10 years later) right here!
I hope you found this DIY range hood build inspiring, and happy DIYing!
Pin Me!


Love your site and your beautiful new oven hood cover! Are you able to tell me the paint colour and brand you used on your hood cover? I am currently installing an IKEA Bodbyn kitchen and would love to know what its best colour match is.
Thanks so much!
Thank you! I took a cabinet door into Home Depot and had them colour match some Behr Cabinet & Trim Enamel to the door colour.
Thank you…thank you…thank you for this post! I am literally in the middle of this project right now and was struggling to finish it because once I started building it, I wasn’t feeling my original design for my range hood. Between the gallery rail, the ledge for artwork…this is exactly what I was looking for! Thank you for sharing – you save my range hood lol
How did you get it secure enough to hold the weight of the range hood? I can’t quite tell where your screws are at in the initial photo for the MDF and 1x4s.
We attached it to the upper cabinets which are bolted to the wall.
Morning! Could you please explain how you attached the mantle piece/ ledge to the front? Thanks love it trying to build one now. Appreciate all your help / inspiration!
I am also curious about how you attached the piece to the front
We used finishing nails!
A custom DIY hood cover adds a polished, personal touch while elevating the overall kitchen design.
Is it 30 inches deep with the ledge or without the ledge? Also how deep are your uppers? Mine are only 12inches deep
It’s 30″ deep with the ledge and my upper cabinets are 12″ deep.