How to Make a Scarf into a Cardigan
This post may contain affiliate links · This blog generates income via ads
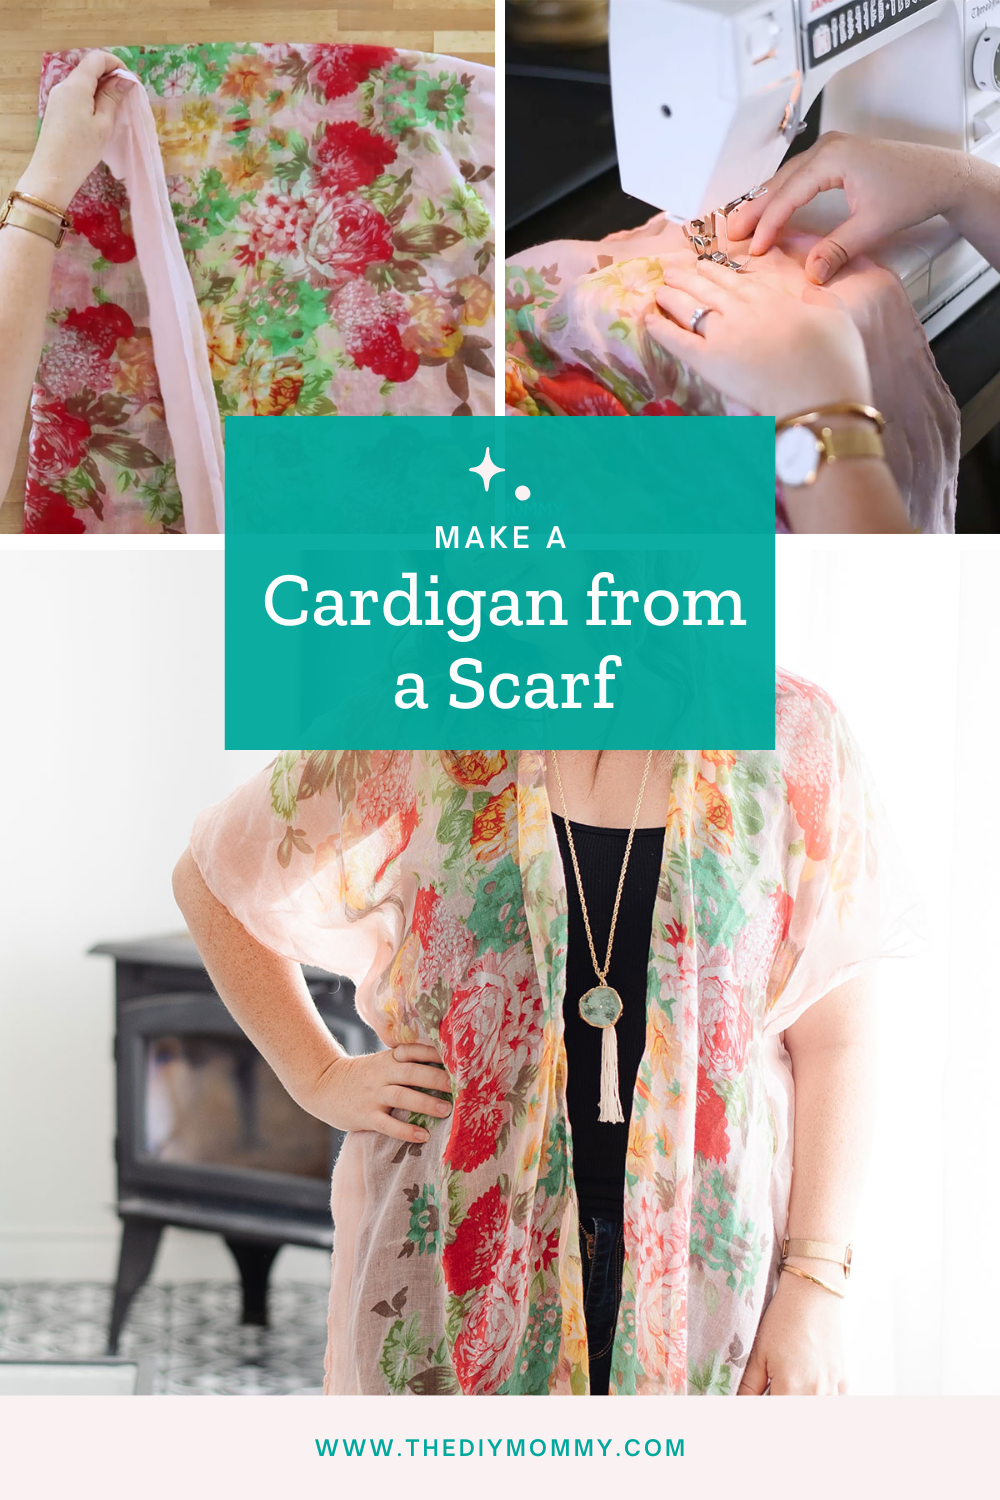
This DIY drapey cardigan is the perfect piece of clothing to wear as a light layering piece, and you can sew it in 20 minutes from a large rectangular scarf! Let me show you how to make a scarf into a cardigan in a few simple steps.
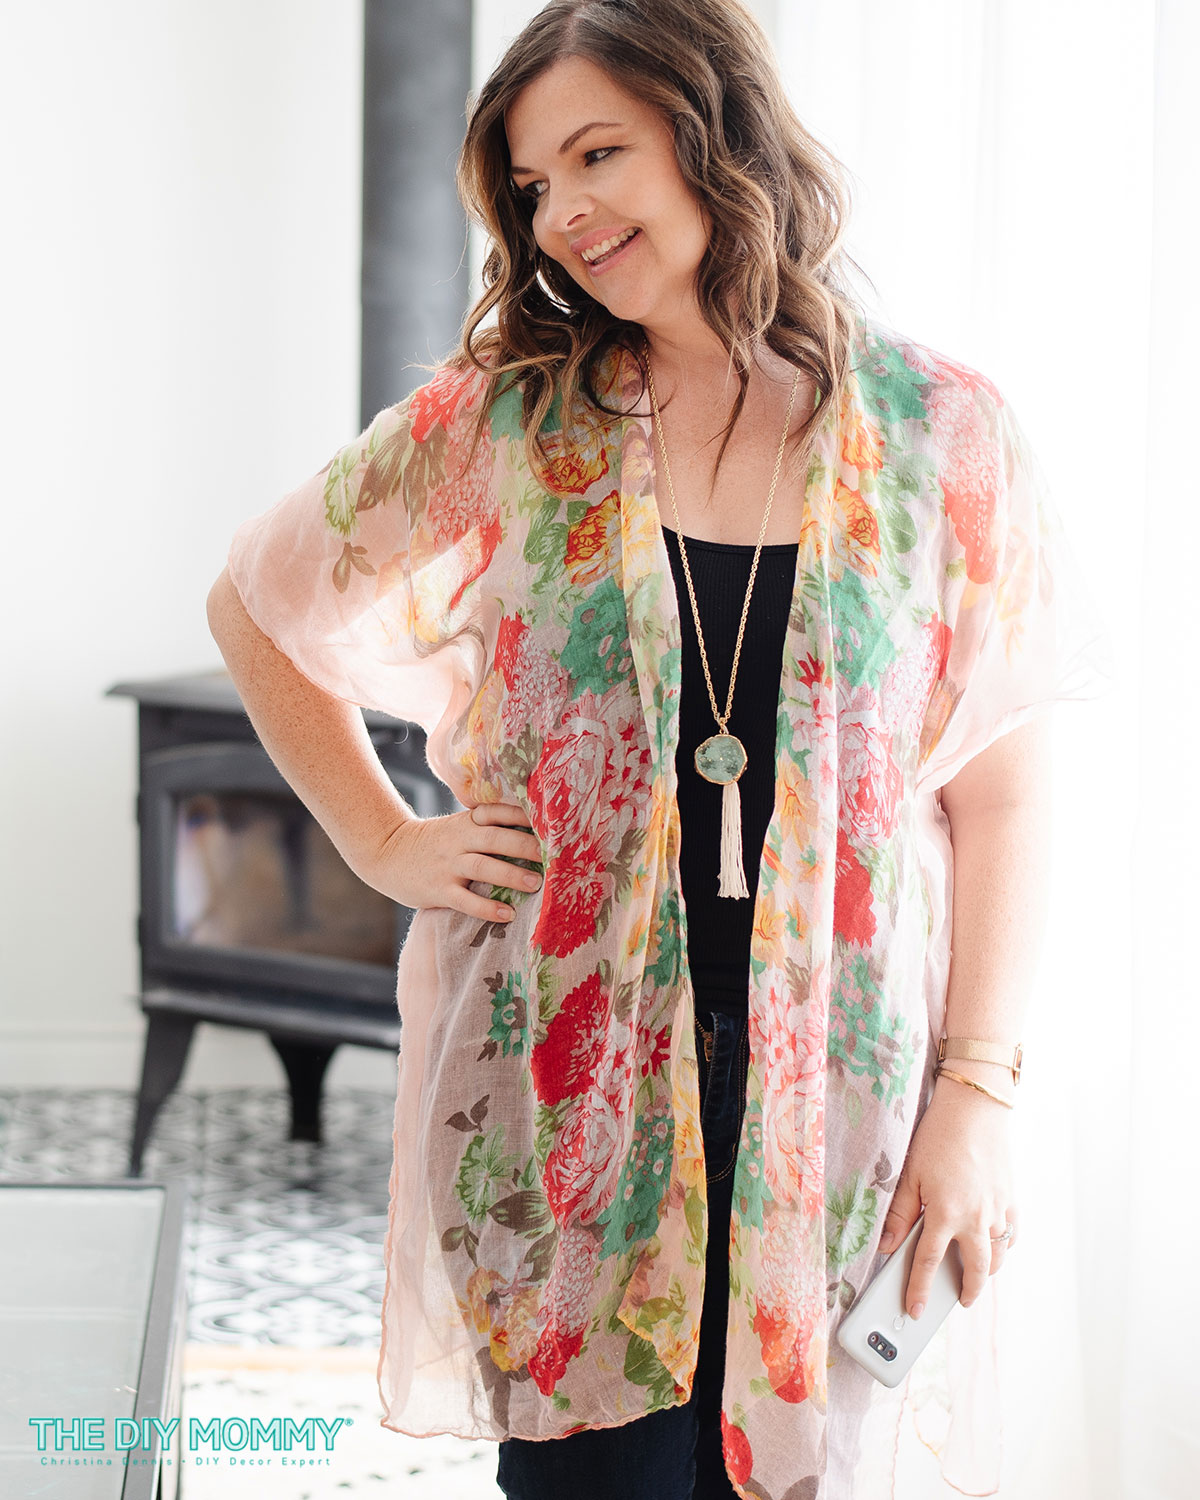
I adore flowy kimono style cardigans, and they are the easiest thing to DIY! Do you have a large, rectangular scarf and basic sewing skills? You can make this beautiful DIY cardigan!
This post was first published in 2018 and has since been updated.

This sewing project is literally only 2 seams and a hem. That’s it!
I found my scarf at Michaels a few years ago, so this is also a great way to give older scarves new life.
Scarves like these from Amazon would be perfect to turn into DIY kimono cardigans: https://amzn.to/2NarJeG You can use silk or light polyester blend scarves.
Use the directions and diagram below to make your adorable cardigan, or watch the video below for the step-by-step instructions.
You Will Need
- large rectangular scarf (mine measures about 33″ wide by 66″ long)
- ruler
- pencil
- stick pins
- fabric scissors
- sewing machine
- thread
Here’s how to make this easy DIY cardigan from a scarf
Grab your favourite, large scarf that needs a new life (for your reference, mine measures about 33″ wide by 66″ long).
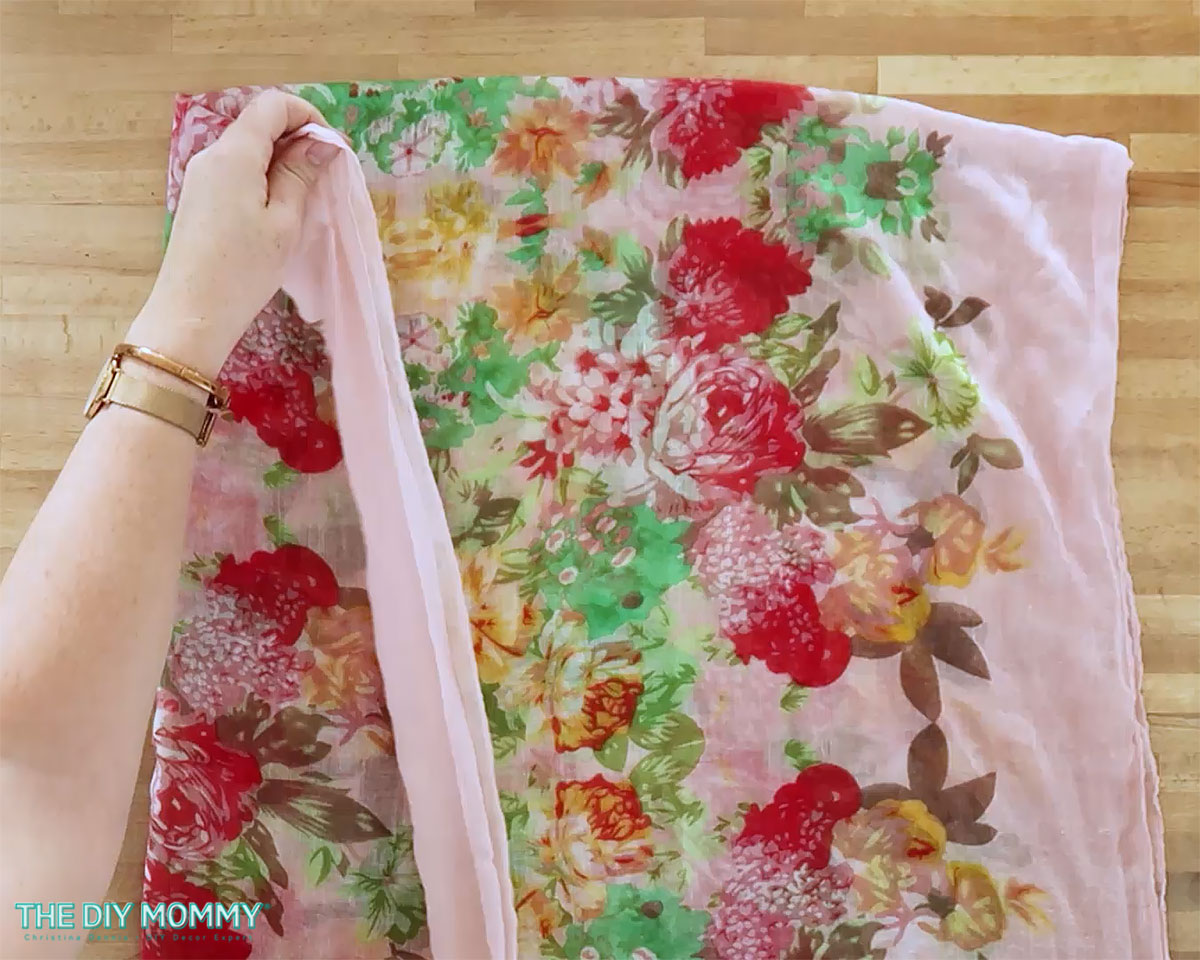
Fold it in half horizontally, and then fold it in half vertically.
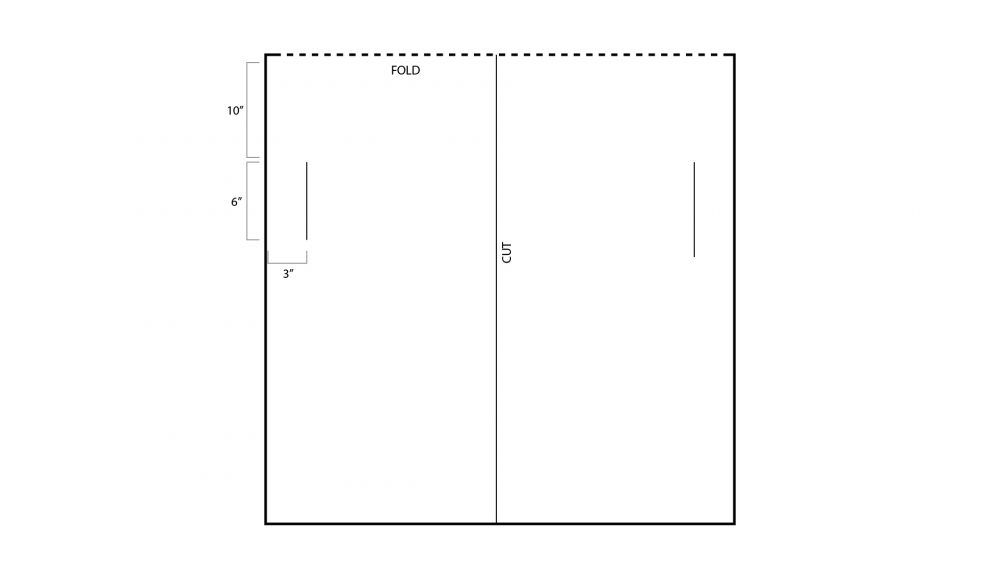
Use this diagram as a reference for where to cut, sew and fold:
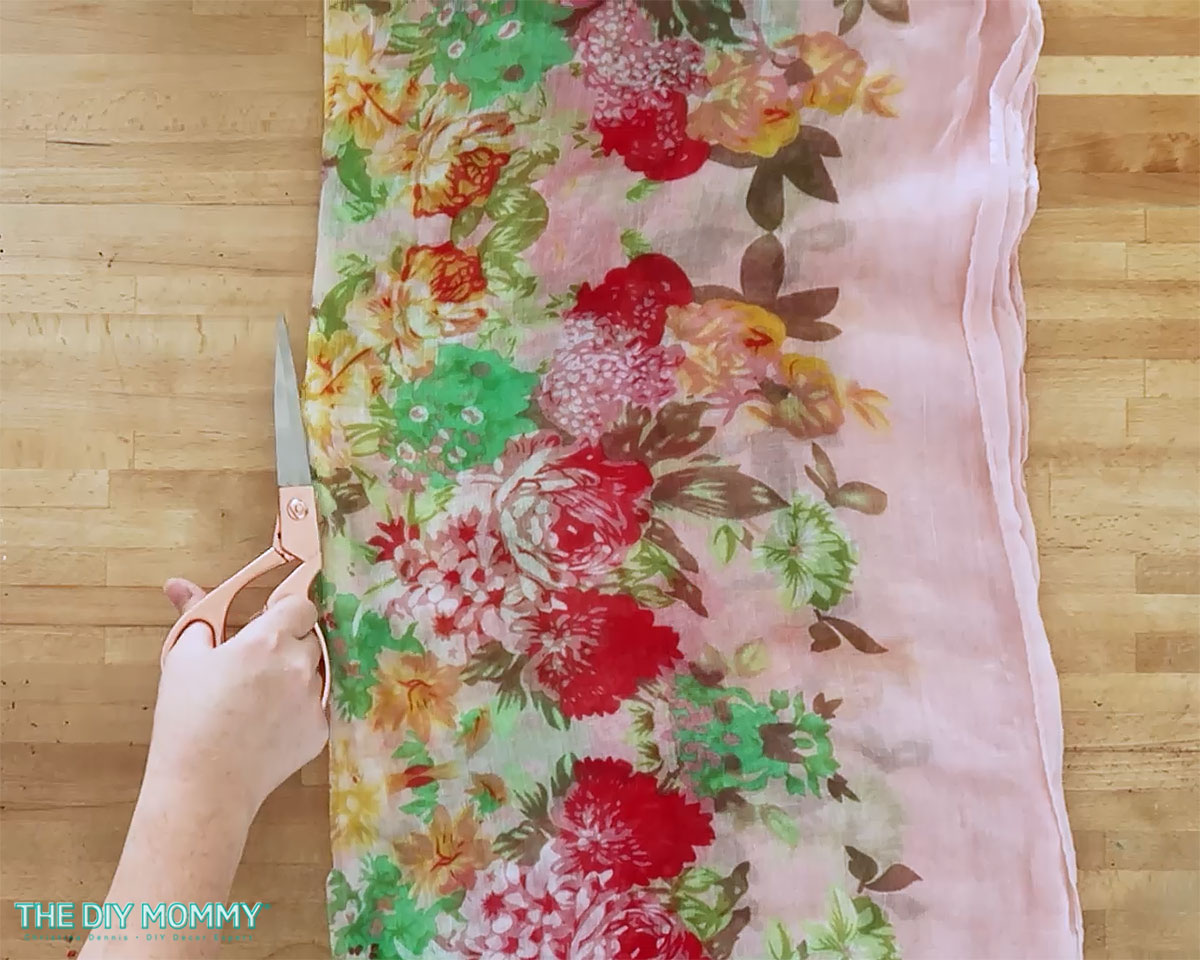
Cut along the front center fold carefully with sharp fabric shears. Only cut one layer of fabric.
Open up your last fold, and you’ll have the center front cut in the middle.
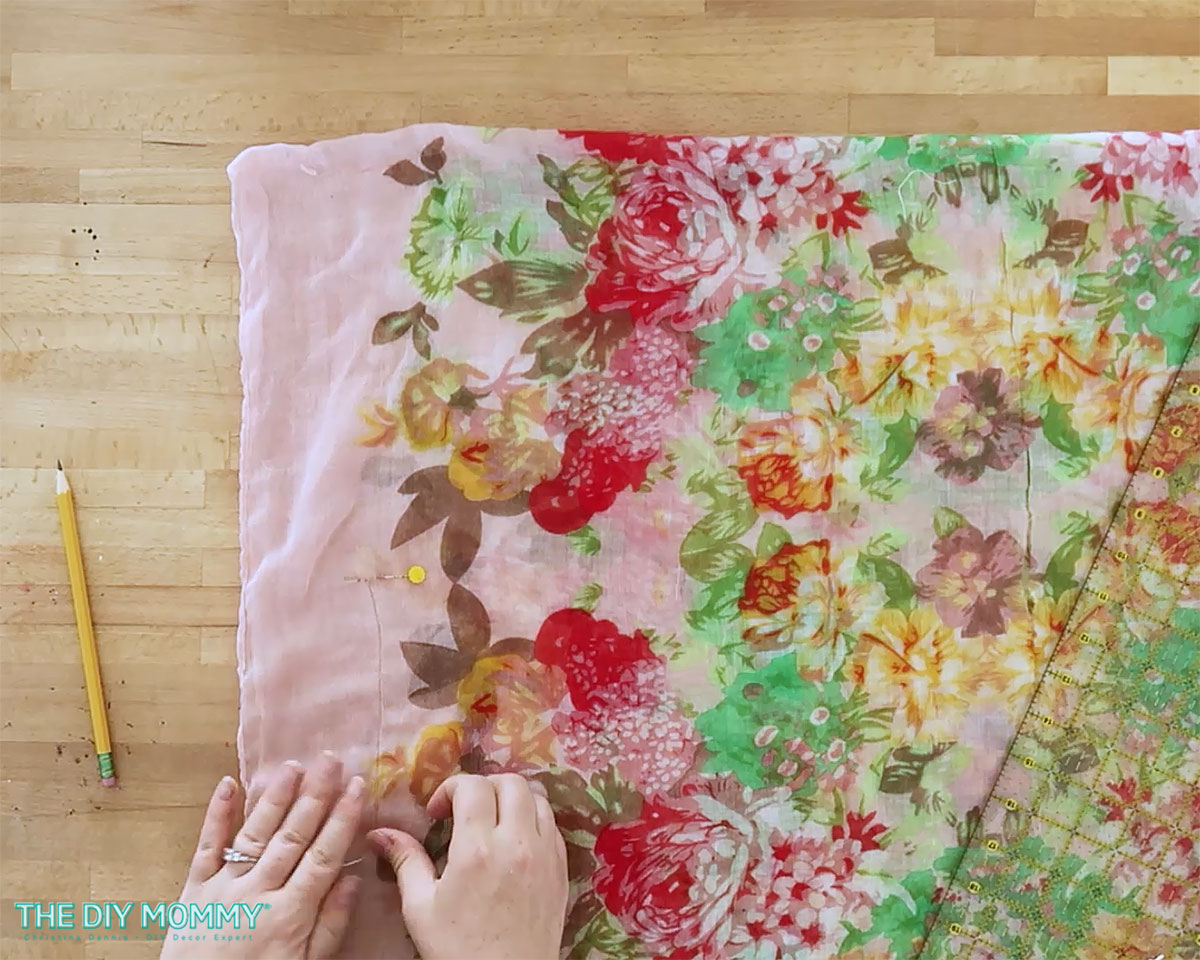
To create arm hole seams, measure 10″ from the top left corner of your folded scarf and make a mark, then measure about 3″ from the left edge of your scarf and make a mark. Draw a line from this point down about 6″. Use stick pins to mark the top and bottom of this line.
Repeat for the right hand side of your folded scarf.
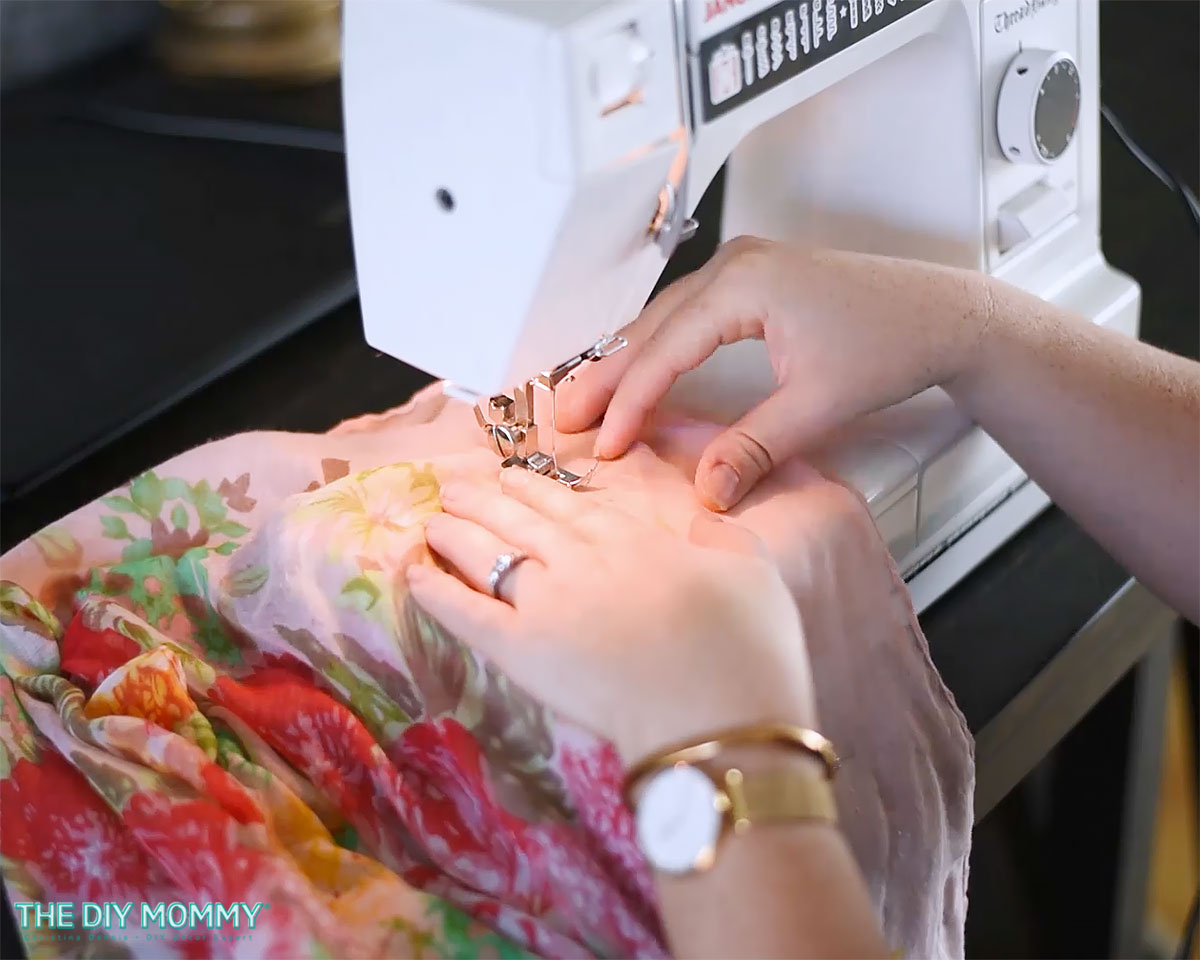
Then, use a sewing machine to sew along these marks to create your arm holes and short side seams. Make sure to back stitch at the top and bottom to secure the seams.
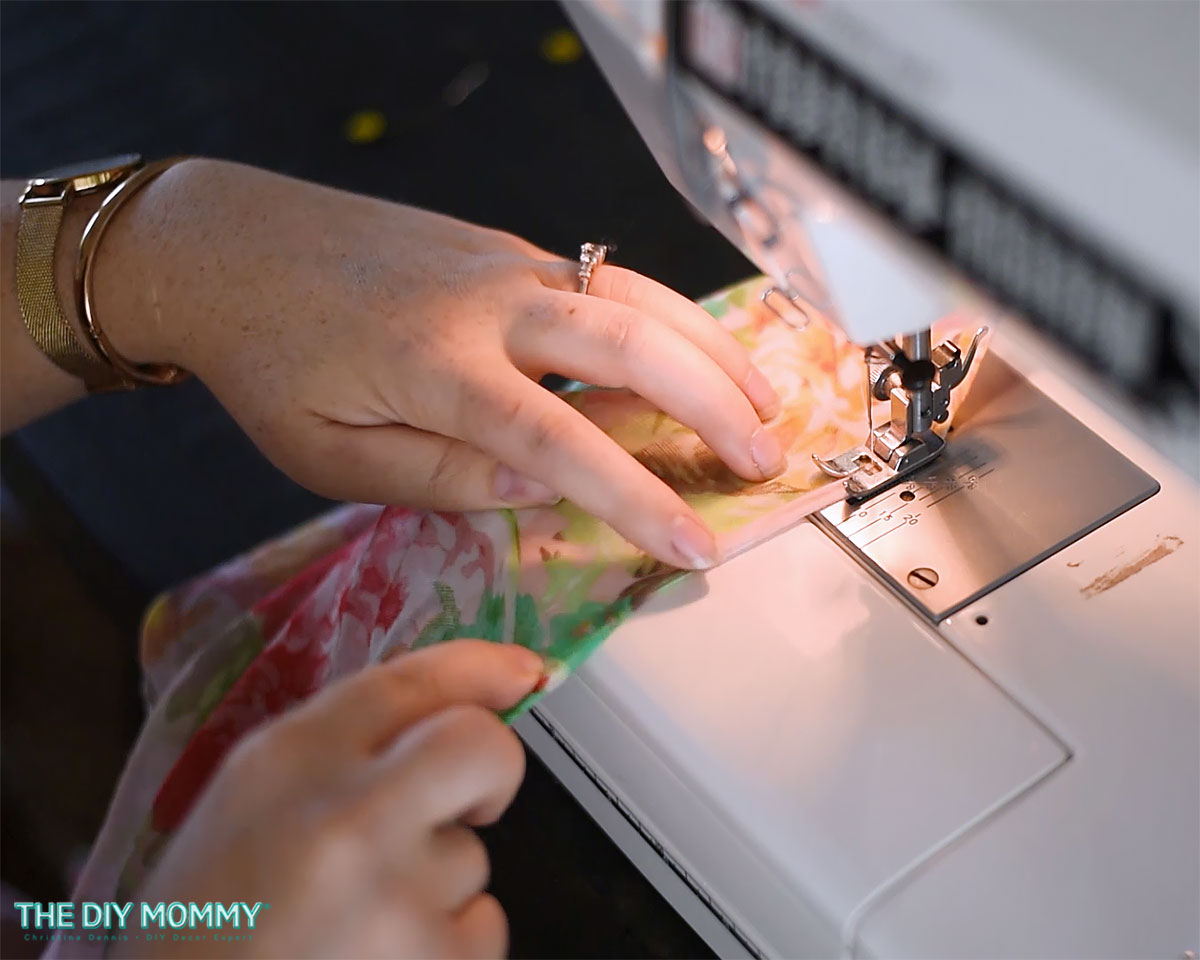
Finally, roll the raw edge you created for the front & neck opening and stitch it in place. I roll my raw edge under slightly once, and then again to create a very small rolled edge hem. You don’t have to worry about the bottom of the scarf as you are using the original scarf hem.
You’re all done! You now have a cute cardigan addition to your wardrobe that you can wear over a tank top during the summer, over a swimsuit as a chic coverup, or over a long sleeve t shirt in the colder months.
Watch my video tutorial below to learn how to sew this simple DIY cardigan from a scarf
DIY Cardigan from a Scarf Instructions

DIY Beeswax Wrap (Extra Sticky)
After many months of fiddling, I’ve come up with an even better way to make a DIY beeswax wrap that makes it extra sticky and easier to use.
Instructions
- Pre-wash your fabric and cut it into 2 squares with fabric scissors. I like 8″ or 11″ squares for beeswax wraps. Cut more squares to make more wraps, but increase the rest of the ingredients accordingly.
- In a double boiler (or mason jar/measuring cup lowered into a saucepan of boiling water), grate 1/2 cup of beeswax.
- Add 3 Tbsp pine resin and 1 Tbsp jojoba oil. The pine makes these wraps extra sticky, and the jojoba oil helps keep the wraps pliable.
- Melt the ingredients in the double boiler until they are all mixed and liquified.
- Meanwhile, lay the fabric squares on some parchment paper.
- When the wax mixture is ready, brush it onto the fabric squares with a brush from the center out.
- Put another sheet of parchment paper over the wraps.
- Use an iron on the “cotton” setting and press it over the wraps to ensure the wax mixture is spread evenly over the wraps. This will also help it seep to the other side of the fabric.
- Remove the wraps from the parchment paper, and hang them to dry.
- Once dry, trim the edges of the wraps with pinking shears.
- Use the wraps to wrap up fruit, sandwiches, cheese, or to cover bowls of food.
- Wash the wraps after each use in lukewarm water with a mild detergent and hang to dry.
- Compost wraps after 6-12 months of use.
Pin Me:


Really great idea. Thank you so much.
Yes! This is right up my alley, simple and sooooooo darling! I have 2 scarves that will be kimonoed this week!
Lovely idea looks great on you although I can’t seem to play the video
Maybe switch browsers? I’m on Safari and it’s working fine for me. You can also watch it directly on YouTube: https://youtu.be/7Nez51Kqk14
Just made my 1st Kimono cardigan and just love it!!! Super Easy.
I wish I had a sewing machine! This looks great!
Pretty and simple
It would be great to note that you should have your scarf right sides together before stitching the arm holes.