10 Curtain Mistakes That Make Your Home Look Cheap (And How To Fix Them!)
This post may contain affiliate links · This blog generates income via ads
Have you ever walked into a beautifully furnished home that somehow still felt “off,” but you couldn’t quite put your finger on why? Chances are, it might have been these common curtain mistakes!

As a long-time interior decorator and DIYer, I’ve learned that curtains can make or break a room’s entire aesthetic. The fascinating part? I’ve seen these exact same mistakes in high-end, spacious homes just as often as in starter apartments.
Interior designers charge thousands to fix these curtain mistakes that might be ruining your home right now. Today, I’m sharing all their secrets… and most fixes cost less than $50!!

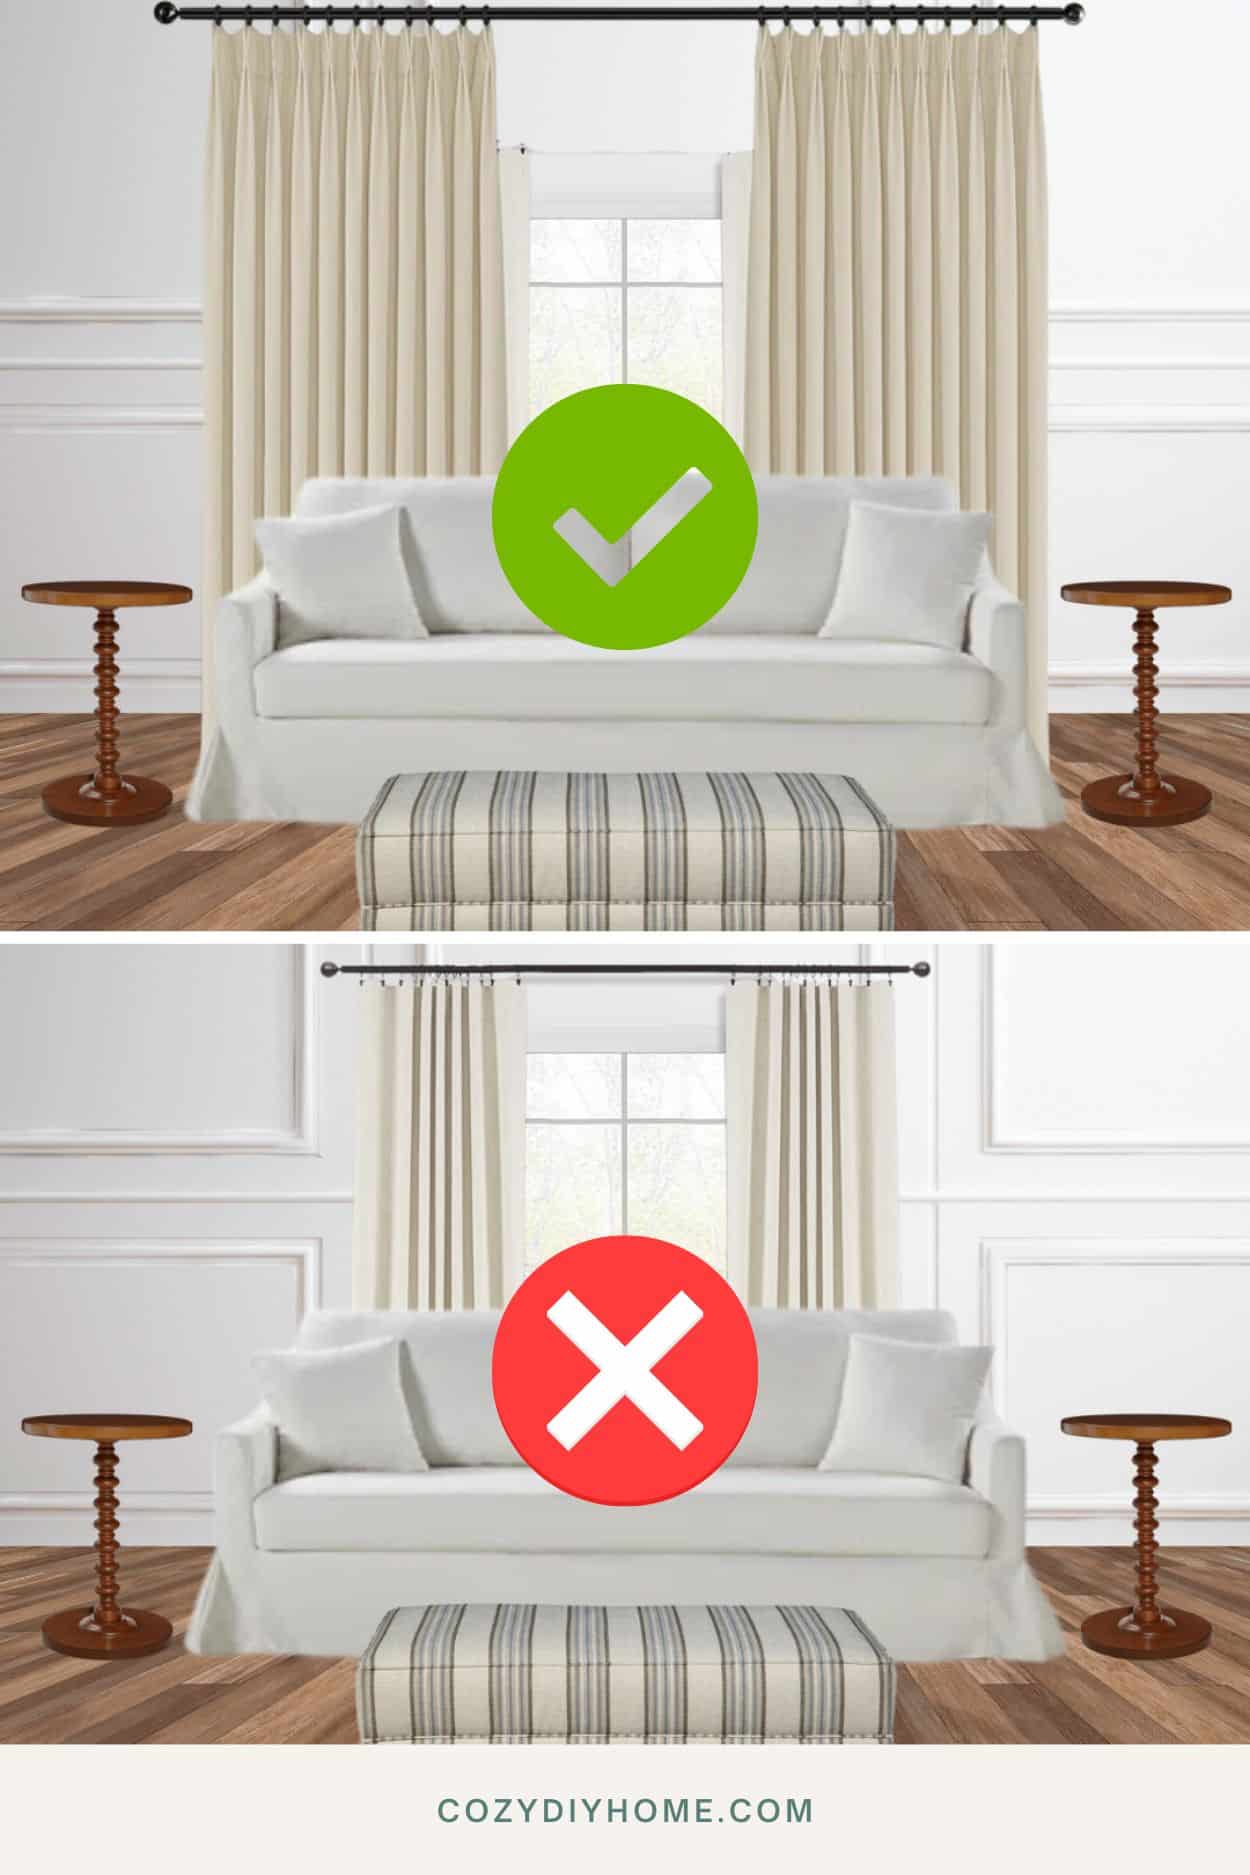
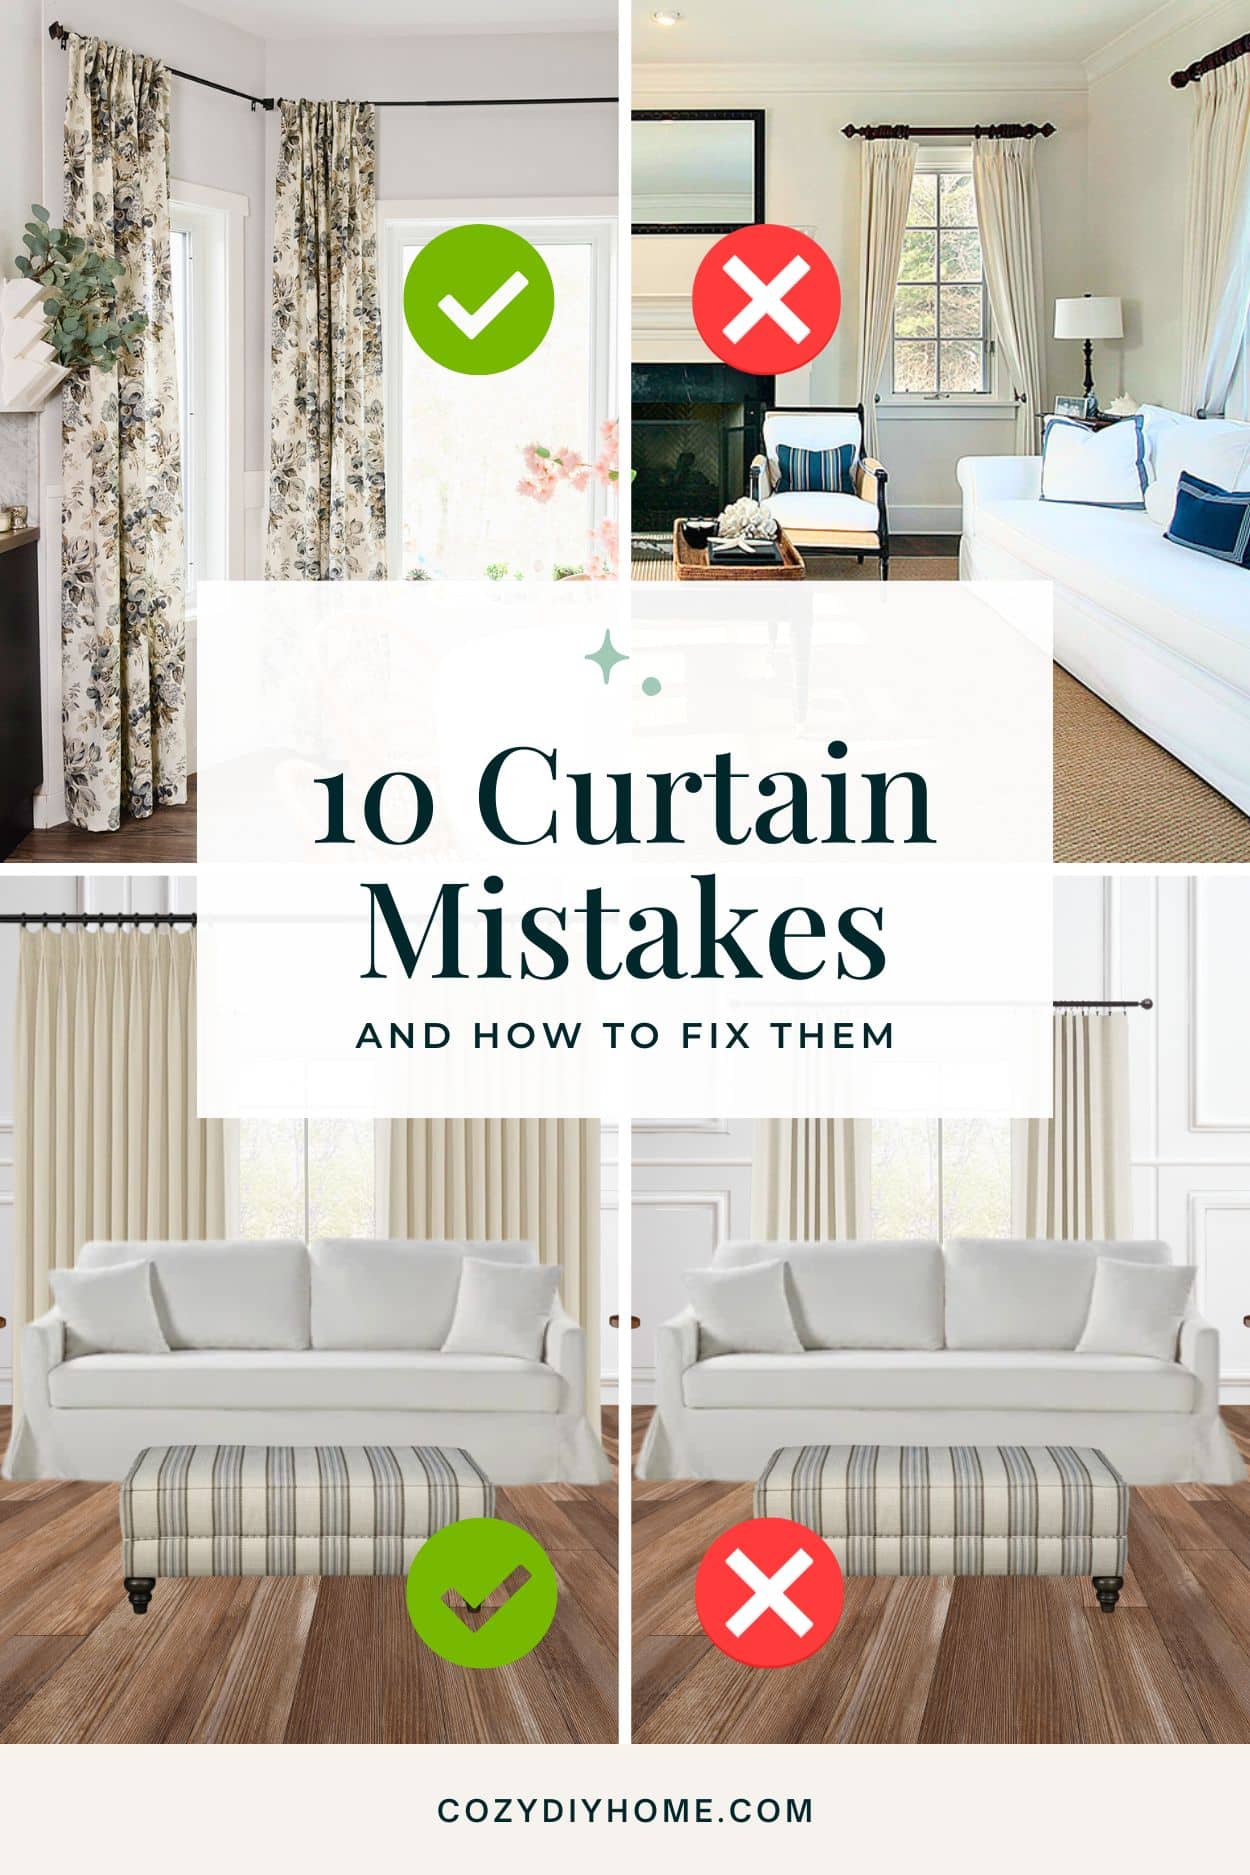
Mistake #1: Curtains That Are Too Short
The fastest way to make your home look unfinished is hanging curtains that don’t reach the floor. When your curtains hover awkwardly above the ground, it creates a disconnected relationship between your window and floor that instantly cheapens your space.
Think of curtains like dress pants – would you tailor your pants to show your ankles? The same principle applies to your windows!
The ideal length should either:
- Graze the floor (my personal favorite for a tailored look)
- 1/2″ above the floor (this is a great option for kitchens or rooms where the floor needs to be cleaned often)
- Puddle slightly for a more romantic or relaxed style (2-4 inches of fabric resting on the floor; not recommended if you have pets!)

Pro tip: Measure from your curtain rod to the floor, then add 1-2 inches for hemming. For IKEA shoppers, their curtains typically come in 98″ or 108″ lengths, perfect for standard and higher ceilings. Don’t forget you don’t need to know how to sew to hem curtains – you can use hem tape and an iron to make them shorter if needed!
What about radiators below windows? In this case, I’d opt for a tailored roman shade instead of curtains.

Mistake #2: Hanging Curtains Too Low
This mistake instantly shrinks your room. When you mount curtain rods directly above the window frame or just a couple inches higher, you’re missing a major opportunity to create the illusion of height and grandeur.
Here’s the fix: Mount your curtain rod 4-8 inches above your window frame, or even better, about 2-6 inches from the ceiling. This one change can make your standard 8-foot ceiling suddenly feel like a luxurious 9 or 10-foot ceiling!

In my home office, I re-mounted the curtain rods a few inches from the ceiling and bought longer drapes from IKEA. This simple adjustment made our standard-height ceilings feel so much more expensive.

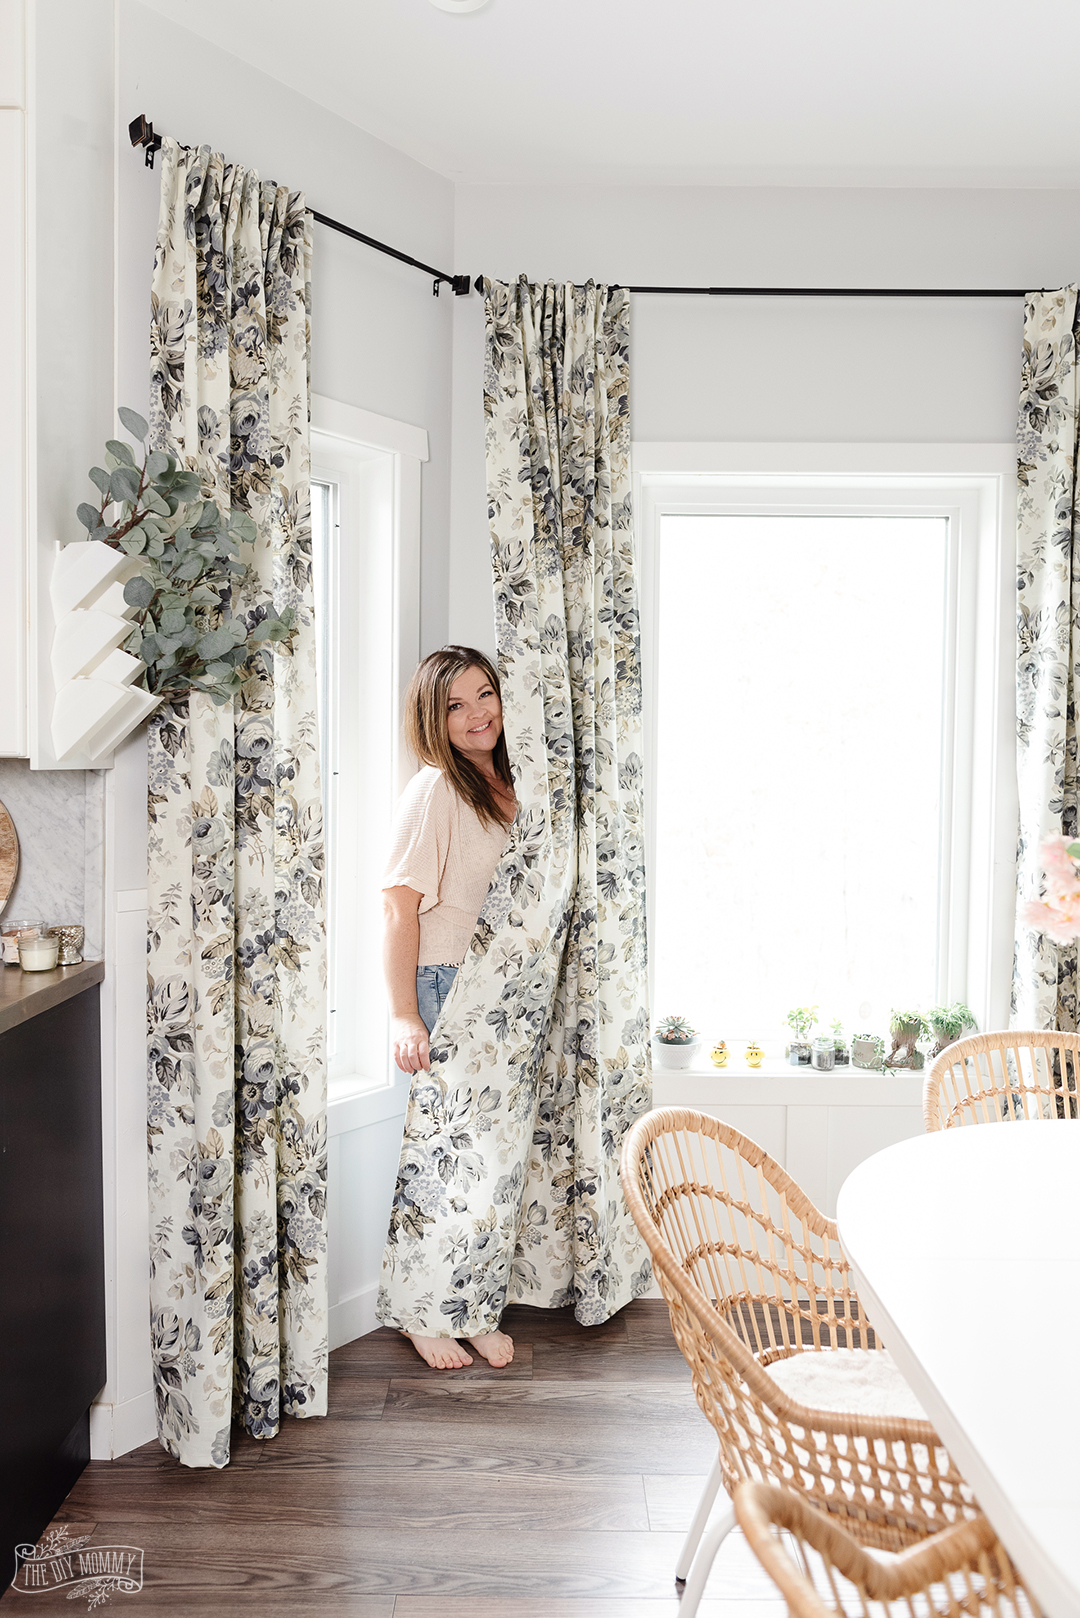
Mistake #3: Skimpy Curtain Width
Thin, flat curtains that barely cover your window create that “college dorm” look we all want to avoid. Your curtains should have beautiful folds and volume even when closed.
Here’s my formula: Your curtains should be 2-3 times the width of your window. So for a 36-inch window, you want 72-108 inches of curtain width.
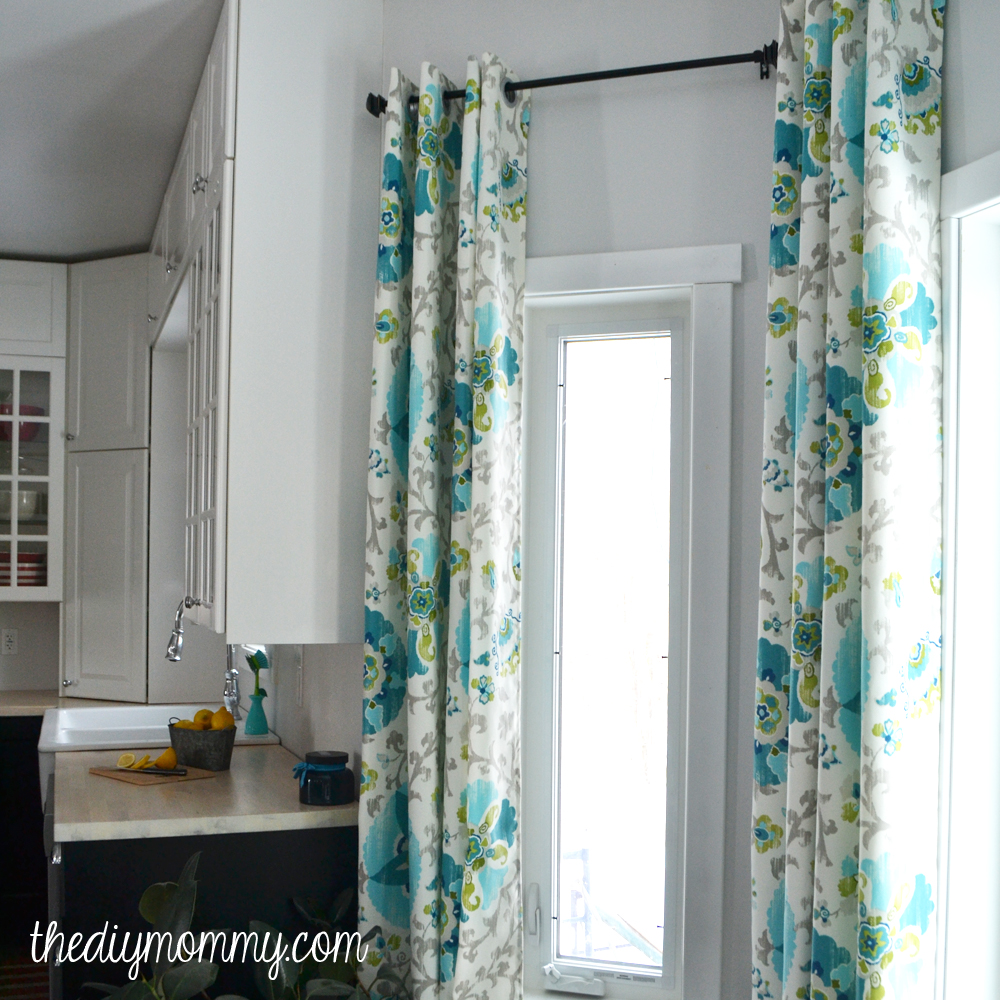
This often means using multiple panels. In our living room, I used four linen IKEA DYTÅG panels – two on each side – to create that luxurious, full look that makes people think you spent far more than you did. You can even attach the panels together with hem tape if you wish.

Mistake #4: Cheap-Looking Fabrics
Not all budget curtains are created equal! Certain fabrics instantly cheapen your space:
- Stiff polyester that reflects light unnaturally
- Fabrics that pill easily (those little fuzzy balls that appear over time)
- Plastic-looking synthetic lace
- Overly shiny materials that look like satin
Opt instead for:
- Natural fabrics like linen (my favorite!)
- Cotton or cotton blends
- Linen-polyester blends (more affordable than pure linen)
- Some heavier recycled polyester fabrics look great – like these IKEA curtains that have the look and drape of wool
Budget tip: IKEA’s HÄGGVECKMAL plaid curtains and SANELA cotton curtains look far more expensive than their price tag and are available in those longer lengths we talked about.

Mistake #5: Clashing Curtain Color
Choosing the wrong curtain color can create visual chaos in your room. Let me simplify color theory for you:
- For curtains that blend in: Choose colors analogous (next to) your wall color on the color wheel
- For curtains that pop: Choose complementary colors (opposite on the color wheel)
- For a fail-proof option: Choose white, off-white, or a neutral that matches your trim
For 2025, we’re seeing a big trend toward tone-on-tone curtains that match wall colors for a seamless, luxurious look.
Mistake #6: Conflicting Patterns
Pattern mixing is an art! The most common mistake is choosing patterns that compete rather than complement.
Follow this simple rule: Contrast both scale and pattern type.
- If you have large floral pillows → choose small geometric curtains
- If you have bold striped wallpaper → choose subtle textured curtains
- If you have busy patterned rugs → choose solid curtains with texture
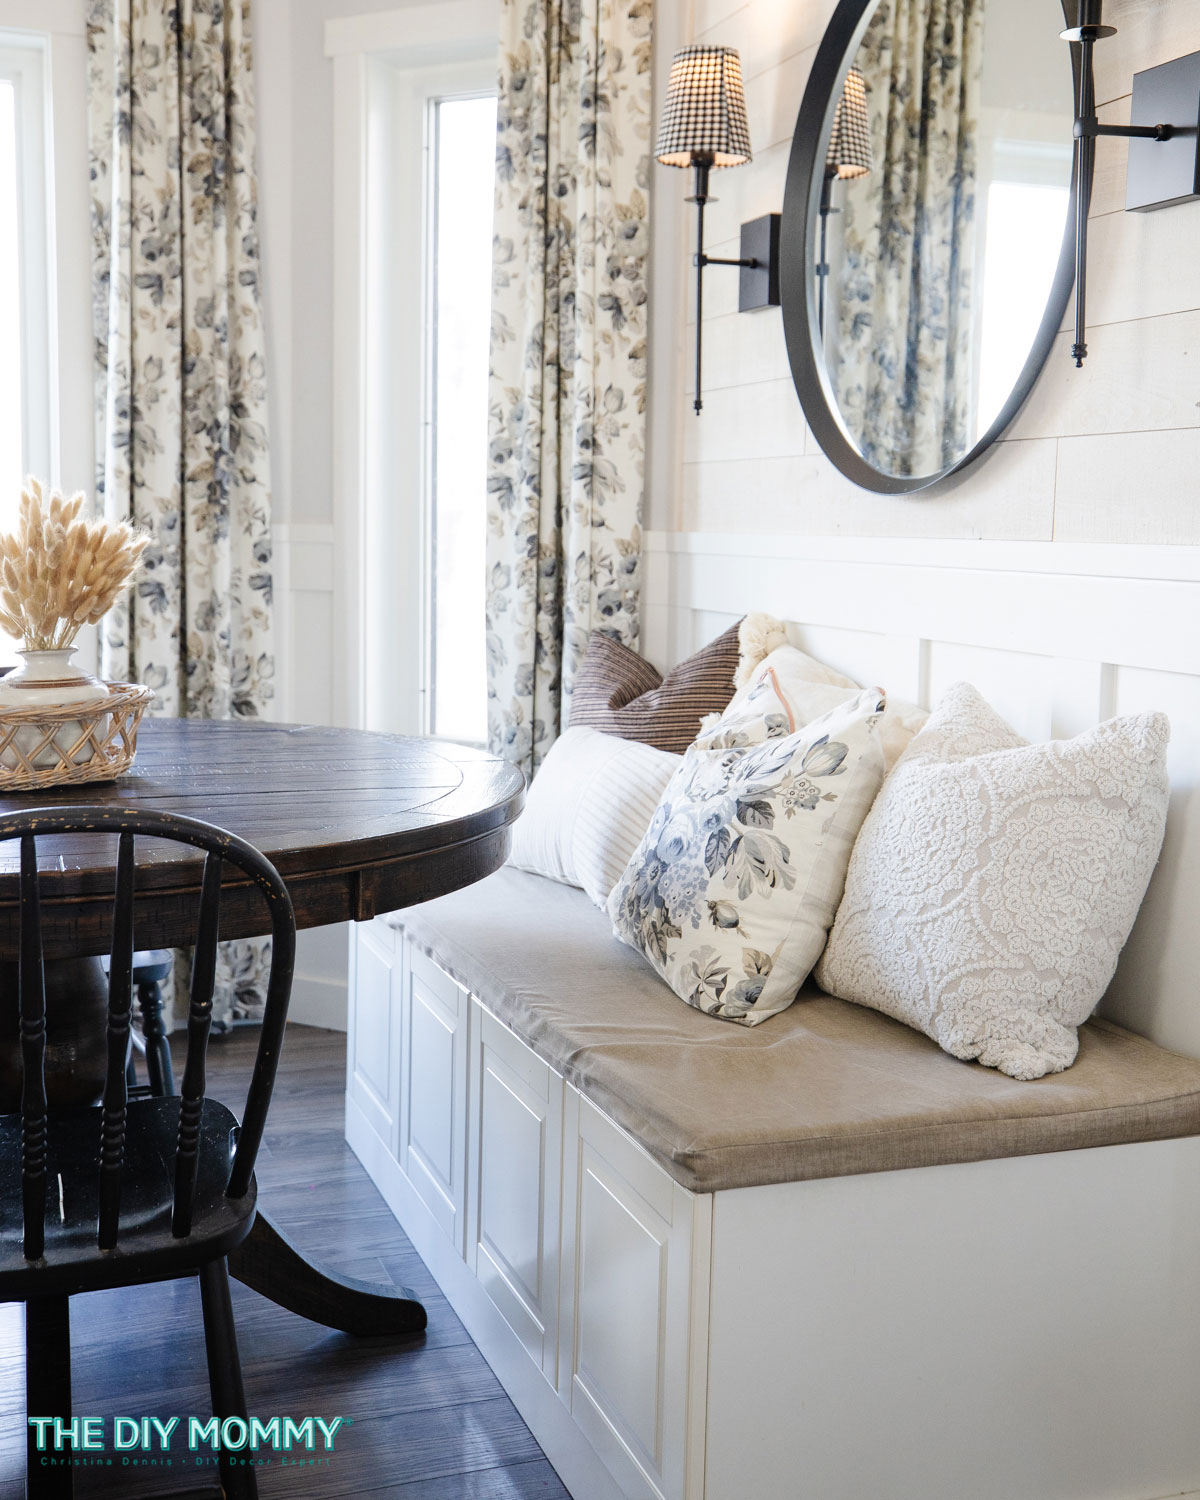
My black and white floral curtains in our breakfast nook work because they’re paired with solid furniture and small-scale geometric pillows – the contrast in scale makes it work. You can learn how to make DIY pleated curtains like mine right here!

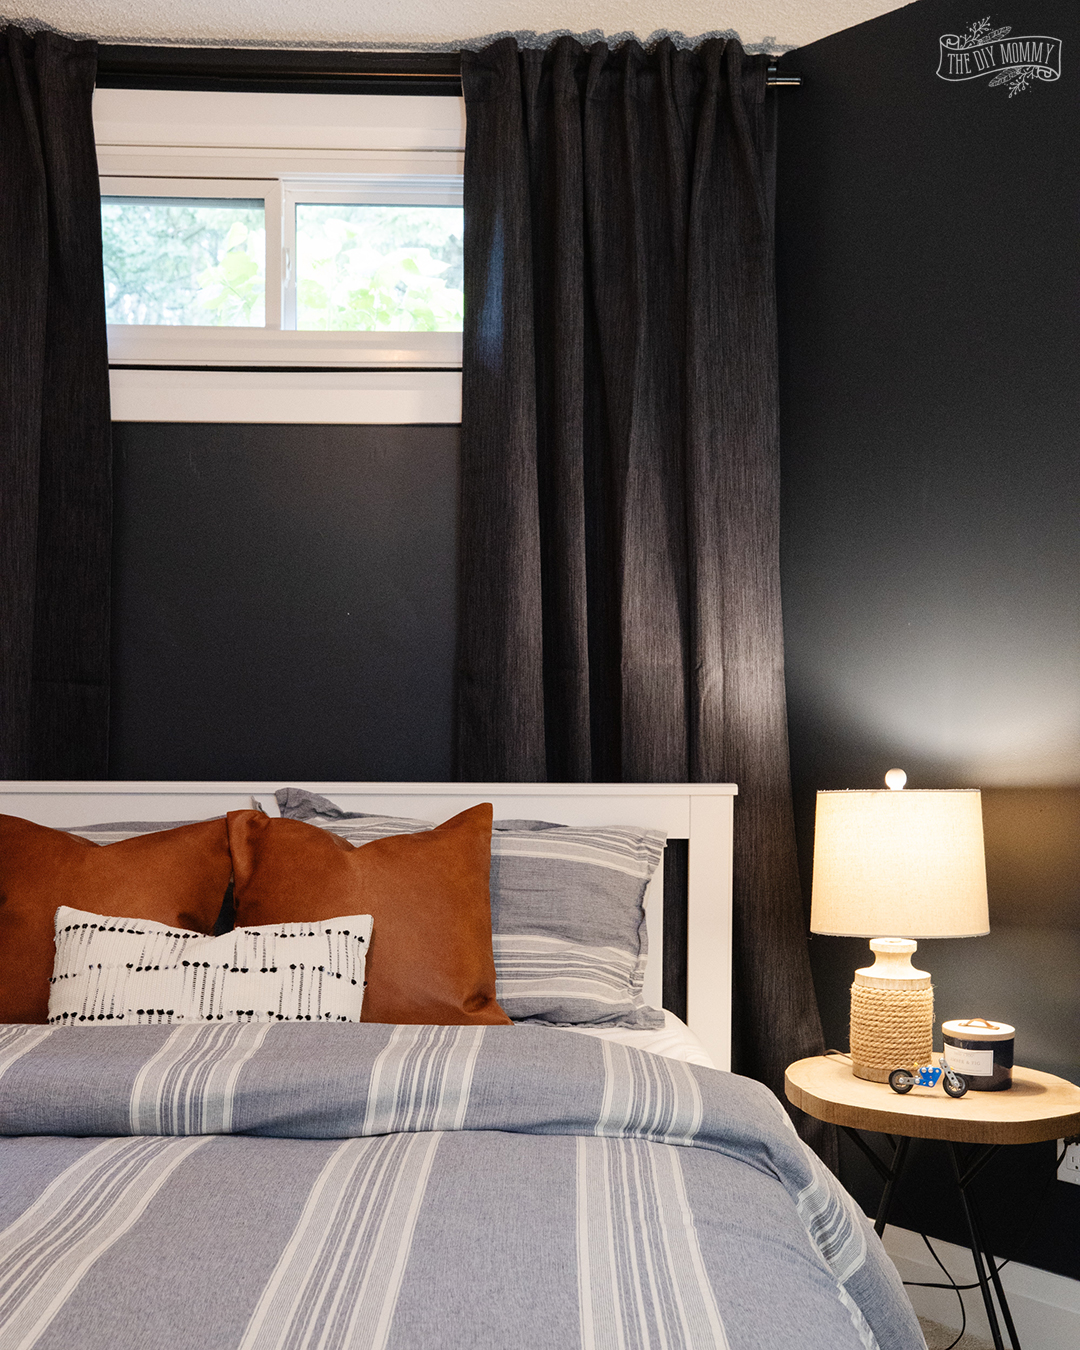
Mistake #7: Wrong Weight for the Room’s Function
Bedroom curtains and living room curtains should not be the same! Matching function to fabric weight is essential:
- Bedrooms → Blackout or lined curtains (prevents early morning wake-ups)
- Living rooms → Medium-weight fabrics (balance of privacy and light)
- Kitchens & breakfast nooks → Lighter fabrics that filter light beautifully
- Home offices → Consider light-filtering options that reduce screen glare
I learned this lesson the hard way in our vacation rental. Beautiful sheer curtains looked great in photos but led to 5am wake-ups for our guests! I quickly replaced them with black-out drapes that helped create a better sleep environment.
Mistake #8: Ignoring Your Hardware
Hardware makes or breaks your curtain game. Think of curtain rods like jewelry for your windows – they should enhance, not detract.
Avoid:
- Flimsy, too-thin rods that sag in the middle; I’ve made this mistake in a few of my rooms and I’m currently changing the rods one by one as I can afford them
- Plastic finials or end caps
- Mismatched hardware throughout a room
- Rods that are too short (they should extend 8-12″ past your window frame)
Invest in:
- Metal rods with visual weight
- Cohesive hardware that matches your door handles or light fixtures
- Center supports for any rod longer than 5 feet
Budget tip: Spray paint inexpensive hardware to match your other fixtures! IKEA also has some great options like their gold rods and curtain rings.
Mistake #9: The Wrong Hanging Method
How you hang your curtains matters as much as the curtains themselves. Grommet tops can give “college dorm” vibes. Here are some more contemporary options:
The options, from most to least formal:
- Pinch pleats (most tailored and expensive looking & popular for 2025)
- Back tabs (hidden hardware look)
- Rod pocket (casual, but can look dated if not done right)
- Clip rings (versatile but casual)
- Top ties (casual and feminine)

For 2026, we’re seeing a return to more tailored hanging methods like pinch pleats and hidden back tabs for a cleaner look.
DIY tip: You can transform basic IKEA panels with curtain hooks & rings for under $15, giving you that custom pinch pleat drapery look for a fraction of the cost!

Mistake #10: Not Pressing or Steaming Your Curtains
This is the mistake I see EVERYWHERE – even in million-dollar homes and luxury hotels! Nothing screams “I don’t care about details” like wrinkled, creased curtains straight from the package.
Those horizontal fold lines from packaging are a dead giveaway that your curtains were just thrown up without care. It’s like wearing a beautiful dress with visible shipping creases – it ruins the entire look and the lines won’t ever really come out unless you press them!
This is the easiest fix on our list, but one that makes the BIGGEST visual impact:
- Option 1: Iron your curtains before hanging (use appropriate heat setting for fabric)
- Option 2: Steam them once they’re hung (my preferred method!)
- Option 3: For stubborn wrinkles, try hanging them in a steamy bathroom
I invested in a $30 handheld steamer years ago, and it’s been a game-changer. Just 5 minutes of steaming can transform your space from “just moved in” to “professionally styled.”
For 2026, this detail-oriented approach is what separates amateur-looking spaces from magazine-worthy rooms. It’s the finishing touch that makes ALL the difference!

Frequently Asked Questions
Curtains should usually be hung higher than the top of the window frame to make the room feel taller and more spacious. A common guideline is placing the curtain rod about 4-8 inches above the window frame, or even closer to the ceiling if you want a more dramatic look. Hanging curtains higher draws the eye upward and creates the illusion of taller ceilings.
Yes; most designers recommend floor-length curtains for the most polished look. Curtains that are too short can make a room feel unfinished or cheap. Ideally, the panels should either just kiss the floor or hover about ½ inch above it for a clean and tailored appearance.
For a full, luxurious look, curtains should usually be 2 to 3 times the width of the window. This allows the fabric to gather nicely when closed and prevents curtains from looking flat or skimpy. Wider panels also make the window feel larger and more balanced in the room.
Curtain rods should extend beyond the window frame so the curtains can stack against the wall when open. A typical recommendation is 8-12 inches past the window on each side, which lets more light in and visually makes the window appear wider.
Natural-looking fabrics such as linen, cotton, and velvet tend to look more high-end than shiny synthetic materials. Heavily glossy fabrics or overly busy patterns can sometimes make curtains look cheaper or dated, even in a nicely decorated room.
Absolutely. Curtains are actually making a comeback as homeowners look for ways to add warmth, texture, and softness to a space. Designers are increasingly using layered curtains, dramatic drapery, and full floor-length panels to create a more luxurious and cozy feel in modern interiors.
Not always, but hanging curtains higher and wider than the window can dramatically improve how a room looks. When rods extend beyond the window frame and curtains frame the wall space, the window appears larger and the room often feels brighter and more balanced.
Yes. Many people layer curtains over blinds for both style and functionality. Installing curtains above blinds can soften the look of the window, add texture to the room, and provide additional light control and privacy when you need it.
My Favourite Sources for Budget-Friendly Curtains
- Amazon linen-look curtains (I love the look and feel of these for the price!)
- Amazon room-darkening drapes (these look incredible, and they’re great for bedrooms)
- IKEA (I pretty much love all their curtains, and they’re a wonderful source for longer lengths)
A Final Note about “Rules”
I want to remind you of something important: These are guidelines, not rules. YOUR home should reflect YOUR style and what YOU love. If you adore short curtains or have a creative reason for hanging them lower, do what makes you happy! These tips are simply starting points if you’re unsure where to begin or if something feels “off” about your space.
The most beautiful homes aren’t the ones that follow every design rule perfectly. They’re the ones that feel personal… like the people who live in them! So take what works for you, leave what doesn’t, and make your home a place you truly love.
What curtain mistakes have you spotted in your home? Have you tried any of these fixes? Let me know in the comments below!
PIN ME:


Such great tips, thank you!!!