IKEA Hacks That Actually Add Storage (And Still Look Beautiful)
This post may contain affiliate links · This blog generates income via ads
If your home is starting to feel cluttered, you’re definitely not alone! Storage is one of the biggest challenges in creating a cozy space, especially when you are working with a smaller home or a tight budget. The good news is you don’t need custom furniture or a huge renovation to fix it. With a few smart IKEA hacks, you can add real, functional storage that also looks designer and stylish.
In this post, I’m sharing my favourite IKEA hacks that actually add storage you will use every day. These are practical, beginner-friendly ideas that can transform your space without spending a fortune.

Quick Overview
Time: 1–2 days depending on project
Cost: $50–$400 depending on hack
Skill level: Beginner to intermediate
Tools: Drill, screwdriver, level, measuring tape
Materials List
Materials will vary by project, but here are the most common items used:
- IKEA KALLAX shelves
- IKEA HAVSTA cabinets
- IKEA STALL shoe cabinets
- IKEA TV bench (BESTÅ or similar)
- IKEA kitchen cabinets
- Wood for tops or trim (Home Depot or Lowe’s)
- Paint or stain
- Cabinet handles or knobs
- Wall anchors and screws
Step-by-Step Tutorial
Since this post includes multiple hacks, I’ll break each one down into simple steps so you can choose what works for your space.
Hack 1: Window Seat from KALLAX Shelves

Step 1: Position your KALLAX units
Place one or two units under your window. This creates the base of your seat and storage. I used one four-section unit for my daughter’s bedroom window.
You can also add a couple units on either side of the window like I did to create even more storage!
Step 2: Secure and level them
This is important for safety and comfort. Use brackets if needed.
Step 3: Add a cushion
Create one long, custom cushion or use a few floor cushions like I did on top of the unit beneath the window for comfort.
Why it works:
You get hidden cube storage plus a cozy seating area in one!
Hack 2: Coffee Bar from HAVSTA Cabinets

Step 1: Assemble base cabinets
These hold heavier items like coffee machines. I used a few HAVSTA base units for my coffee bar, and left an area for a bar fridge.
Step 2: Add a countertop
This will give you a surface for your items. I used IKEA’s inexpensive faux marble laminate countertop.
Step 2: Add upper cabinets or shelving
Perfect for mugs and decor! I used a couple of glass-doored HAVSTA units, and added some wooden shelving in the middle.
Step 3: Style and organize
Use trays and jars to keep everything tidy.
Why it works:
It creates dedicated storage while making your kitchen or dining area feel more organized.
Hack 3: Dining Bench from IKEA Fridge Cabinets

Step 1: Create a base
Build a base from 2×4 lumber to give your bench the right height and add a stable support.
Step 2: Lay cabinets horizontally
These become the base of your bench. I used two 30 inch wide over-the-fridge cabinets.
Step 3: Add a wood top and cushion
This finishes the look and adds comfort. I made a custom cushion from 1 inch foam and indoor/outdoor fabric.
Why it works:
You get deep storage for items you don’t use daily, and a comfy place to sit that doesn’t take up a ton of space!
Hack 4: Entryway Storage from STALL Shoe Cabinets
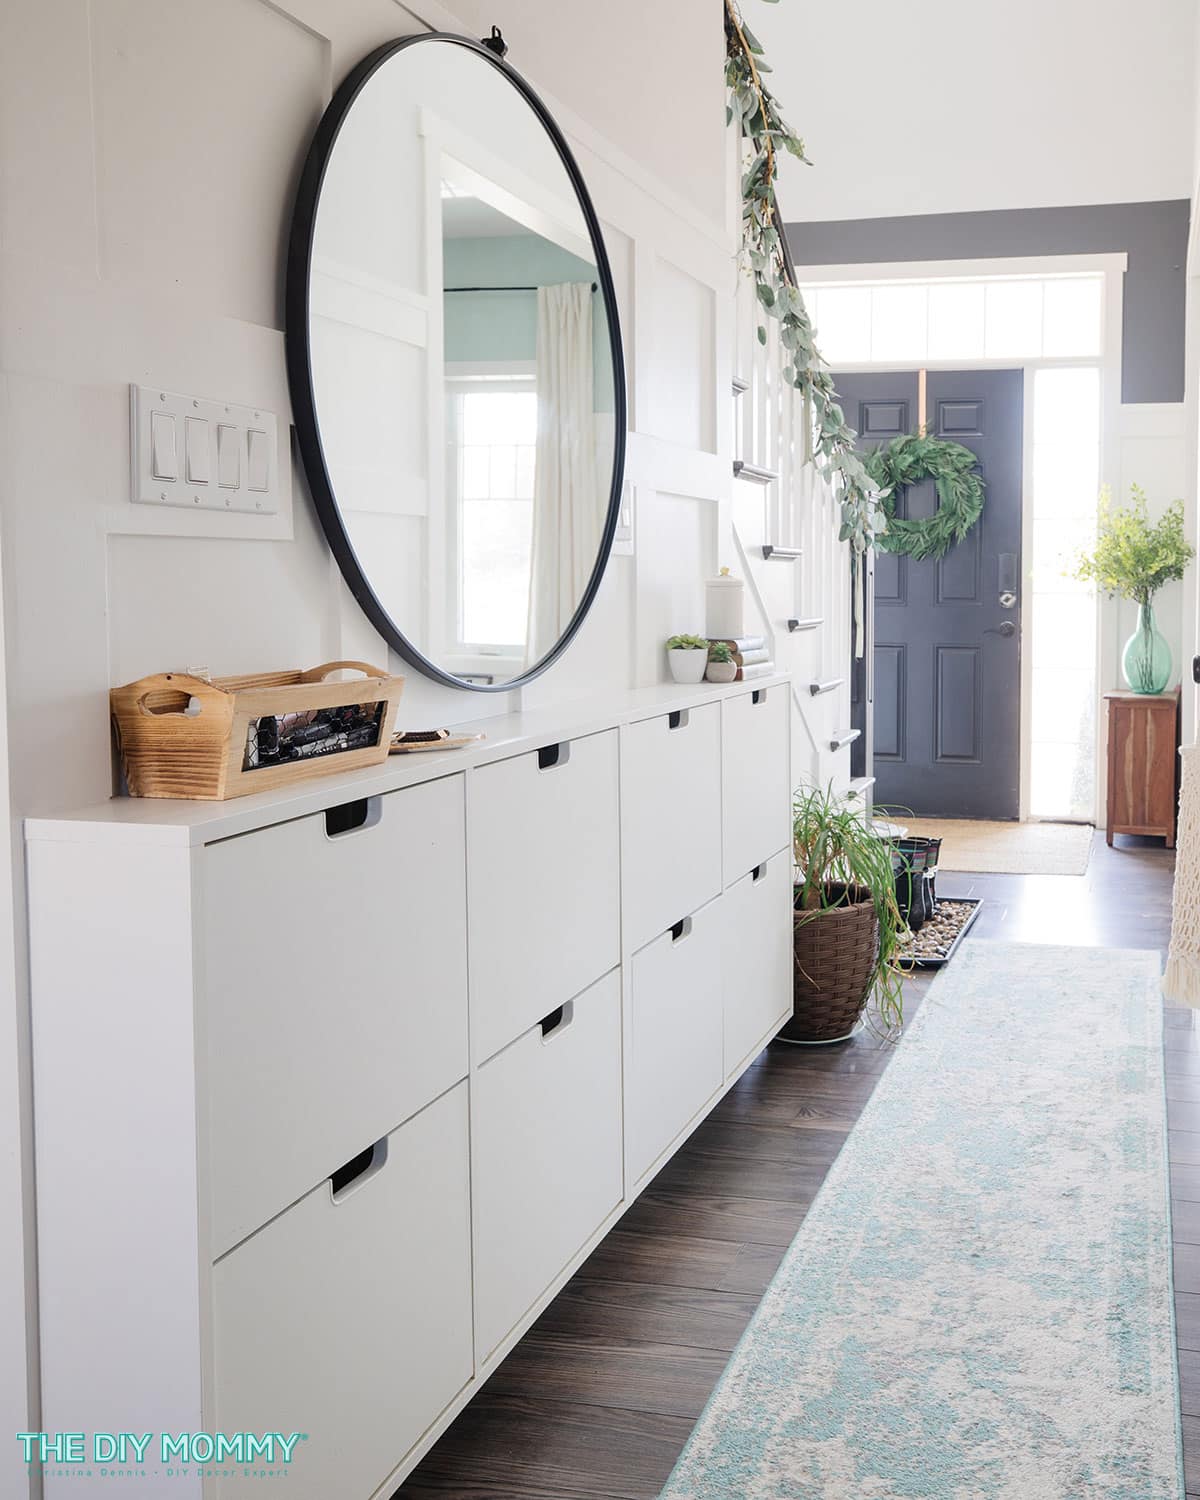
Step 1: Mount STALL cabinets to the wall
These are designed to be wall-mounted for safety.
Step 2: Paint to match your trim
Paint the cabinet boxes and doors to match your home’s trim colour exactly. I used a bonding primer and a cabinet & trim enamel for a long-lasting finish.
Step 3: Create board & batten trimwork
Use MDF baseboard to create board & batten trim detail around the cabinets. Caulk them and paint them in the same colour as the cabinets for a built-in look.
Step 4: Style the top surface
Add a mirror or decor to complete the look.
Why it works:
It keeps clutter off the floor and uses vertical space. This is a great solution for a narrow entryway.
Hack 5: Entryway Bench with Hooks from IKEA TV Bench

Step 1: Place your TV bench along the wall
This becomes your seating and storage base. (Prime and paint it first if you want a pop of colour, like I did with mine!)
Step 2: Add trim detail, a shelf, and wall hooks above
Perfect for coats and bags! You can paint these to match your bench.
Step 3: Add baskets or bins on the shelf
Keeps everything organized and hidden.
Why it works:
It creates a functional drop zone for everyday items.
Hack 6: Bathroom Vanity from IKEA Kitchen Cabinets

1: Select IKEA kitchen cabinets
Pick up a 24″ sink cabinet and an 18″ drawer cabinet to create a 42″ vanity with ample storage.
2: Modify cabinet depth
Cut the backs and sides to create a 21 1/2″ deep cabinet.
3: Assemble the cabinets & secure to the wall
Build the cabinets as per IKEA’s directions, and assemble them to the bathroom wall.
4: Paint
You can choose to prime & paint your cabinet doors and cover panels for a more custom look.
5: Sink, countertop, and finishes
Install a countertop, sink and hardware to complete your vanity. You can also add custom details like a sink skirt for some extra charm.
Hack 7: SKÅDIS Pegboard Organization Wall
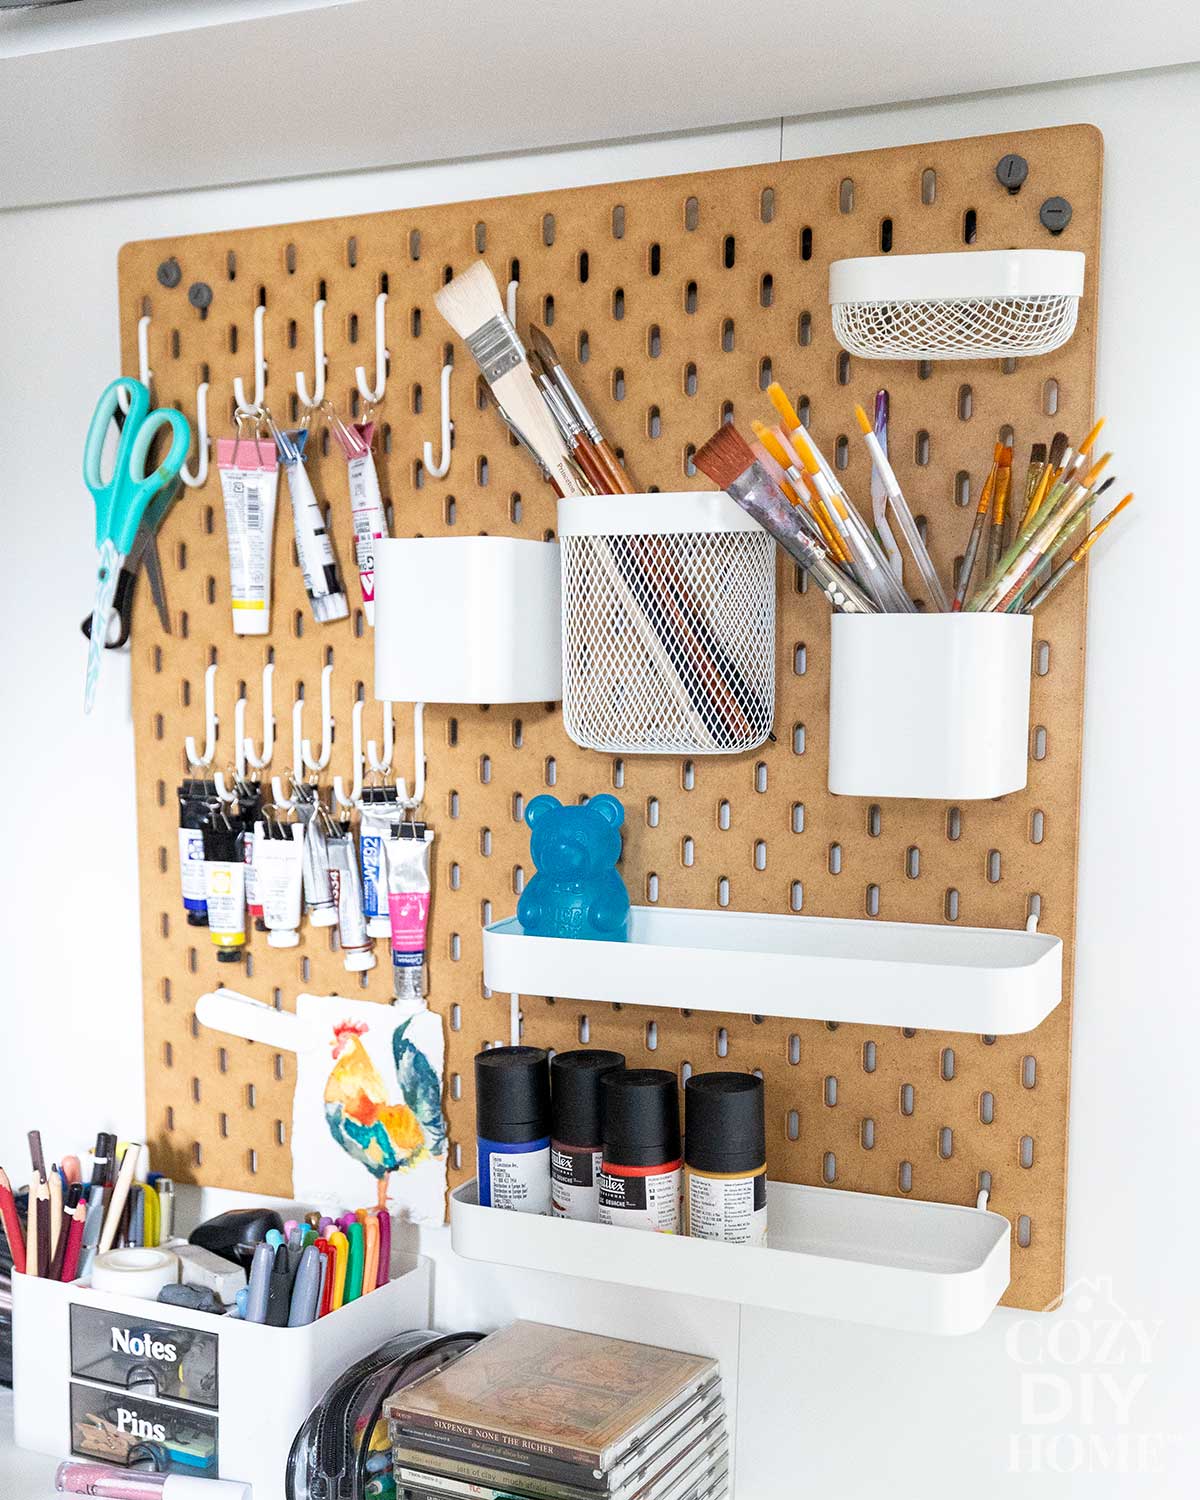
1: Mount the pegboard
Choose a spot near your main clutter zone.
2: Add hooks, bins, and shelves
Customize for your needs.
3: Adjust as needed
That’s the beauty of pegboards!
Why it works:
It adds flexible vertical storage without taking up floor space.
Tips for the Best Results
- Always anchor large furniture to the wall for safety
- Use matching hardware to make pieces feel cohesive
- Add wood tops or trim to elevate the look
- Measure your space carefully before buying
- Paint is your best friend for a custom finish
Interior designers often say that built-in style storage can increase perceived home value because it looks intentional and permanent.
Styling or Usage Ideas
Once your project is done, here are some cozy ways to style it:
- Add neutral baskets for hidden storage
- Use soft cushions and throws on benches
- Style with books, plants, and candles
- Keep everyday items accessible but tidy
- Rotate decor seasonally for a fresh look
Frequently Asked Questions
Yes, as long as they are properly secured and assembled.
Some require only basic tools like a drill and screwdriver. Others require simple power tools like a miter saw and nail gun.
Absolutely. Start with simpler projects like the pegboard wall.
Yes. Most of these hacks cost a fraction of custom furniture.
Related Projects
If you enjoyed this post, you might also like:
- I Tried the Viral IKEA HYLTARP Sofa for Over a Year and Here’s My Honest Review
- How I Created My Dream DIY Coffee Bar with an Epic IKEA Hack
- DIY IKEA Farmhouse Sink Vanity: Budget Bathroom Remodel
- Easy IKEA Hack: Entryway Organizer with MOSSLANDA Picture Ledge
- The Best IKEA Products that Actually Last, According to a Home Stylist
Creating a home that feels calm and organized doesn’t have to be expensive or complicated! These IKEA hacks give you real storage solutions while still keeping your space cozy and beautiful.
Start with just one project, and you might be surprised how much of a difference it makes.
If you try one of these hacks, I would love to hear how it turned out! Tag me on social: @cozydiyhome


