Organize Recycling & Create a Family Command Center in Your Mudroom
This post may contain affiliate links · This blog generates income via ads
Do you need help with your mudroom organization? Come see how I created a DIY combined recycling organization station/family command center with inexpensive kitchen cabinets and a few personal touches!
Disclosure: This post is sponsored by Brookfield Residential. As always, all of the opinions here are my own.
Show Home Collaborations
I was thrilled to partner with Brookfield Residential here in Edmonton to create some fun, functional, and easy DIY projects that you can recreate in your home. In case you missed it, you can read all about how I built a simple and functional DIY entry hook wall at the Dawson show home. I also showed you how I gave a closet an industrial makeover on a budget. And then, I taught you how to build a framed pegboard and workbench in a garage nook. I was a busy little bee for a while there!
Current Project
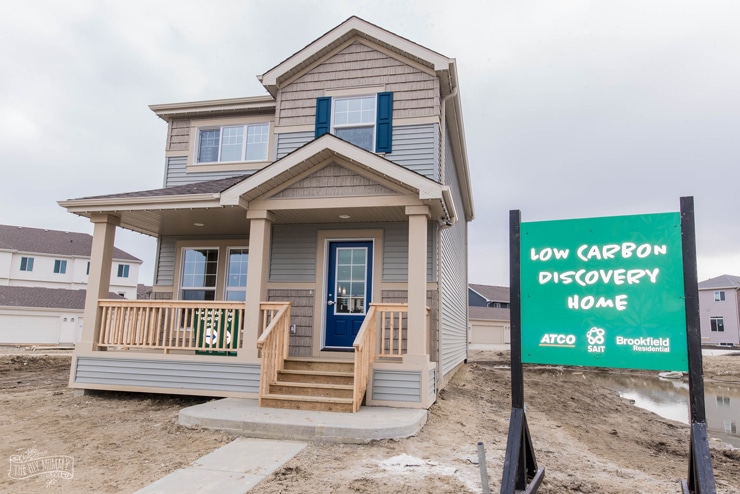
For this project, I had the privilege of working in the Low Carbon Discovery Home in the Chappelle Gardens community in South West Edmonton. From winding recreational trails to fun events at the Social House, Chappelle Gardens is all about connectivity and community. It’s the perfect place to raise a family! Donald R. Getty School is nearby. It also has a community garden and lots of space to play.
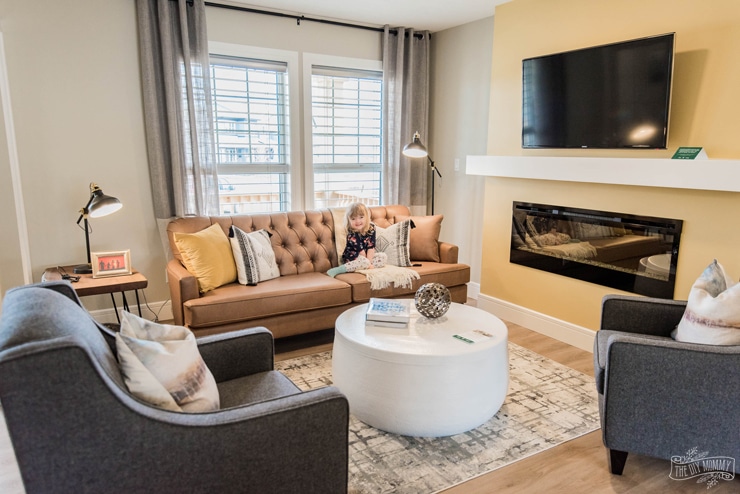
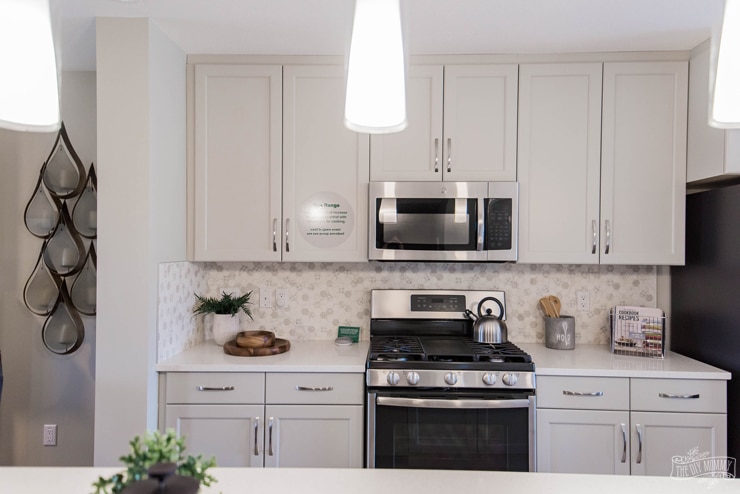
This time, I worked on the Brighton model show home. It has three spacious bedrooms, a beautiful galley-style kitchen with a large island, and a rear entry mudroom with main floor laundry. This last space is where I did my DIY!
This Low Carbon Discovery Home was built to create an affordable, low-carbon home. How? By reducing emissions and utility bills! And it does this by reliably producing as much electricity as it consumes.
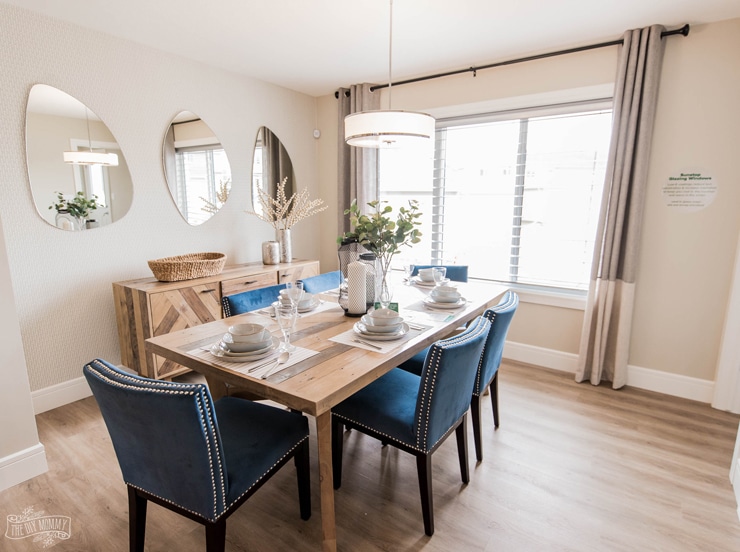
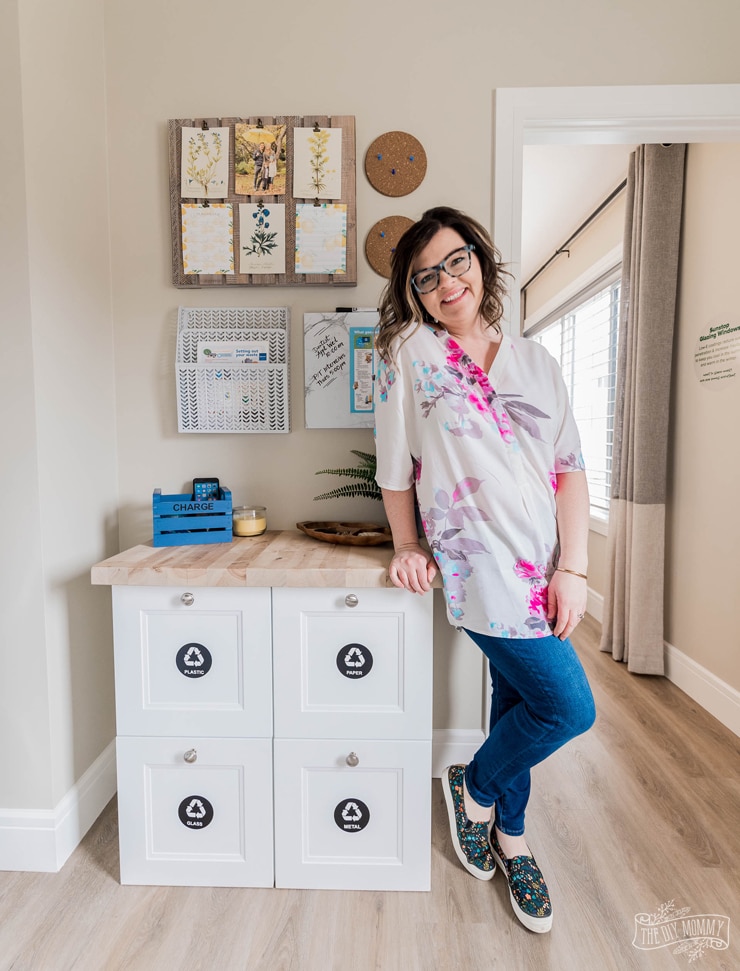
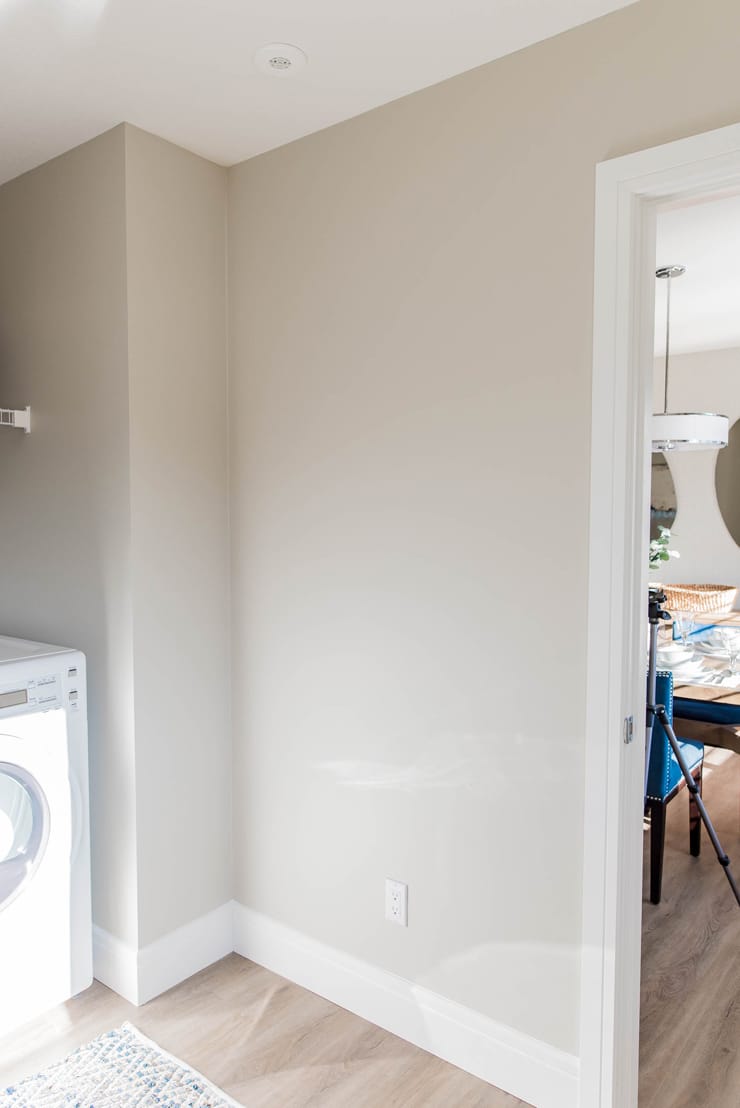
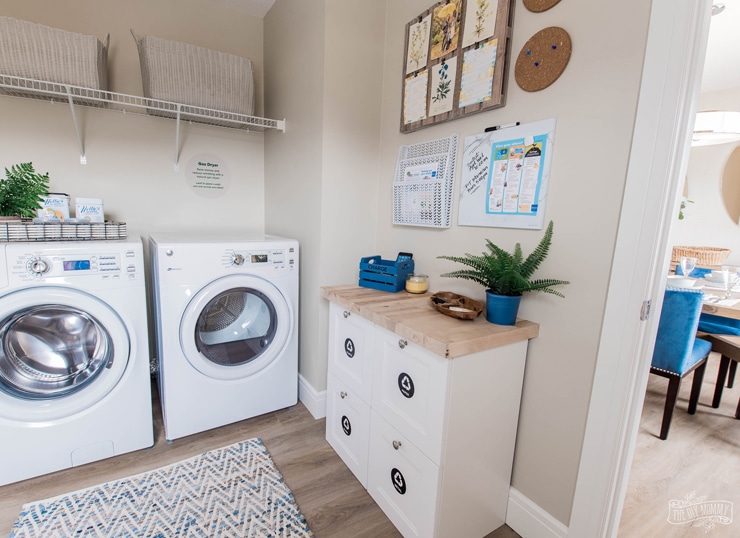
I was inspired by all of the earth-friendly features in this home! So, I thought it would be a good idea to continue the theme with my DIY project: a recycling center made from kitchen cabinets with a family command center. A little nook just inside the Brighton mudroom/laundry room was the perfect place for this!
Here’s how the mudroom nook looked BEFORE:
Now, watch my YouTube video below to see how I made over this nook in the Low Carbon Discovery Home’s mudroom. Or, follow the step-by-step written instructions below:
How to create an organized home recycling station and family command center
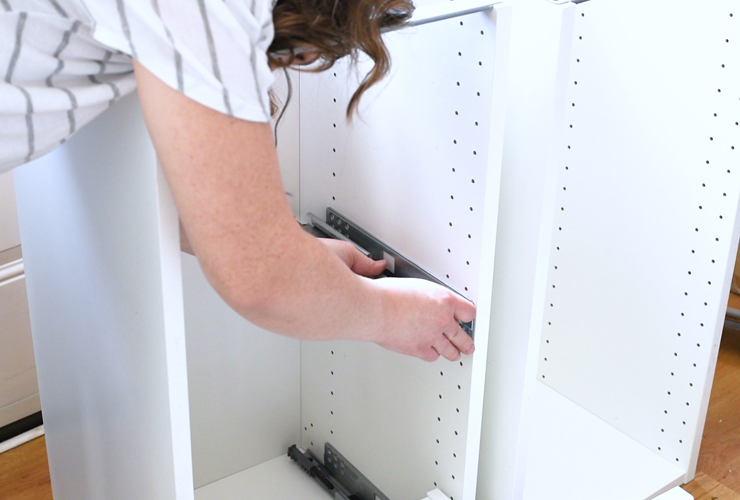
First, I purchased two 15 x 15″ IKEA kitchen cabinets with drawers. Then, I assembled them as per the instructions.

Next, I cut a hole in the back of one cabinet to match the placement of an outlet on the wall of the mudroom nook.

Then, I put the cabinets in place. I attached them to each other with screws, and then I installed a wooden countertop. I decided to float the cabinets on the ground so that they would be easily removable. The countertop was a scrap piece from one of my husband’s renovation jobs. So, it was a great way to use leftover material!
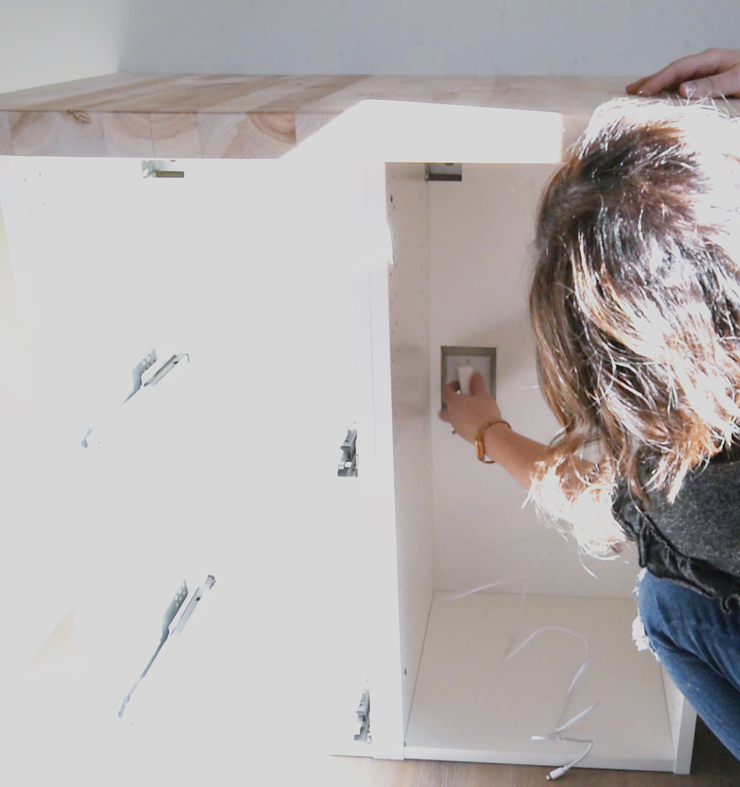
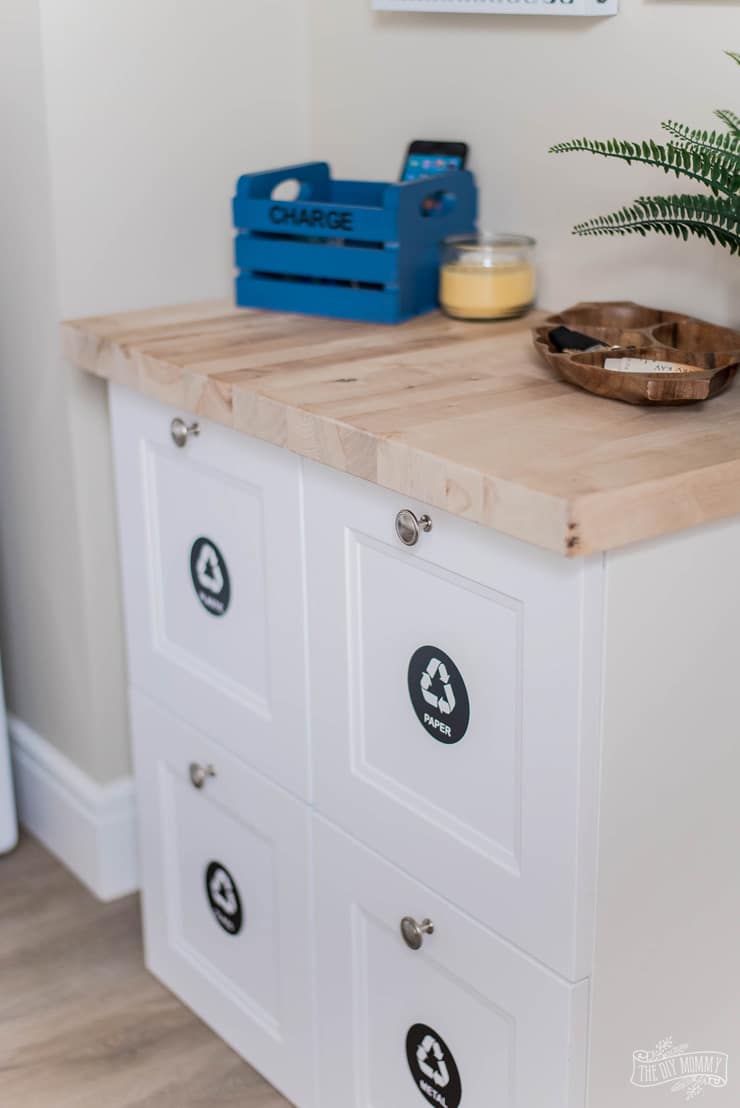
Next, I plugged a phone charging cable into the outlet behind the cabinets. I threaded the cord through the holes at the top of the cabinets (at the back) and out of a hole we drilled on the top left of the wooden counter top.

I used a wooden crate I had on hand and spray painted it to make a simple charging station to sit atop the cabinets.
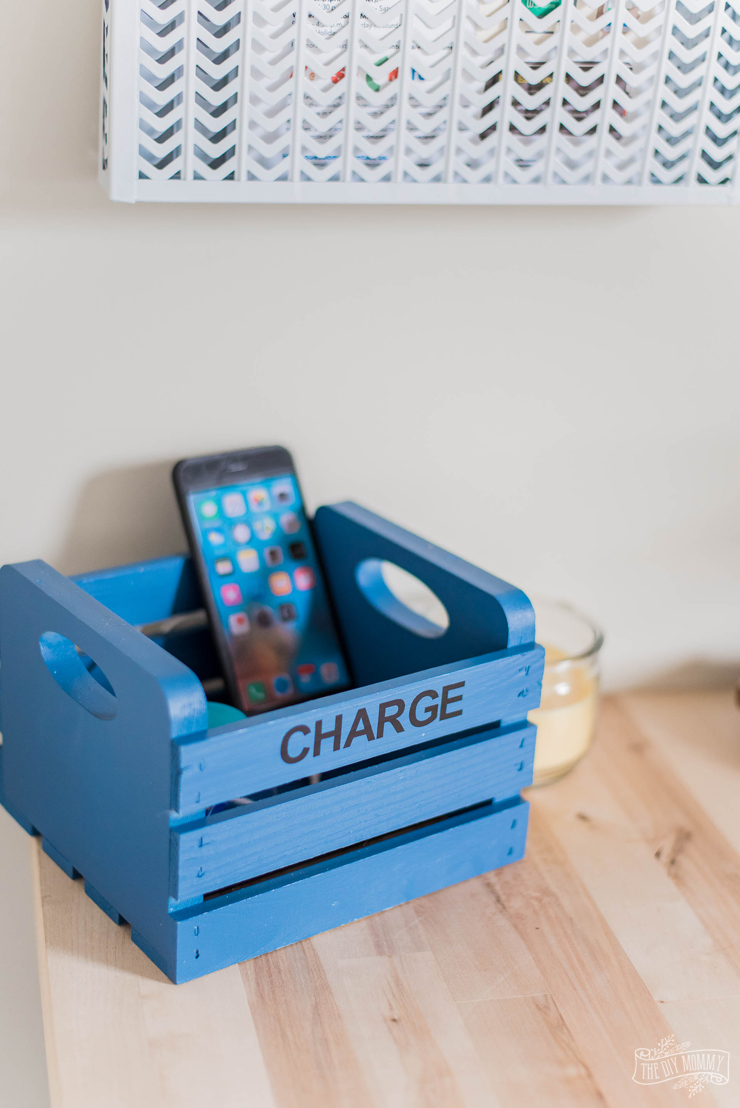
The phone charging cord threads perfectly through the hole in the counter and into the crate to charge a phone or other device.
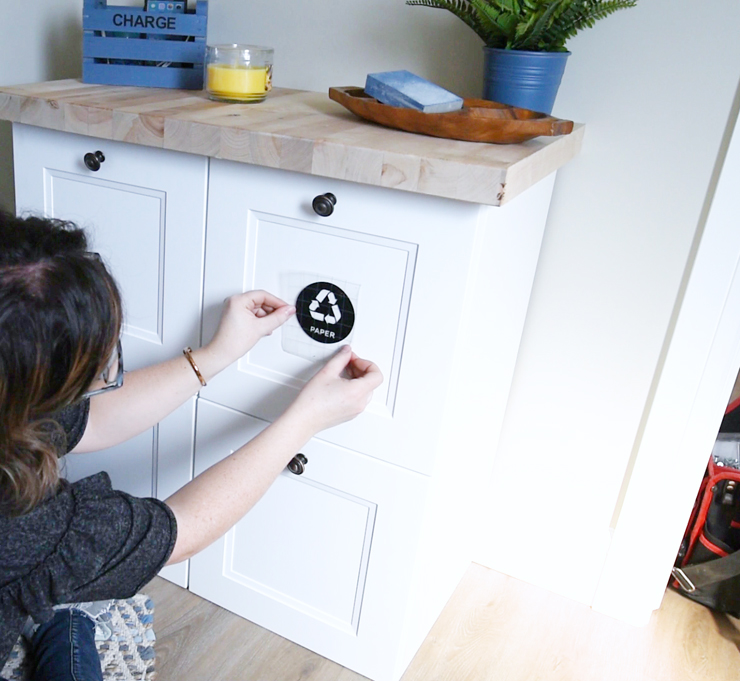
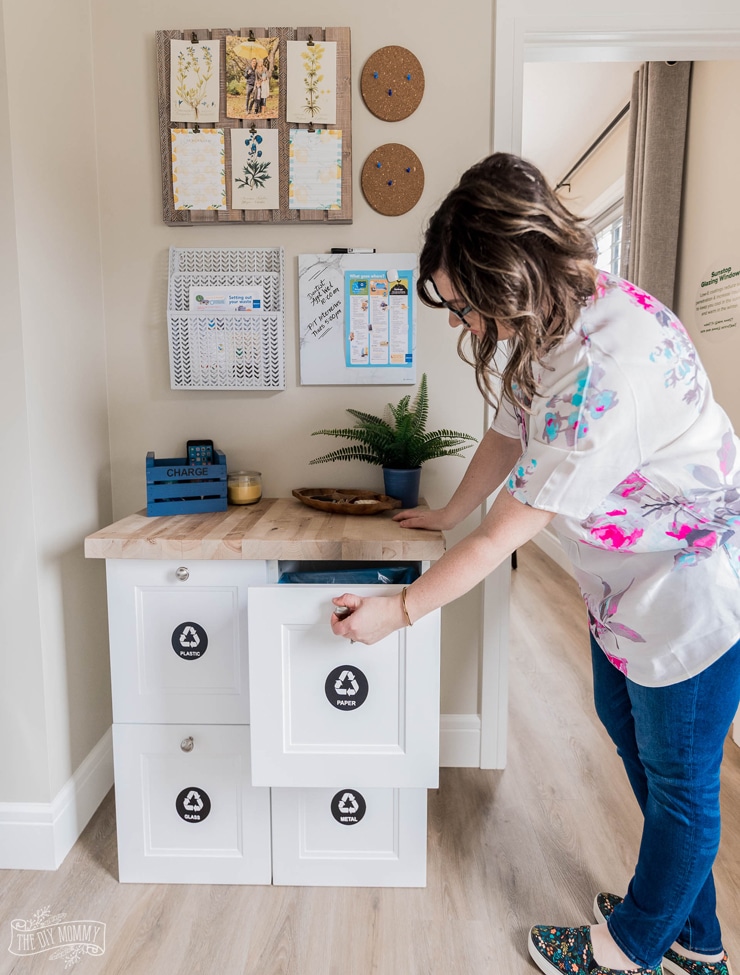
I used my Cricut to create labels for the charging station and the fronts of the cabinets for recycling. But, you could also use sticker paper and your printer to create similar labels.
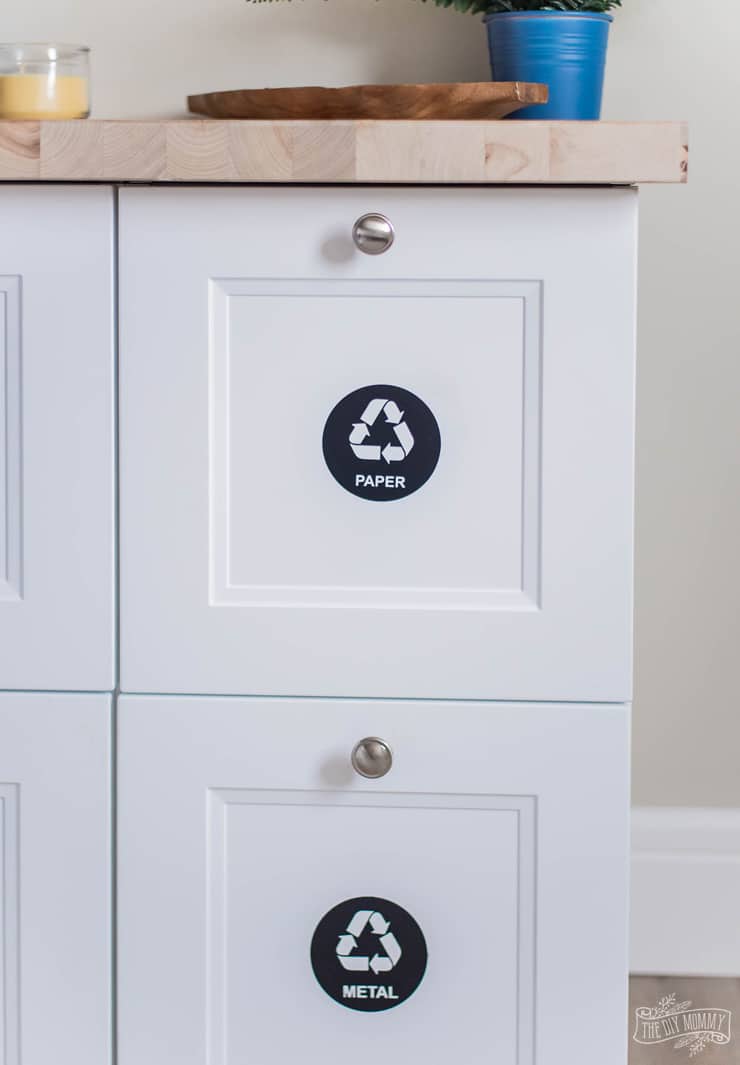
Click here to download my free art file for the recycling labels for glass, paper, plastic, and metal!
Finishing Touches
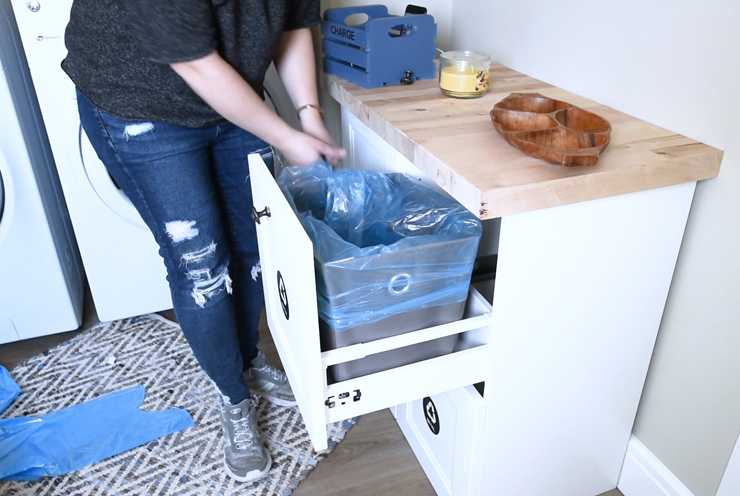
To complete the recycling cabinet, I added some fabric bins and recycling bags to the drawers. I also attached knobs to the drawer fronts.
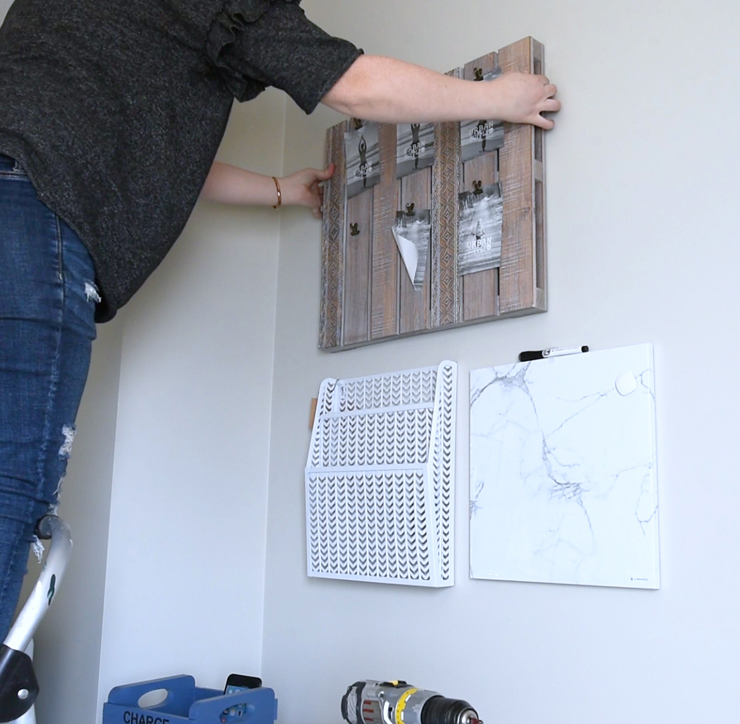
I made a simple command center above by mounting a magazine file, a whiteboard, a bulletin board, and recycled cork trivets to the wall.
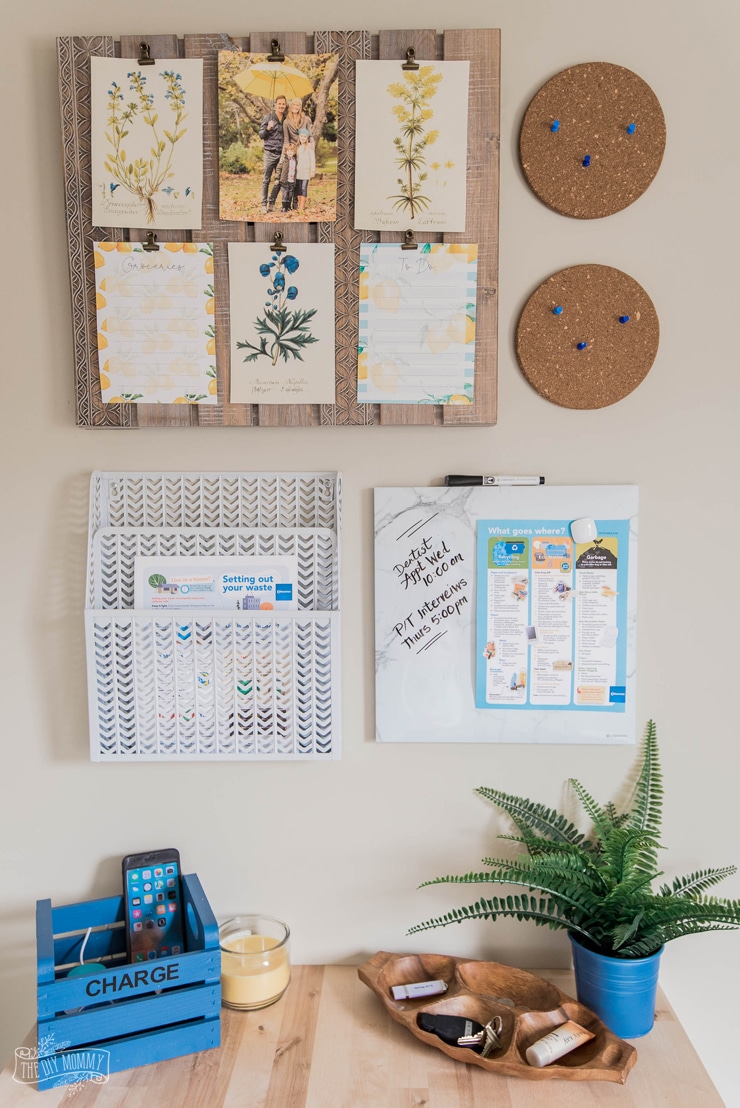
Then, I attached some free printable artwork to the wooden bulletin board. You can find these lovely blue & yellow-themed vintage botanical prints right here.
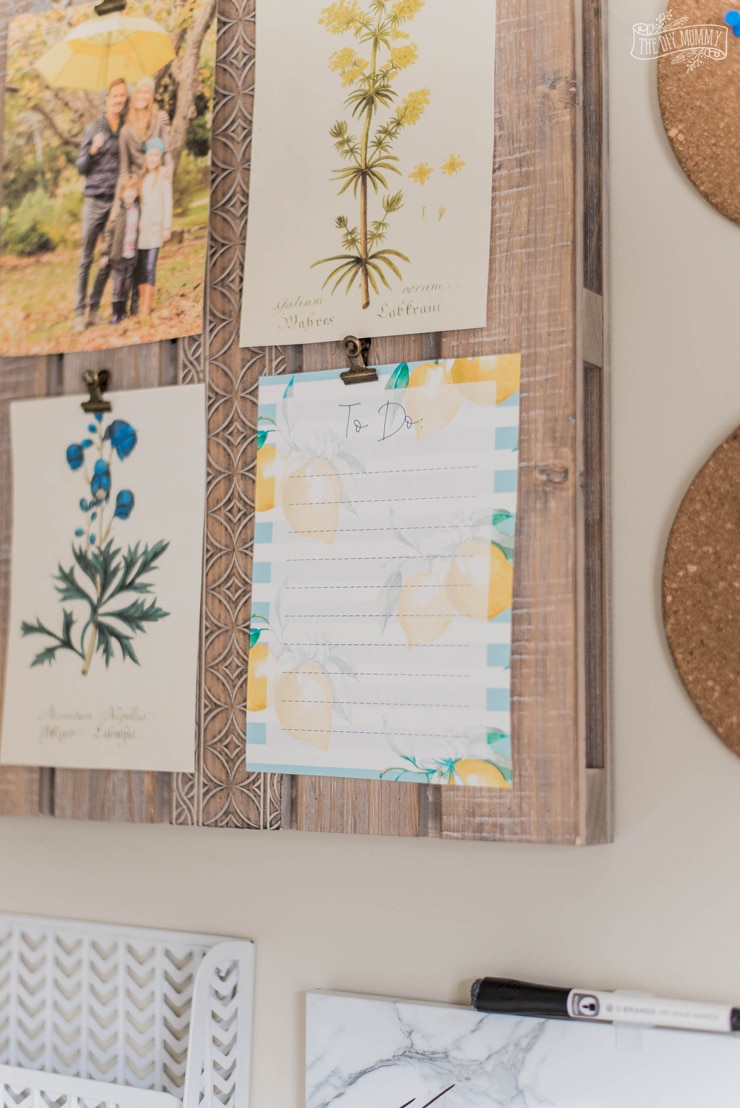
The lemon-themed printable lists are made by me! You can download them for free right here.

A candle, a plant in an upcycled pot, and a thrifted wooden tray for keys and other items completes this counter. It’s so pretty and functional!
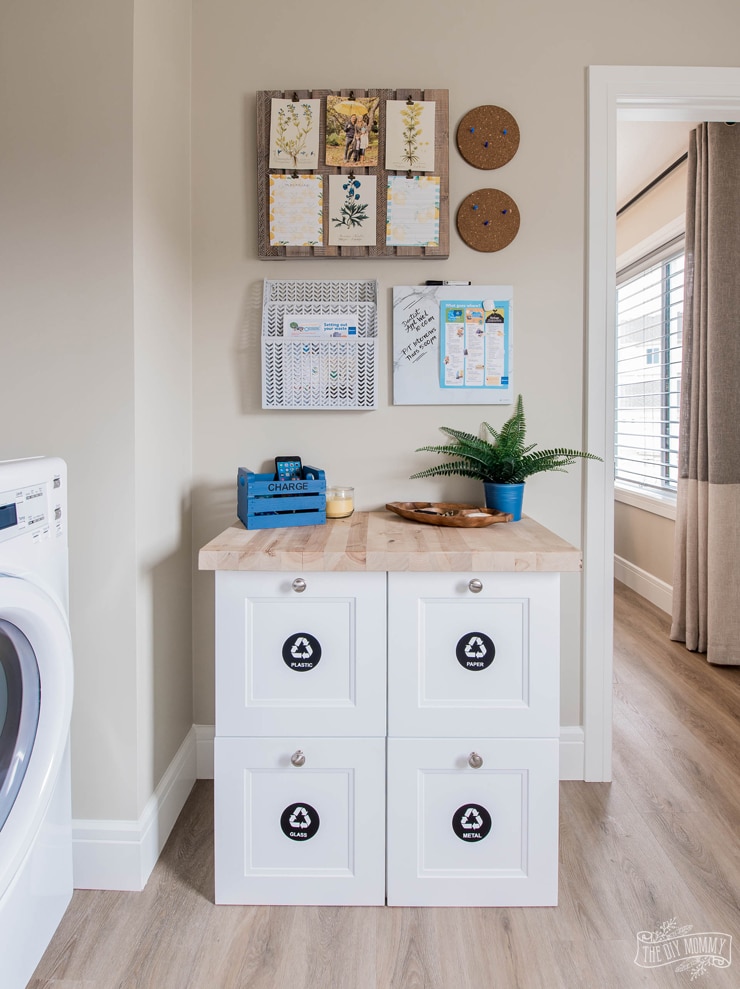
I love how this DIY recycling station and command center turned out. And, the yellows, blues, and greens are perfect for an earth-friendly home!
Not only is it practical. It also adds character and customization to this mudroom/laundry room.
I hope you enjoyed this transformation as much as I did! I loved created an eco-friendly DIY that added so much functionality to a little nook that was otherwise wasted space. And thank you to Brookfield Residential for the opportunity to add value to this show home! Can’t wait until next time.
PIN ME:


I love this. The ‘pallet’ bulletin board is adorable. Where did you get it?
Love this! , What is the wall paint color, please?.
This is a Brookfield home that they designed and built. I do not have any information on the wall colors.
Great idea! Did you get the bin you put in it at IKEA? Which model IKEA cabinet did you use? It looks like it’s sitting on the floor, not mounted/floating. Did I missed something, or were you saying you’re going to float it? Anyway, I think this is my solution. Thanks!
The cabinets are just sitting on the floor so they can be moved. The bins are from Walmart.