Make Beautiful DIY Outdoor Chairs with 2x4s and 2x6s
This post may contain affiliate links · This blog generates income via ads
Summer is the perfect time to refresh your outdoor space, and what better way to do it than by building your own stylish DIY outdoor chairs? If you’re looking for a budget-friendly and beginner-friendly woodworking project, then Ana White’s Modern Outdoor Chair plan is your go-to. With just some 2x4s, 2x6s, and a little elbow grease, you can build stunning chairs that add a fresh, modern look to your patio or garden.

A few years ago I had the opportunity to decorate the small front porch of a show home. The client wanted a cheerful design that showcased some easy DIY projects, so I thought building some simple outdoor furniture would be a fun addition! I love how these chairs turned out, and I’d highly recommend giving them a try. There are no pocket holes or other tricky parts to this build and you only need basic tools, so it’s a nice beginner’s project.
Getting Started
For this project, I followed Ana White’s Modern Outdoor Chair plan, which is super easy to follow. The plan focuses on simplicity and style, making it ideal even if you’re new to woodworking. Plus, it only requires 2x4s and 2x6s, so it’s a straightforward project with a stunning outcome. (If you’re not following Ana White’s website, you should! She has dozens of beautiful, free plans for multiple woodworking projects.)
Materials and Tools
Before diving in, gather the following:
Materials:
- 2x4s and 2x6s spruce, pine, or cedar lumber (I used inexpensive spruce lumber from The Home Depot)
- Deck screws
- White exterior latex paint (or stain)
- Outdoor chair cushions (I recommend finding these before you source & cut your lumber for these chairs so that you know what width you’ll need to make your chairs)
- Outdoor throw pillows
- Blankets
Tools:
- Miter saw
- Drill
- Sandpaper
- Paintbrush or roller
I was able to keep my wood costs around $100 by using inexpensive spruce lumber from The Home Depot. The affordable wood doesn’t sacrifice quality, and the result is a durable and good-looking piece of furniture.

Modifying the Plan
The original plan is designed for wider cushions, but I found some outdoor chair cushions that were only 22″ wide. To accommodate these, I made the seat of the chair a couple of inches narrower. This minor tweak to make the chairs a different size made them a perfect fit for my cushions and added a personalized touch to the final design.
Cutting the Lumber
Start by cutting all the pieces according to Ana White’s measurements.
Using a miter saw, make sure all cuts are precise. Clean, accurate cuts ensure that the chair pieces fit together perfectly and contribute to the overall stability of the chair. Make sure your saw blade is sharp for nice clean cuts.
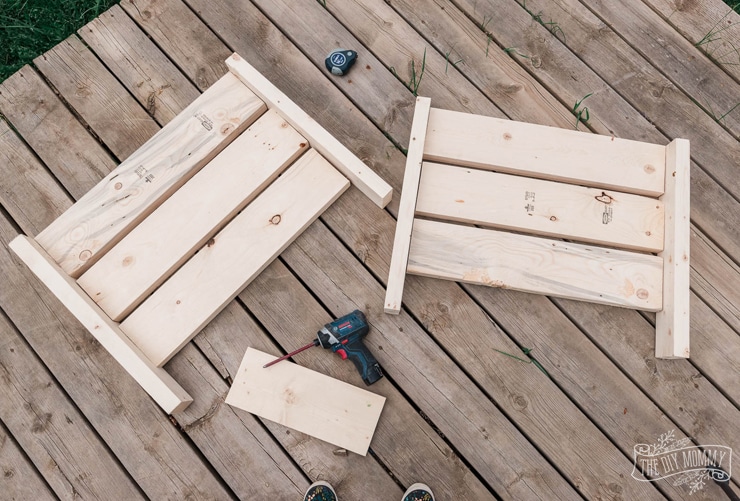
Assembling the Legs & Arms
Begin with the two legs / arms that will create the side frames. Assemble them using the 2x4s and 2x6s, ensuring that everything is square and level. Ana White’s plan provides a clear guide on the assembly process, making it easy to follow along.
As you screw the pieces together, it’s helpful to pre-drill the holes to prevent the wood from splitting. Drilling these pilot holes is particularly crucial if you’re using softer wood like spruce.
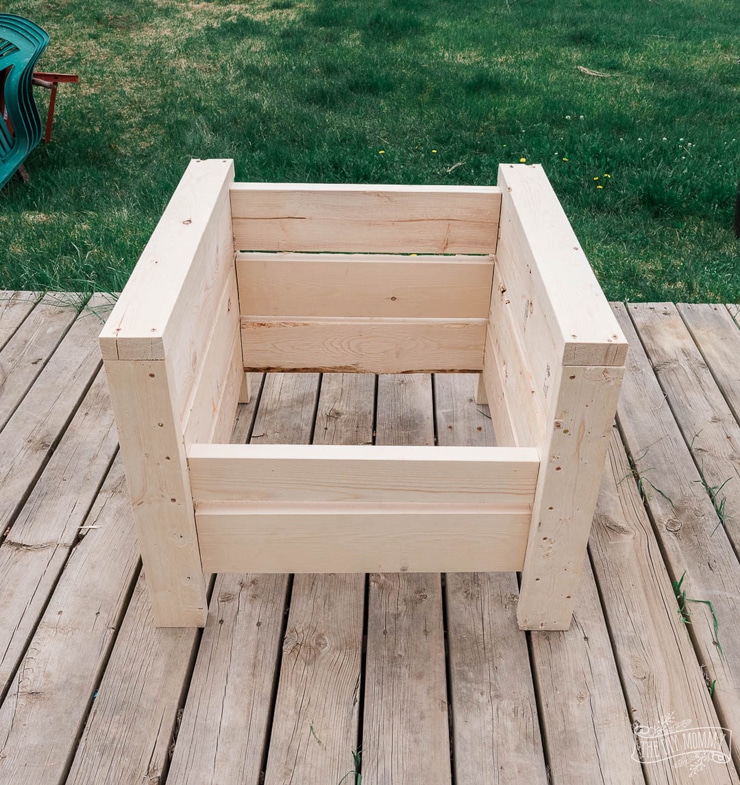
Adding the Front and Back
Next, it’s time to add the front and back slats to your DIY patio chair. Position the 2x6s according to the plans attach them to the arms with screws. Space the slats evenly for a clean, uniform look. Add the back top piece to blend in with the tops of the arms.
The arrangement of the 2x6s is what gives these chairs their modern, clean lines. The chunky look of the slats adds both comfort and a striking design element to the chairs.
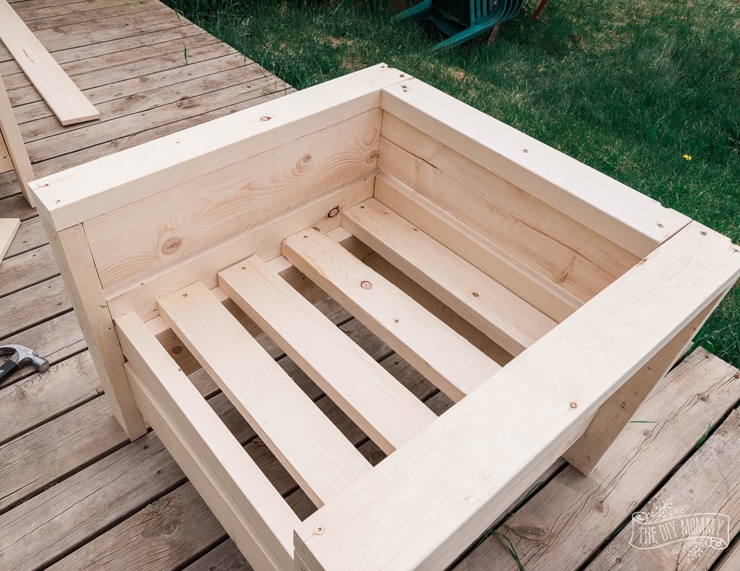
Adding the Seat Slats
Now, it’s time to add the seat slats to the seat frame. Add two cleats to the inside of each arm, arrange the 2×4 seat slats evenly on top, and screw them in place.

Sanding and Painting
Once the chair frame and slats are in place, give the entire chair a thorough sanding. This step smooths out any rough edges and prepares the wood for painting. Sanding is a crucial step to ensure the paint adheres well and to avoid splinters.
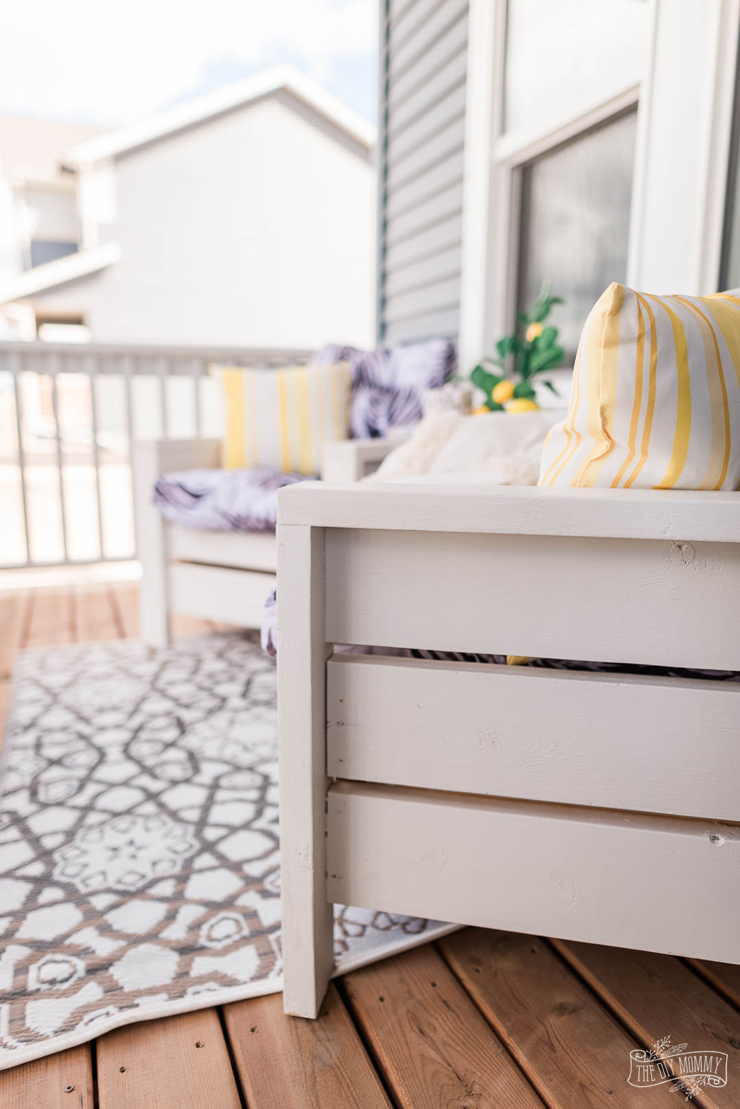
I opted for a bright white exterior latex paint to give the chairs a crisp, clean look that pops against the colorful exterior of the home I styled these at. Apply the paint evenly, allowing each coat to dry thoroughly before adding the next. Two to three coats should provide a solid, durable finish.

Finishing Touches
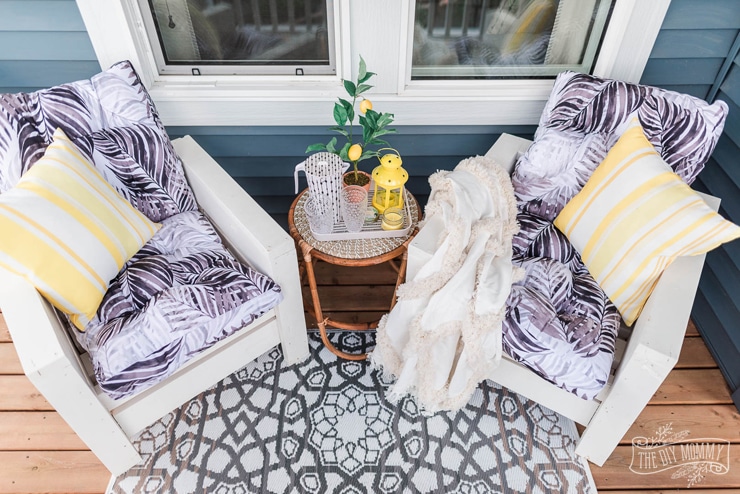
With the paint dry, it’s time for the fun part: accessorizing your new chairs! I chose simple, inexpensive outdoor chair cushions that were a perfect fit for the narrower seat. I found these at Real Canadian Superstore, but IKEA can also be a great place to find budget-friendly seat cushion options. You may want to opt for cushions with a firm foam to offer extra back support.
A vibrant yellow-striped throw pillow adds a cheerful touch, while a cozy blanket draped over the armrest invites you to sit and relax.
The side view of these chairs is particularly eye-catching. The row of 2x6s creates a modern silhouette with a hint of farmhouse charm, making these chairs versatile enough to fit into any outdoor décor:
Enjoying Your New Chairs
Now that your chairs are complete, it’s time to enjoy them! These DIY outdoor chairs are not only functional but also add a personalized touch to your outdoor space. They’re perfect for lounging on a sunny day, reading a book, or enjoying a cup of coffee in the morning breeze.
Tips and Tricks
Here are some additional tips to make the process even smoother:
- Use a Level: Throughout the assembly, use a level to ensure everything is aligned correctly. This step helps maintain the structural integrity and aesthetics of the chairs.
- Weatherproofing: Even though you’re using exterior paint, consider adding a sealant or weatherproofing layer like spar urethane to protect the wood from the elements further.
- Customizing: Don’t hesitate to customize the chair dimensions to fit your space or cushions better. Adjusting the width or height can make a big difference in comfort and appearance.
- Testing: Once assembled, sit in the chair to test its stability and comfort. Make any necessary adjustments before painting.
Building your own outdoor chairs might seem like a daunting task, but with a straightforward plan and a bit of effort, you can create beautiful and functional furniture on a budget. These DIY outdoor chairs from 2x4s and 2x6s are a perfect example of how simple materials can transform into stylish pieces. Whether you’re a seasoned DIYer or a woodworking novice, this easy build offers a fun DIY experience and a fantastic addition to your outdoor living space. So, grab your tools and get started DIYing!
Want to make more DIY outdoor furniture? Check out how I built this DIY outdoor sofa!


