How to Put Ribbon on a Christmas Tree: 4 Techniques for a Cozy Designer Look!
This post may contain affiliate links · This blog generates income via ads
Every year, I look forward to the moment I can finally unwrap my ribbons and start decorating the tree. There’s just something magical about the way ribbon instantly makes a Christmas tree look full, layered, and pulled together… like something straight out of a designer boutique, but cozy and lived-in at the same time.
This year’s ribbon style is all about soft, draped movement: wide organza strands that look relaxed, not rigid, paired with a few narrower accent ribbons for depth. I’ve been doing this technique for years, and it’s still the easiest way to give your tree that elevated, custom-decorated look without spending a fortune. Let me show you exactly how I’m styling my 2025 tree and how you can get the same warm, luxurious feel in your own home.
Looking back, my first few Christmas tree designs weren’t very good. My ribbon was wrapped so tightly around the tree, that it looked like it was being strangled! Over the years, I’ve learned some easy techniques to make ribbon look more natural on a tree. I’m excited to share some of my favourite ribbon methods in this step-by-step tutorial!
Gather your ribbon
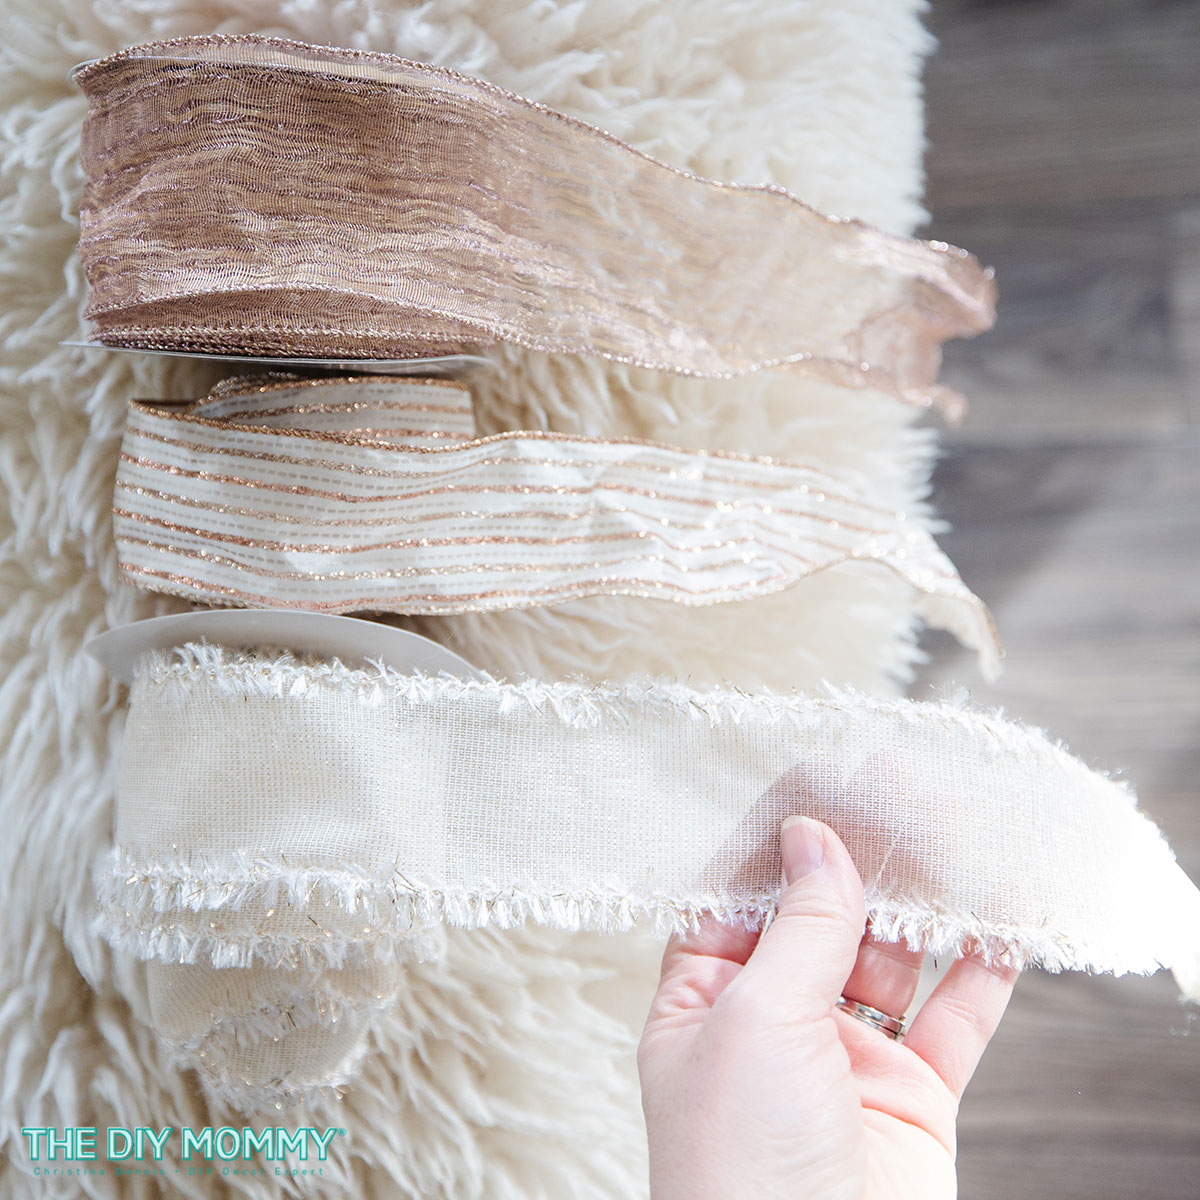
I recommend that you purchase 2 to 3 different types of ribbon for your tree. Choose a wired ribbon so you’re able to manipulate it and make flow perfectly on your tree. Pick ribbon colours and designs that complement each other.
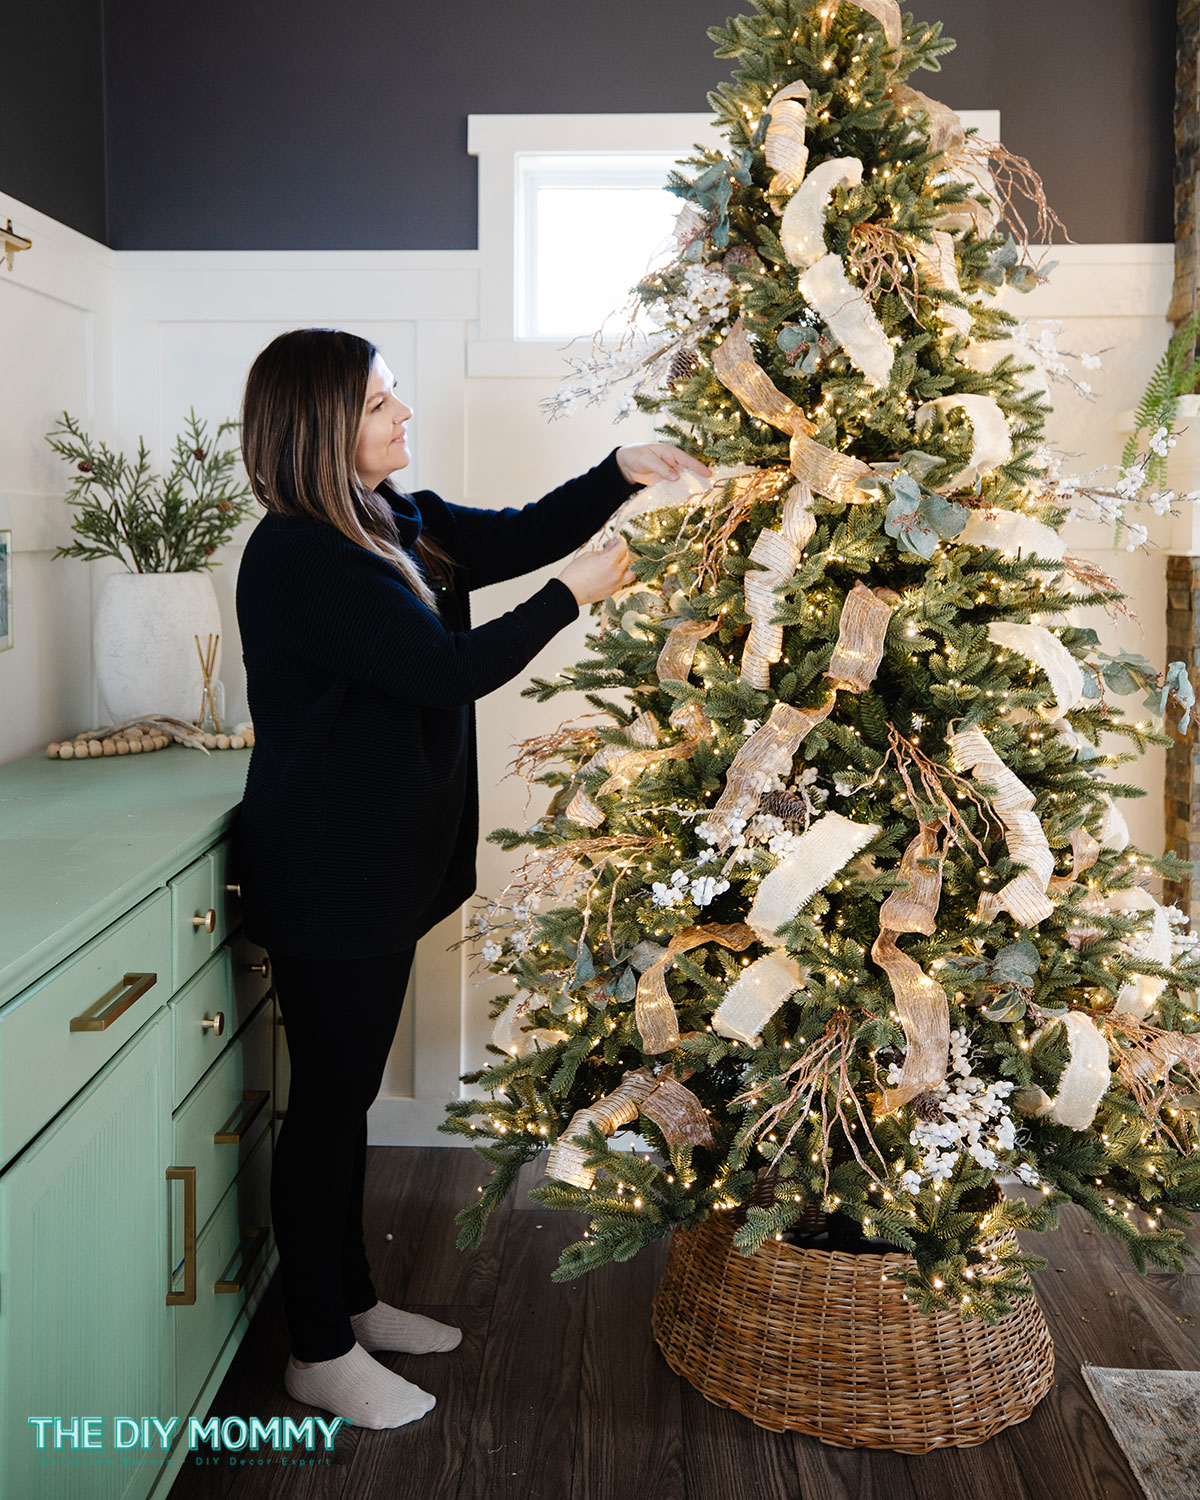
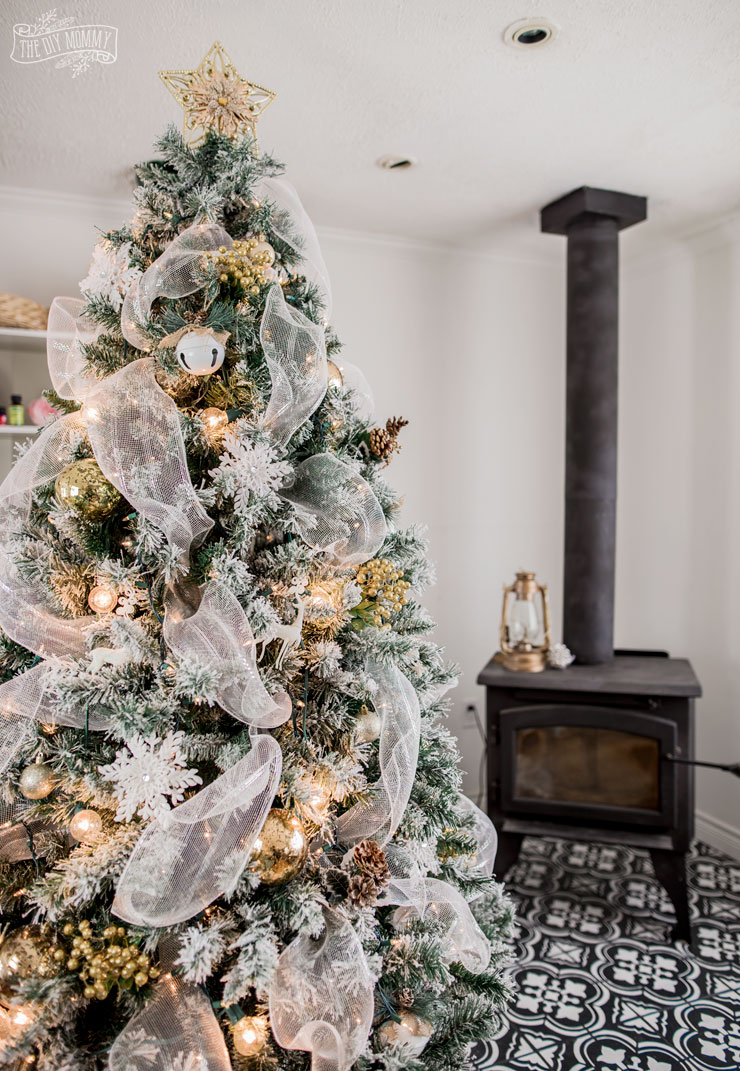
For this year’s Christmas tree, I’m going to keep it neutral in colour scheme. I’ll be using golds, rose golds, whites and greens.
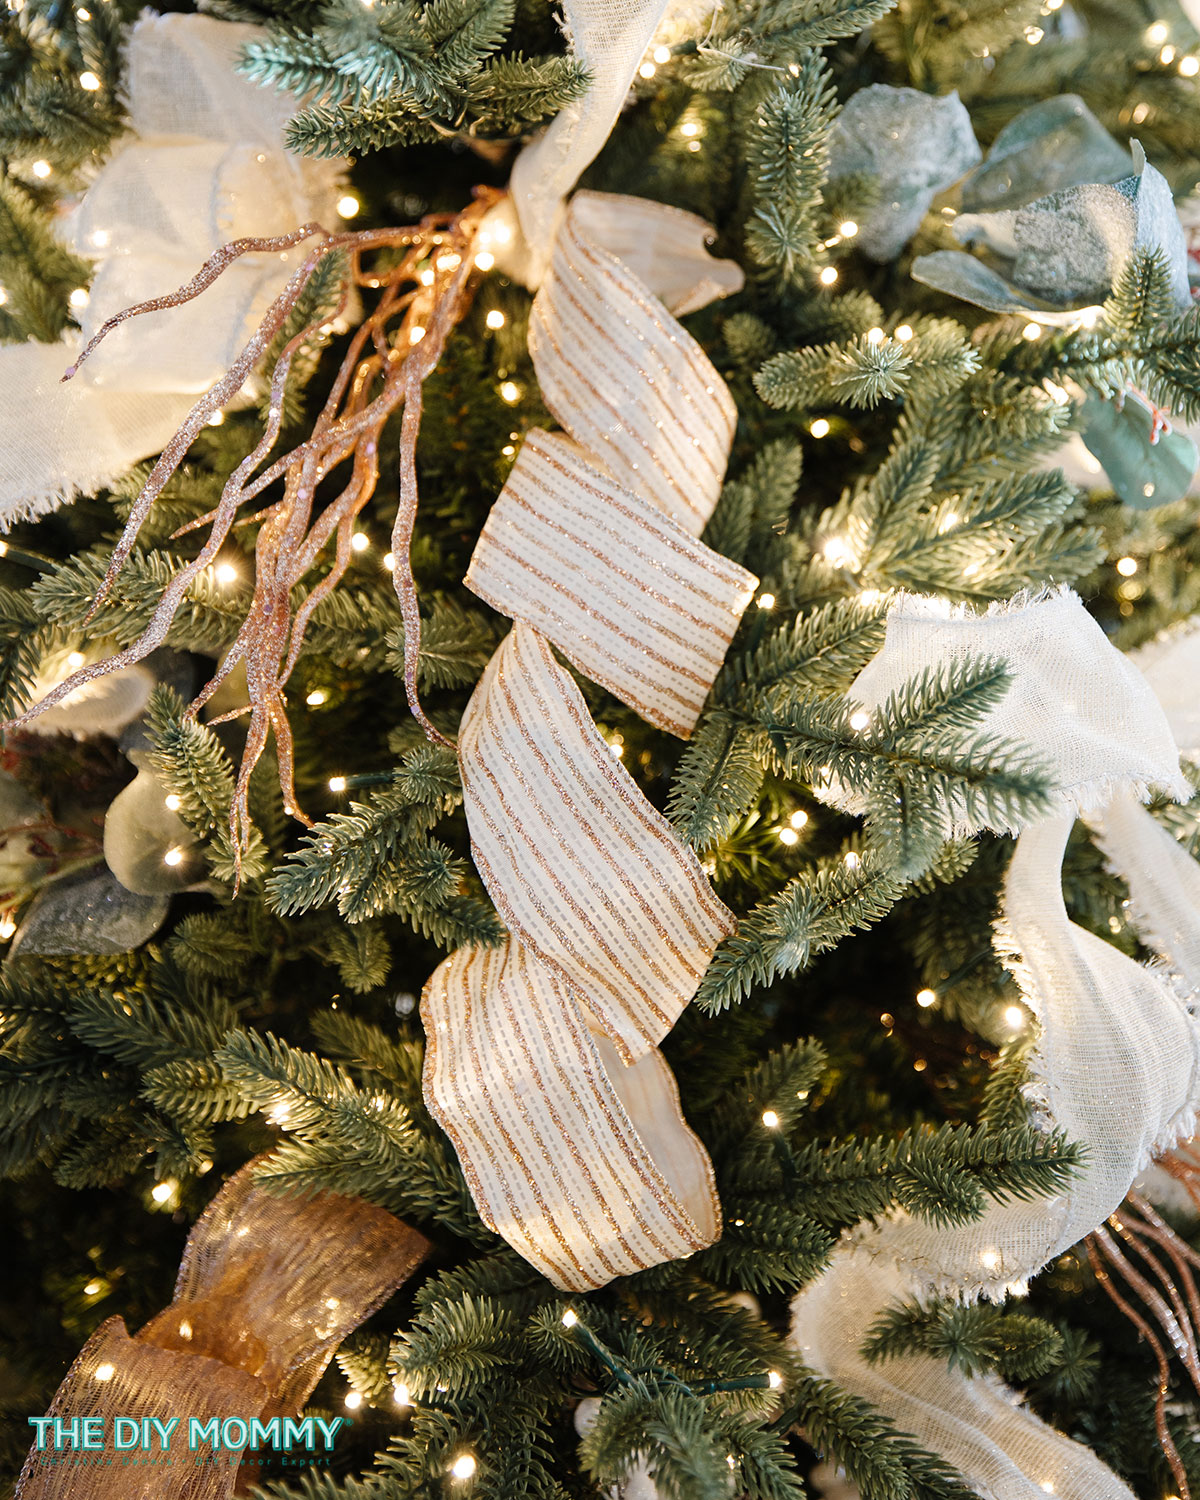
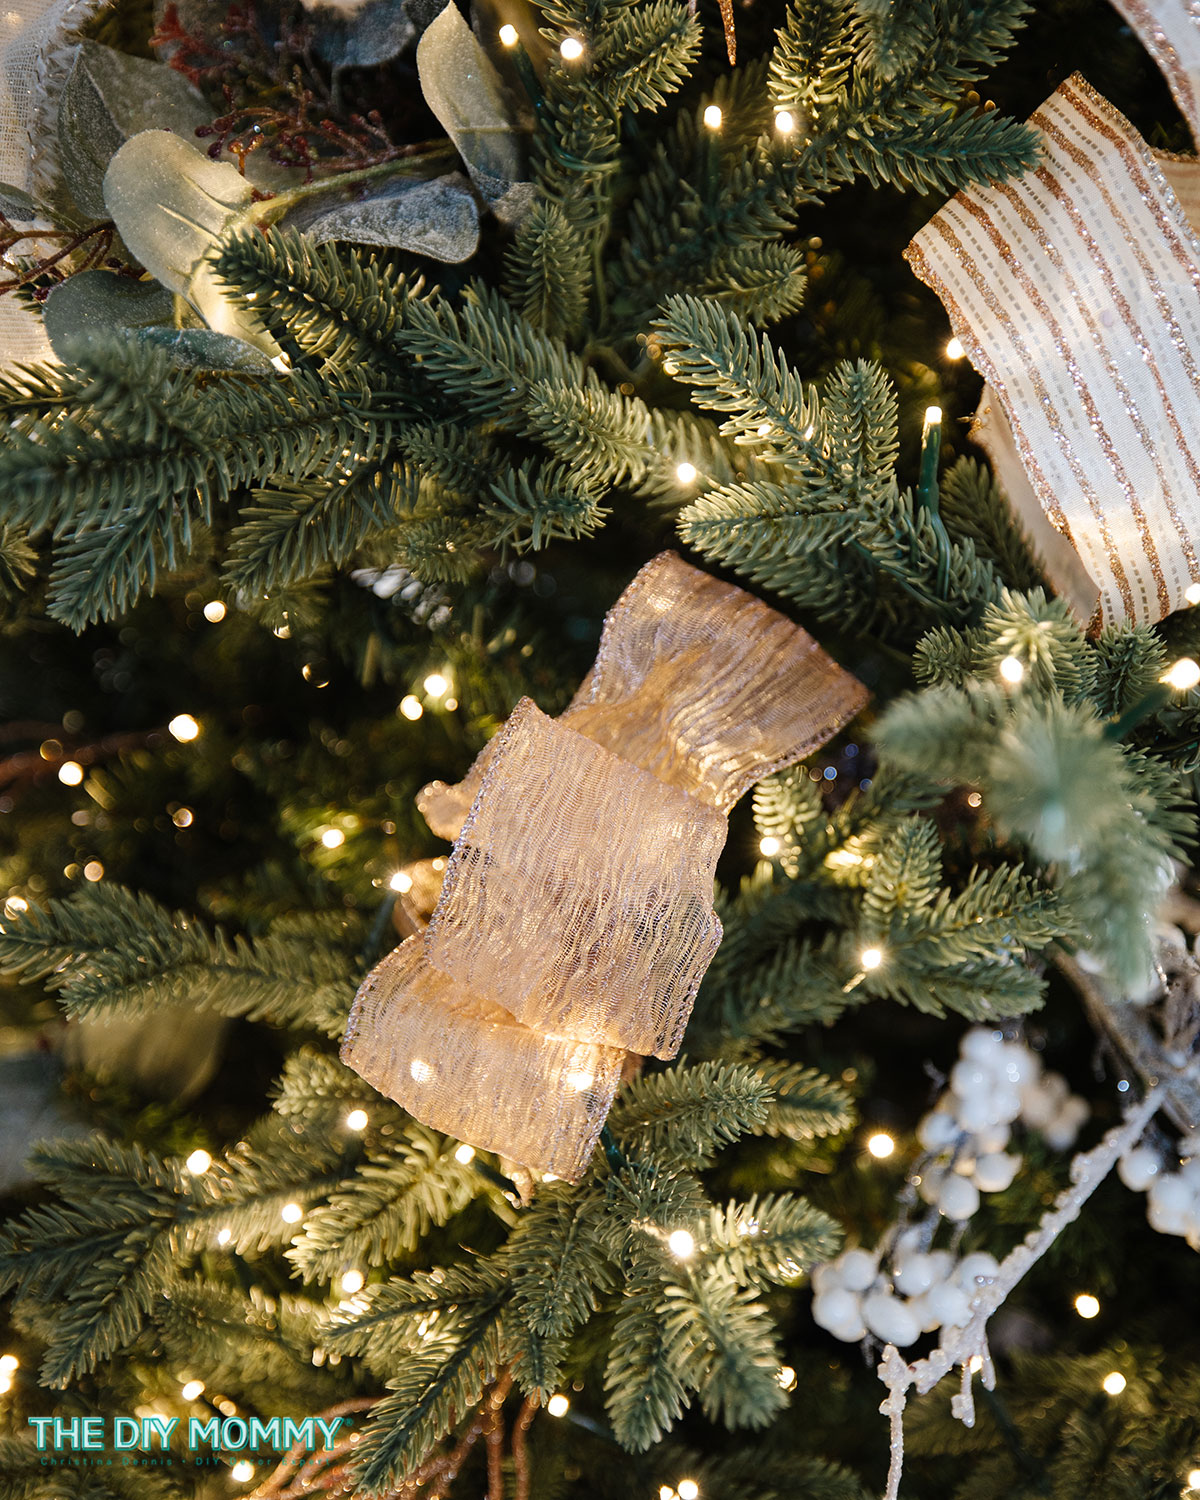
I’m using ribbon from my stash that coordinates with this year’s colour scheme. For this tree, I’m using a white and gold fringed ribbon and then a sheer rose gold ribbon from Michaels a few years ago. For my third ribbon, I’m using a glittered striped ribbon from Canadian Tire that combines both gold and rose gold. I love how this stripe picks up the rose gold and the gold and coordinates with the other two ribbons.
My favourite places to buy Christmas tree ribbon
Well-made ribbon will make a huge difference in how your tree looks. Here are my favourite places to find stunning Christmas ribbons:
- Canadian Tire (I love this gold ribbon collection)
- Michaels
- Amazon (This velvet and gold lame ribbon from Amazon is stunning!)
What width of ribbon to use
When you’re choosing your ribbons, look for a couple different widths. For my tree this year, I have two ribbon selections that are 2 1/2 inches wide, and one that’s 2 inches wide. Varying the widths, the textures, and the colours of the ribbon will add interest to your tree.
How much ribbon to use for a Christmas tree
For a standard 7 1/2 foot tall Christmas tree, I like to use about 20 yards of ribbon altogether. This is a generous amount of ribbon for a full look, and any extra can be used to wrap gifts.
When to put ribbon on the Christmas tree
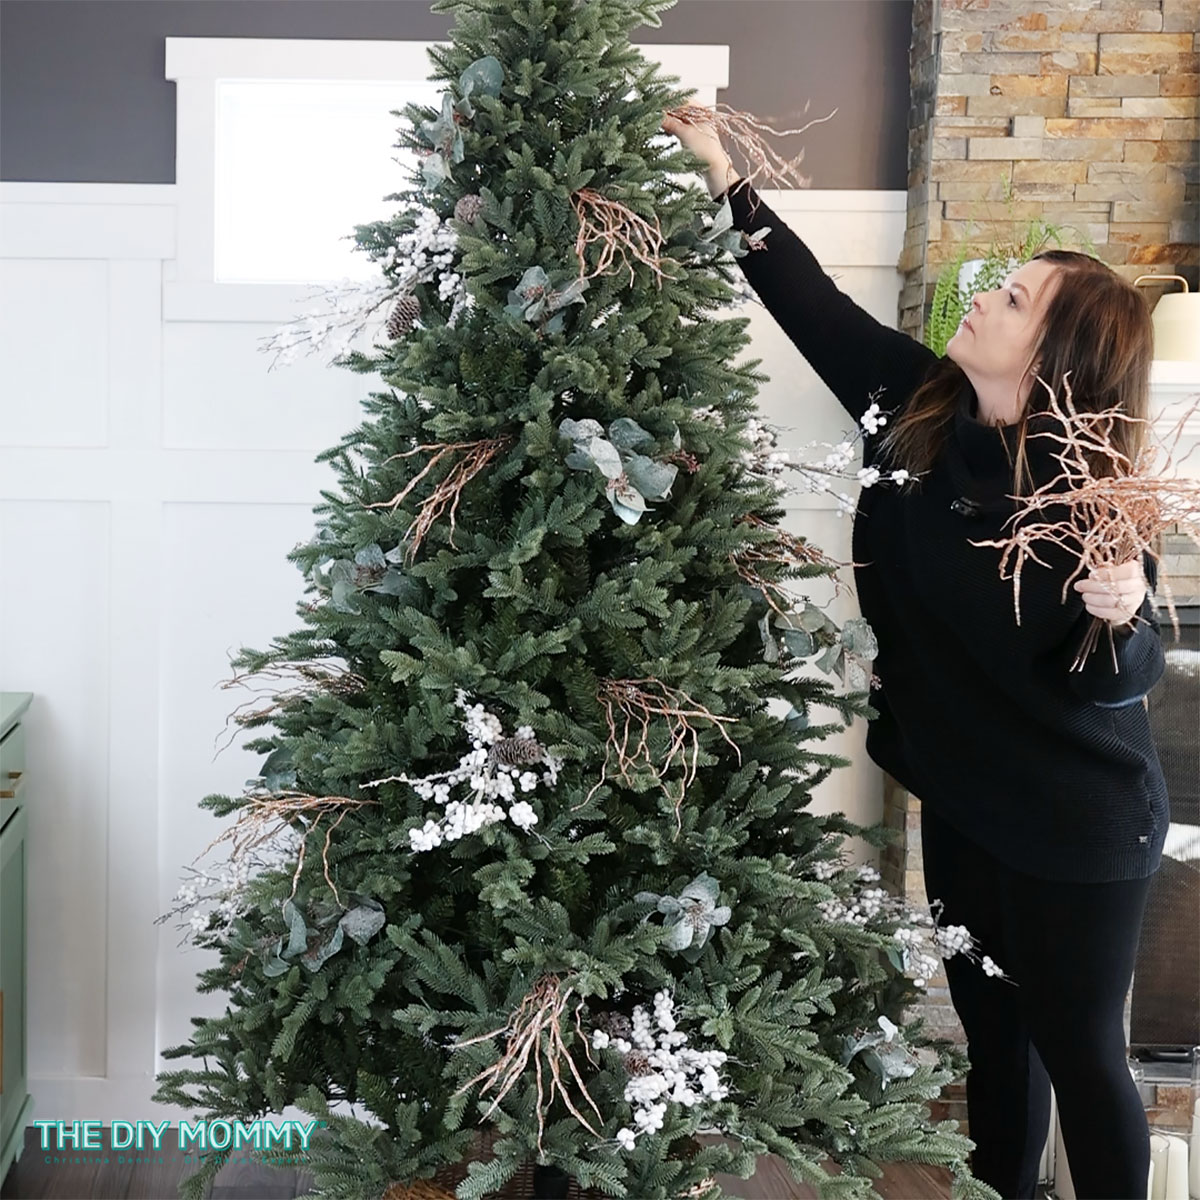
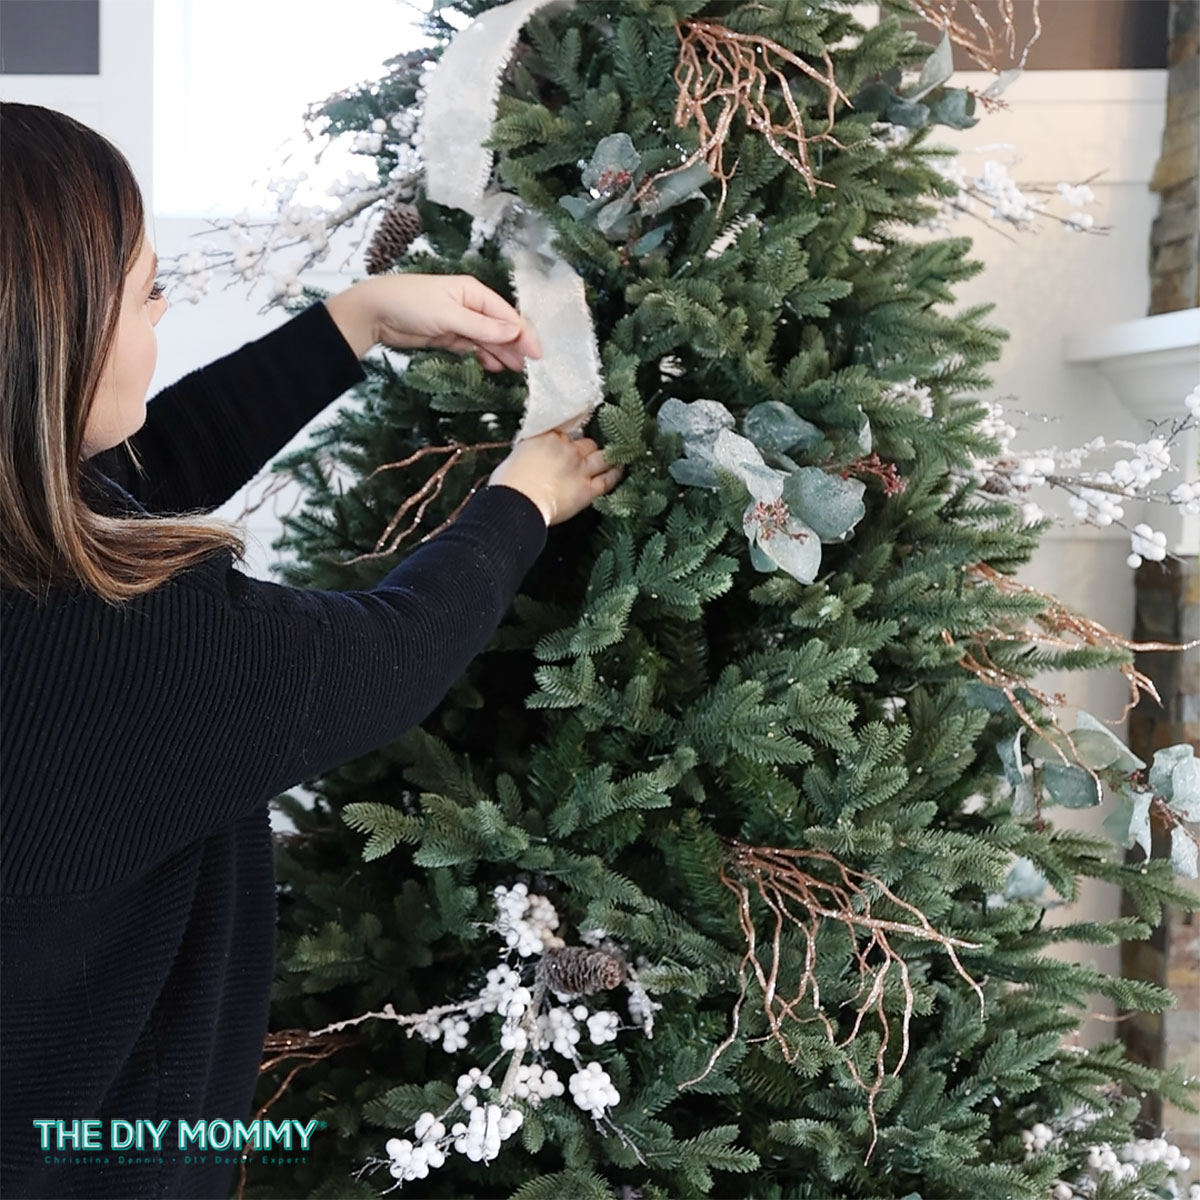
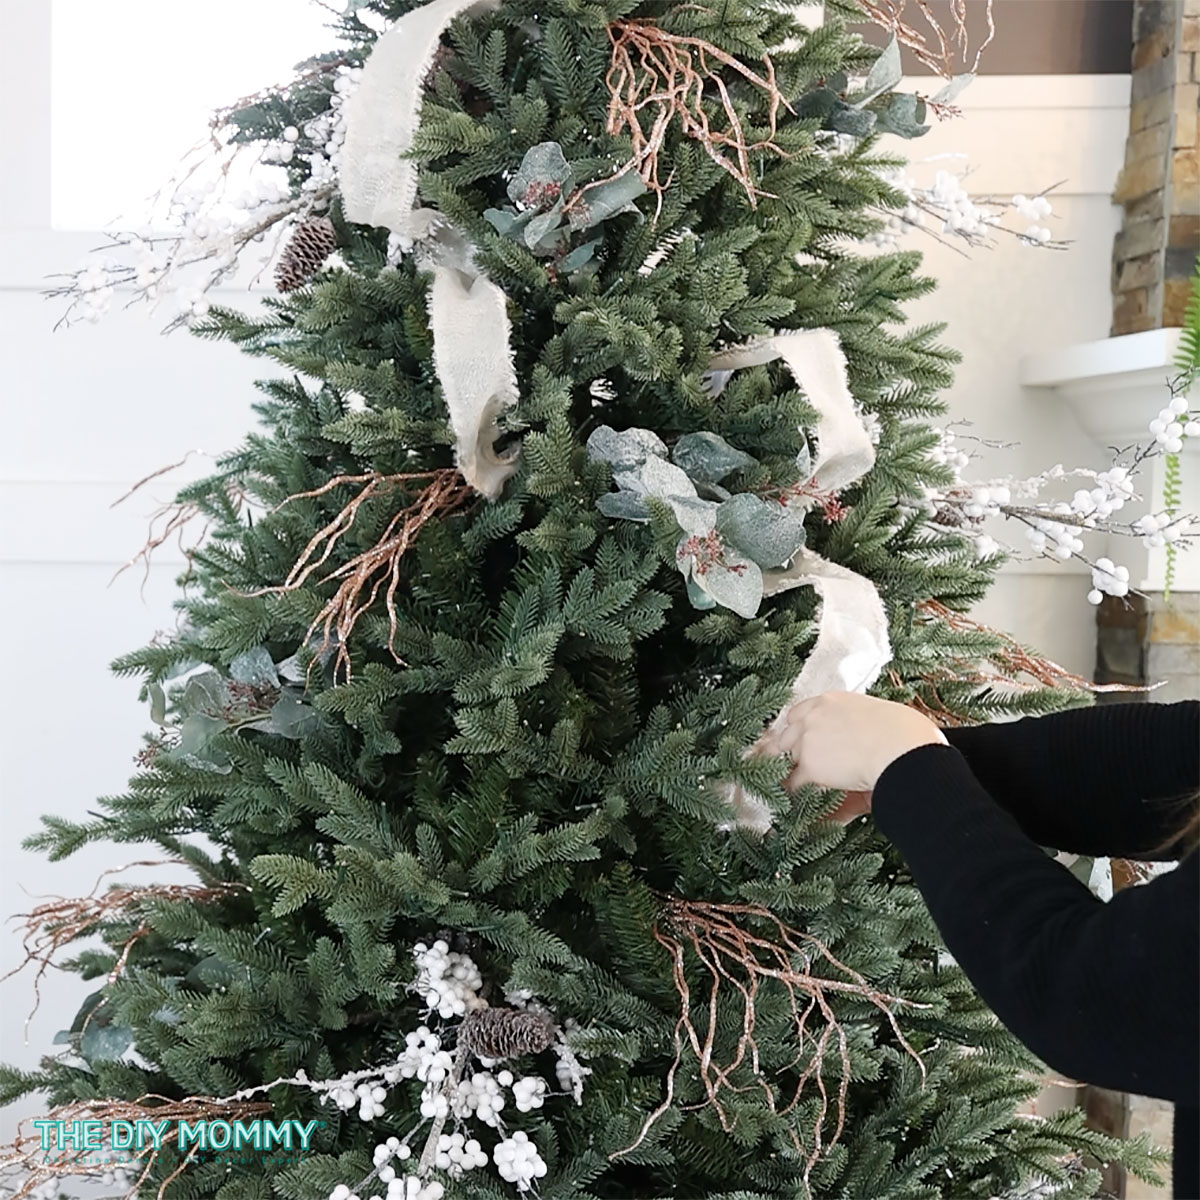
When decorating my tree, I love to start by giving the tree a good fluff to make sure it looks its best. Then, I install picks into the tree. Greenery or glittery picks make a tree feel a little bit more nature inspired and a little bit more textured. I recommend choosing 2 to 3 different textures of picks and adding them to the tree one type at a time. Insert them into the tree evenly, and you can point them up or down according to your preference.
After the picks are added to the Christmas tree, it’s time to add the ribbon!
(My Christmas tree this year is from Costco Canada and I have it linked here along with more of my favourite artificial trees.)
Start with the biggest ribbon
Choose the widest ribbon you have and start adding that to your tree first. In my case, I have two 2 1/2″ wide ribbons, so I’m choosing the one that stands out the most first – the gold fringed ribbon.
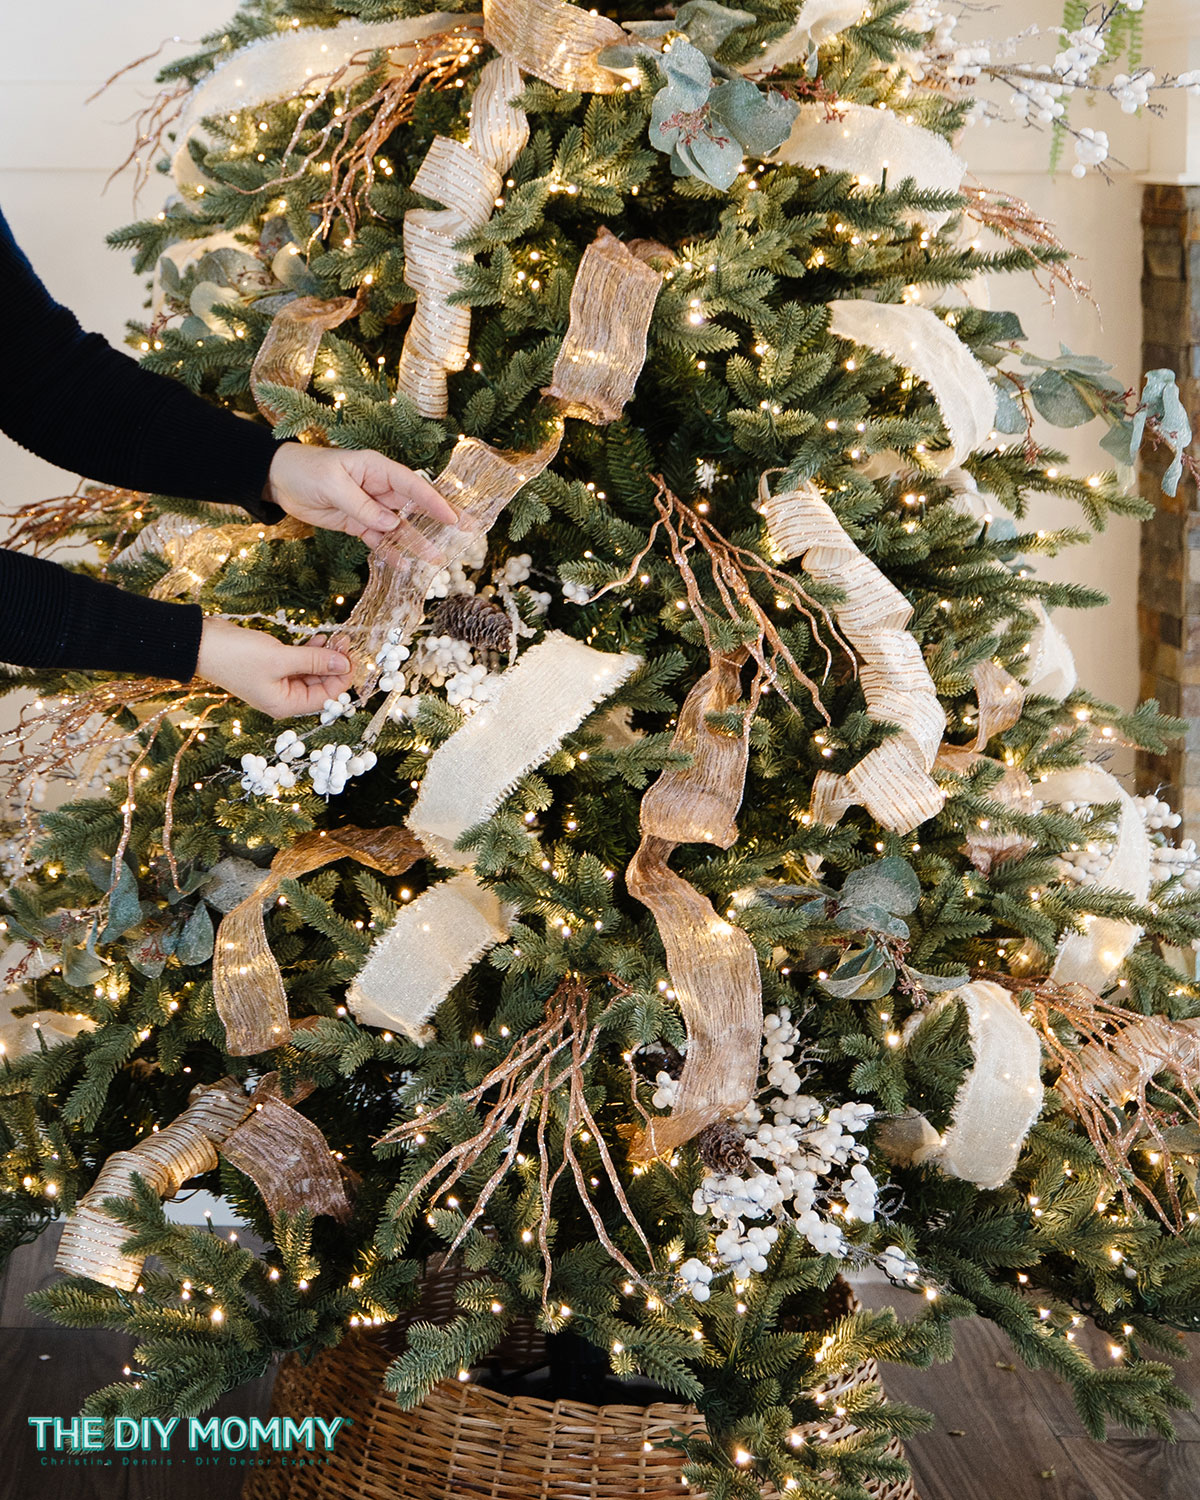
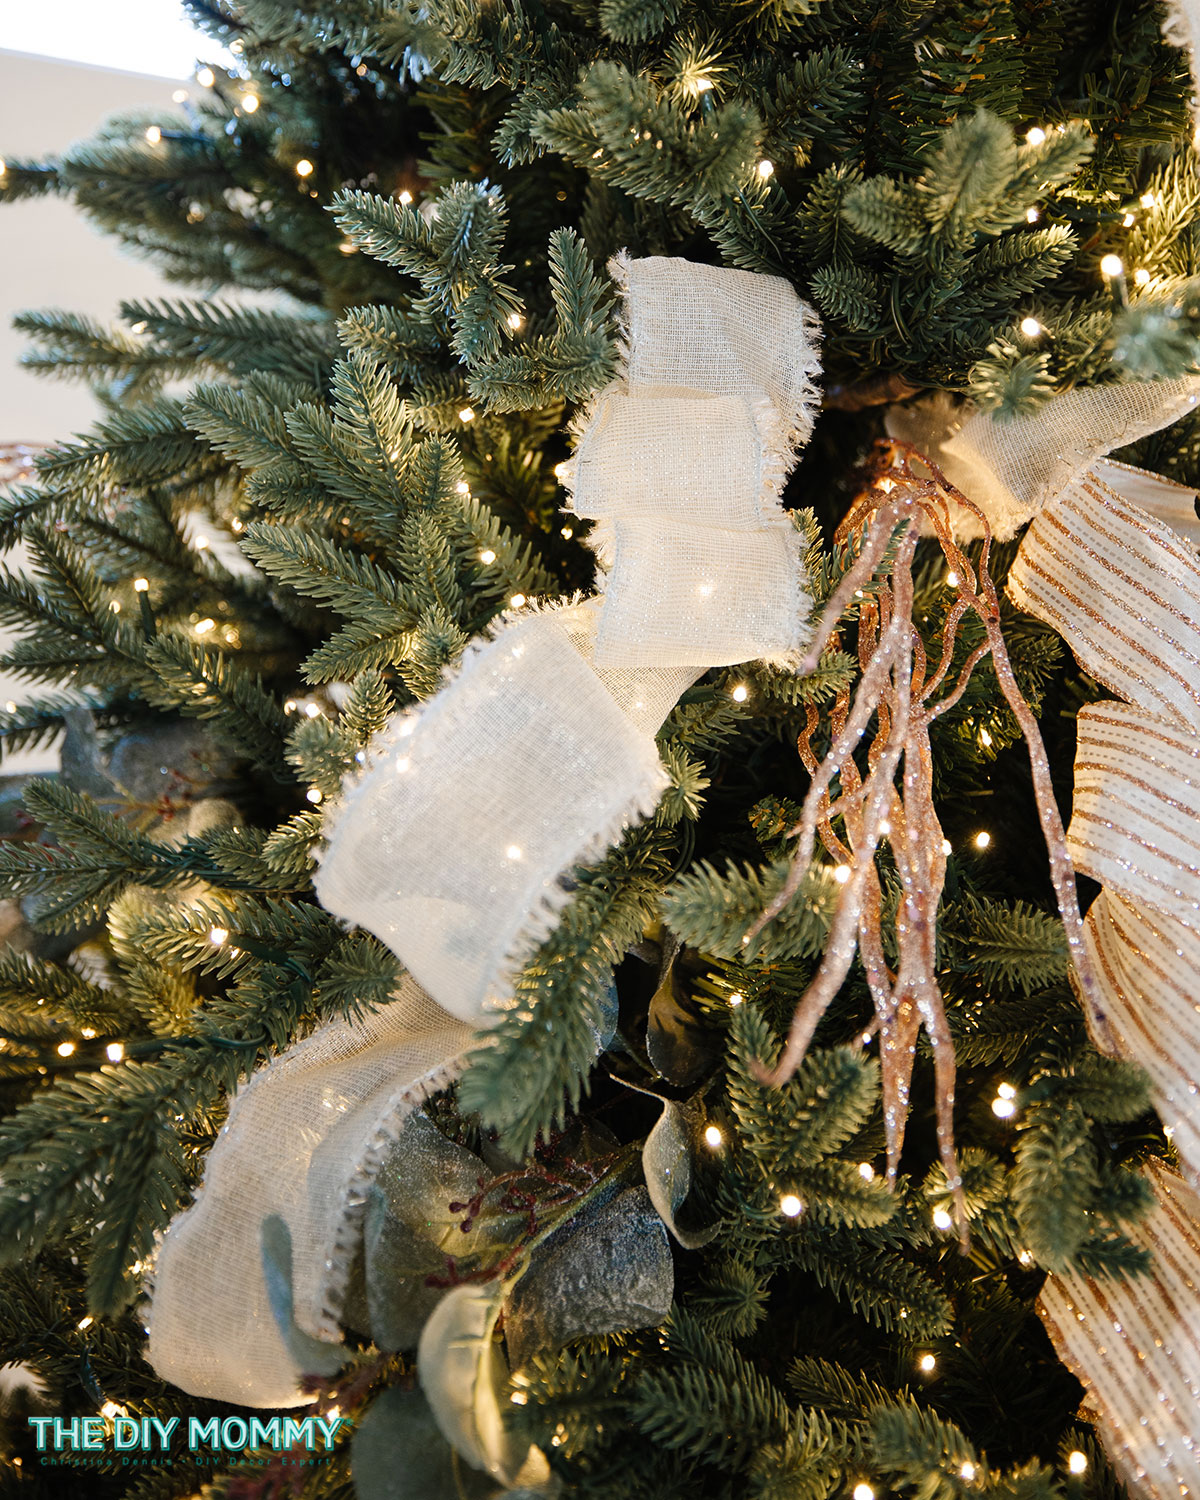
Cascade Technique
There are a few simple ways to put ribbon on a Christmas tree, and this cascade method is my favourite. I’ve been doing it for many, many years! You might have seen it on previous videos and on previous Christmas trees that I’ve decorated. For this technique, cut your ribbon into two or three foot sections. Smaller strips of ribbon are going to make this technique work a lot better.
To begin, put one end of one of the ribbon strips deep into the tree. Then, simply let this ribbon hang naturally on the tree. You can let it hang vertically or diagonally according to your preference.
Once you have the ribbon hanging about 6 to 12 inches down, tuck it back deep into your tree again. Bring it out another time to create a second loop, let it hang down naturally, then tuck the end of the ribbon back inside the tree again. This creates a bouncing, waterfall effect of cascading ribbon. Continue adding ribbon from the top of the tree to the bottom until you’ve added the desired amount.
Once you have the first variety of ribbon added to the tree, you can repeat this process with the second color and third colour.
Use different types of ribbon for different looks
The kind of ribbon you choose will change the look of these effects. For my tree this year, all of the ribbons I’m using are relatively lightweight and 2 are sheer. This gives the tree a romantic and relaxed look.
Here’s the cascade method using stiffer burlap ribbon. This gives each loop more body and provides a completely different look to the tree:
You could also try mesh ribbon for yet another look, and this looks especially pretty on a tree with flocking:
Coiling Technique
The second technique I want to show you is the coiling technique. Begin by cutting the ribbon into 2-3 foot sections. Then, simply wrap the ribbon around your hand to create a nice tight coil. Then, pull the coil gently apart to create a curled ribbon effect. Place that in your tree vertically or horizontally. This is more of a whimsical sort of look for your ribbon. It creates a lot of texture and interest, and this one’s also a great one to use if you have a sparse tree with lots of holes in it because it does fill up a lot of space.
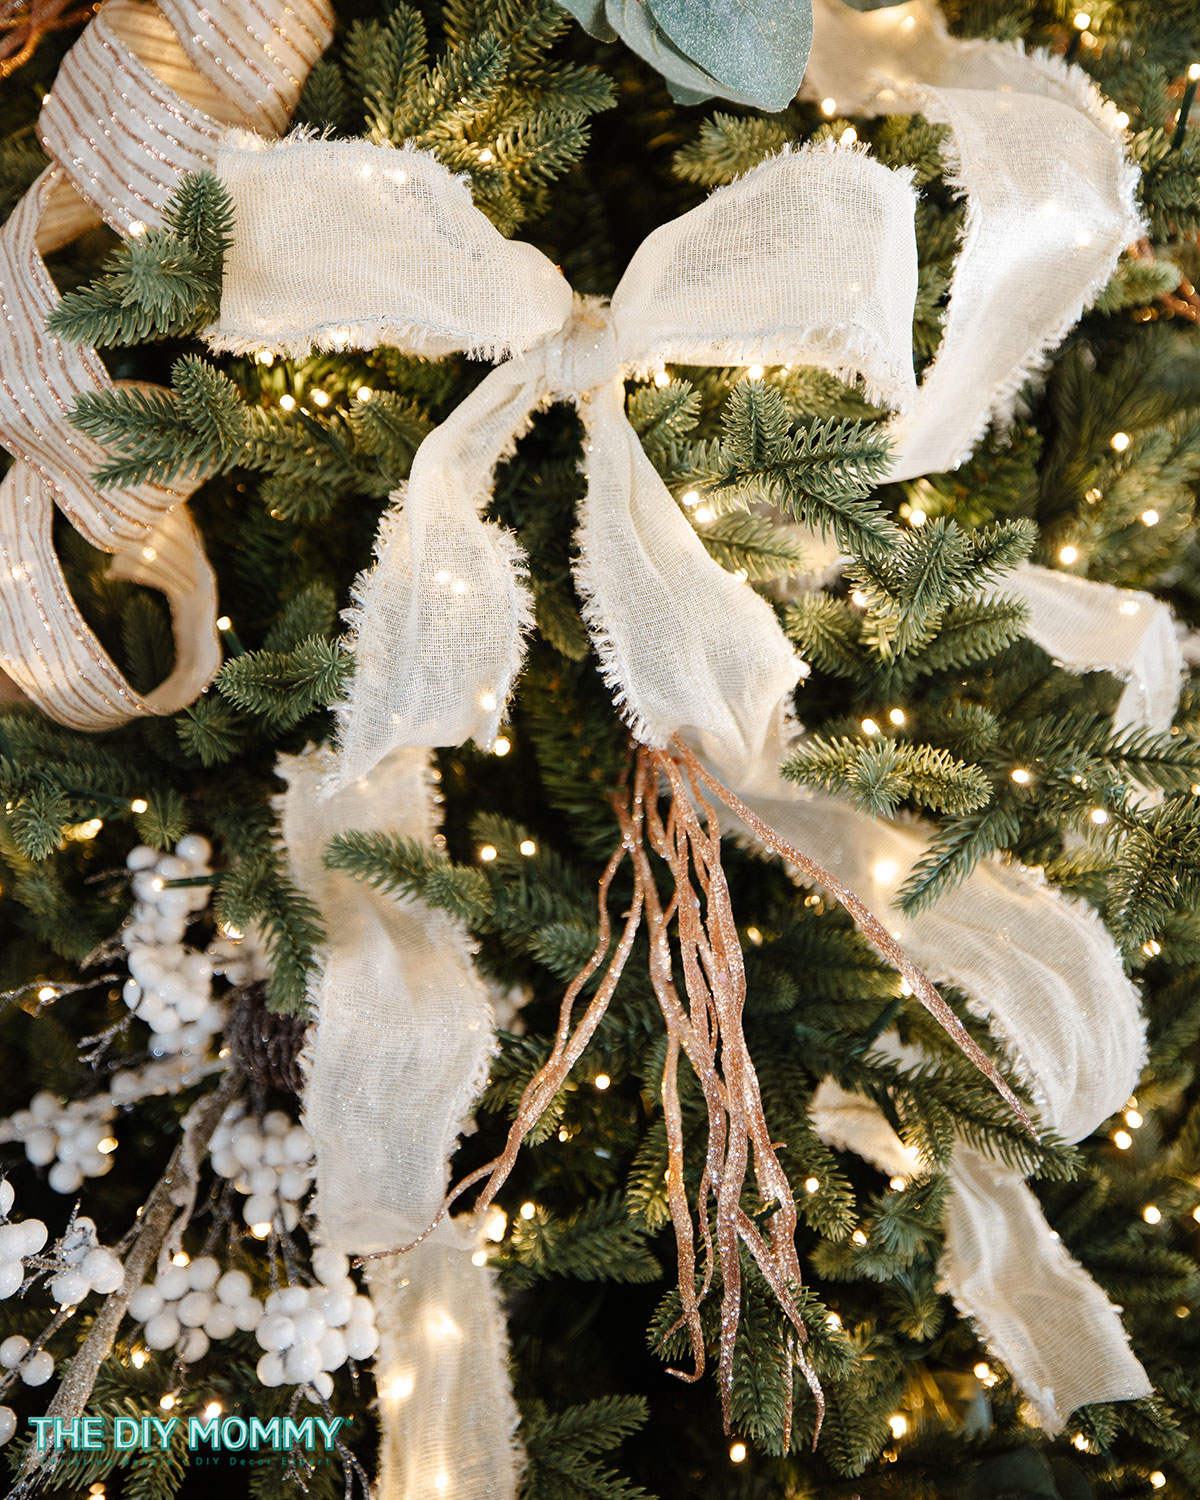
Bow Technique
For this ribbon method, you can use wired ribbon or you can use unwired ribbon. Unwired is going to give you more of a natural feel, and wired is going to be a little bit more formal of a feel. Take a piece of ribbon and cut it into a 4-6 foot section. You can do it shorter if you want to, and then make two bunny ears and simply tie them together. Pull on the tails to make them the length that you’d like.
If using wired ribbon, you can manipulate the bow to make it look exactly how you want. Then, place that in your tree, resting it on a branch, and take the tails and let those bounce down the tree. Like the Cascading Technique, push it nice and deep into the tree, letting it just gently glide out.

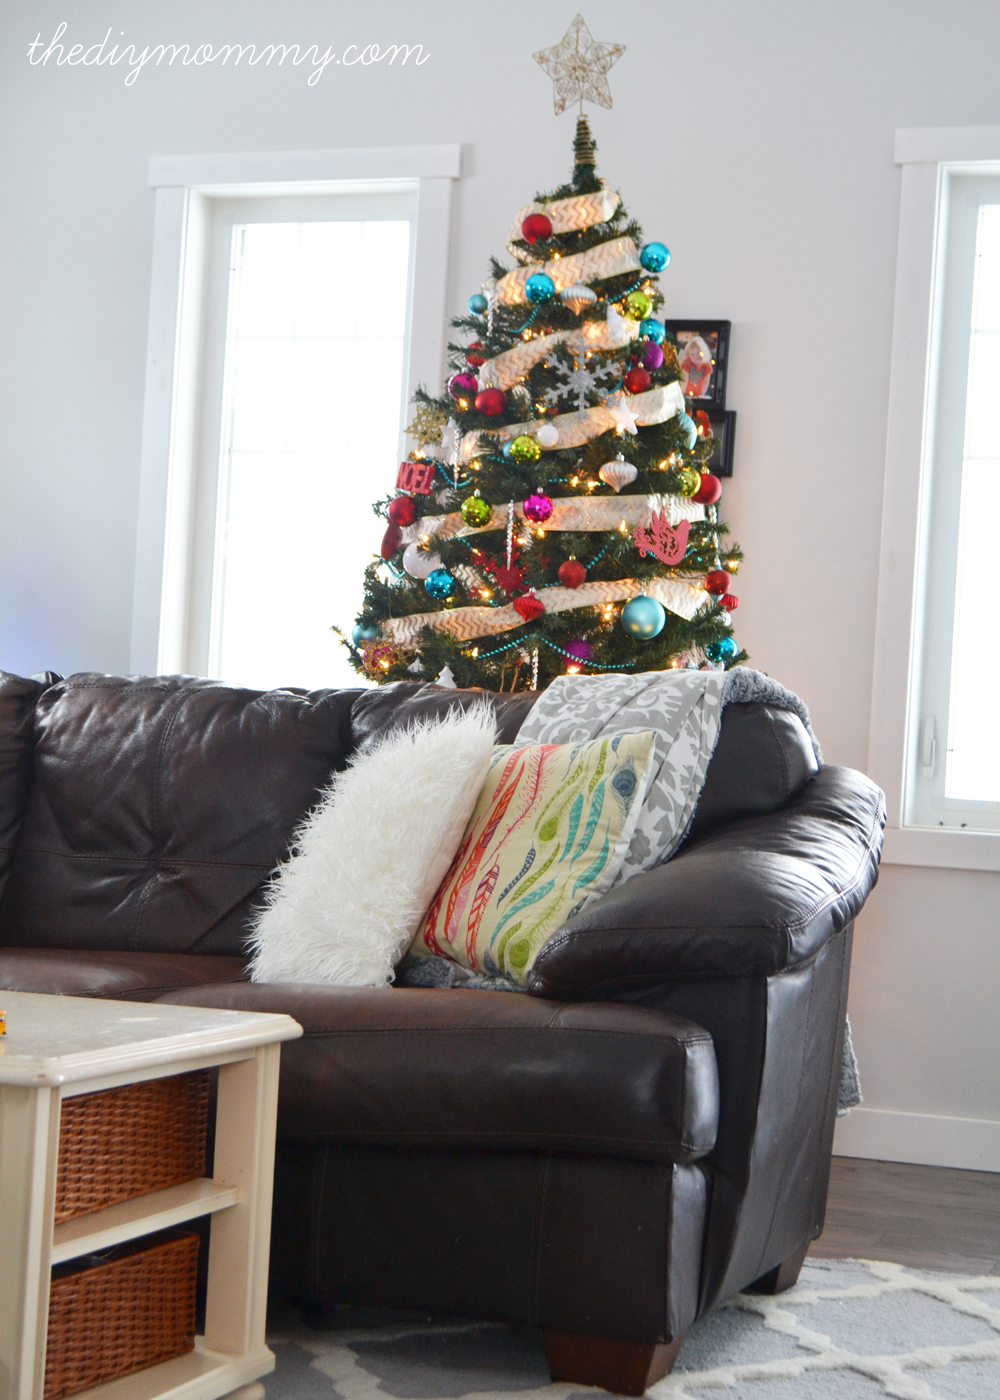
My tree from last year – shown above – shows another variation of the ribbon bow technique. For this simple look, I tied narrow red velvet ribbons around some of the branches.
Triple Loop Technique
This next technique I call the triple loop technique. Begin by taking a strand of ribbon that’s cut to 1-2 feet long. Holding it your hand, create three loops and pinch the folded end gently to secure the loops. Place the looped ribbon into the tree horizontally or vertically, and then spread those loops out.
Loop Technique Variation: Start with a 4 to 6 foot piece of ribbon. Create the three loops at the top of the ribbon and leave a long tail. Place the looped end of the ribbon into the tree, open up the loops, and then use the Cascade Technique to make the tail of the ribbon bounce down the tree vertically or diagonally.
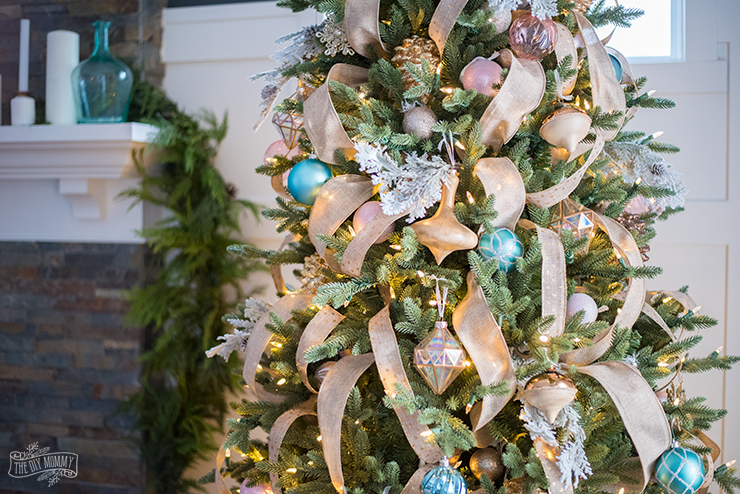
Here’s how my tree looks this year with a combination of cascading & coiling ribbon
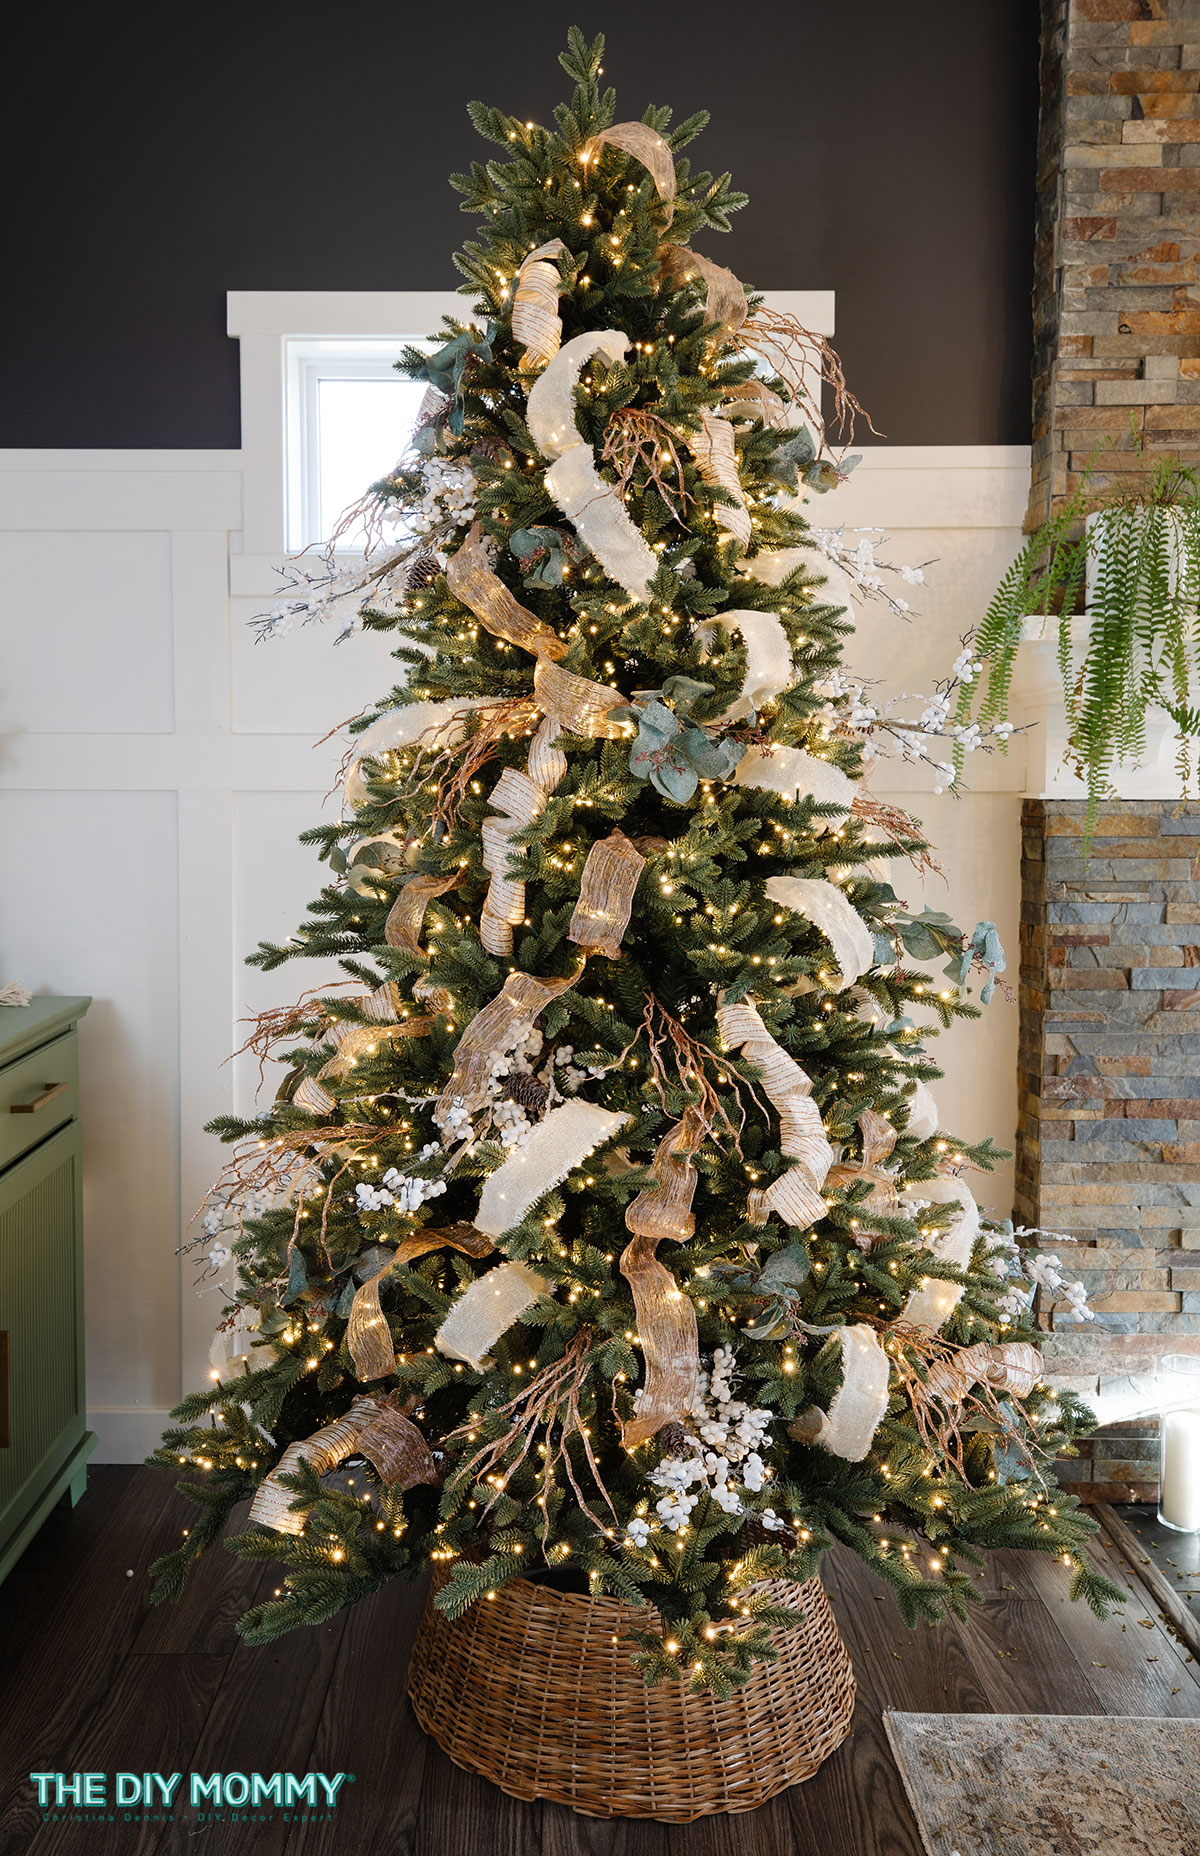
Even without any ornaments or topper, I think it’s already looking so pretty!
Watch my video to learn how to put ribbon on a Christmas tree
Christmas tree decorating next steps
Once you’ve added your ribbon to your tree with your favourite method (or a combination of 2 or 3 methods), you can continue decorating your tree. I like to then add large ornaments deep into the tree, smaller ornaments or ornament clusters closer to the branch tips, and then whimsical ornaments throughout. The final touch is a tree topper and a tree skirt. You can see my whole Christmas tree decorating method from start to finish right here.
And that’s it! Just a few simple steps to make your Christmas tree look effortlessly elegant (and so much cozier). Whether you love a classic gold-and-cream palette, moody cranberry tones, or soft linen neutrals, this ribbon technique works with any style.
I hope this inspires you to slow down, put on a little Christmas music, and enjoy decorating your tree this year. It’s one of those simple traditions that makes home feel extra special during the holidays.
If you’re looking for more Christmas inspiration, make sure to check out my Designer Gift Wrap Ideas on a Budget post next!
PIN ME:


Great post. I was checking continuously this blog
and I am impressed! Very useful info specially the final
phase 🙂 I handle such information a lot. I used to be seeking this particular info for a long time.
Thank you and best of luck.
Hi!
I love your website! I tried to subscribe to your newsletter and it says the site isn’t found? Any ideas?
Thanks,
Lori
Let me send you the link directly 🙂
I love your way of explaining how to put ribbon on a tree. I think it is good start for me to get the new inspiration this season of Christmas.
Please send me the link to suscribe to your website. Thanks dianne
Such simple techniques. my kids are gonna love these ideas. Would love to hear more of these beautiful décor techniques for Christmas.
Your words have a way of encouraging us to embrace our uniqueness and authenticity.
I loved the tips in this post! The spiral technique was so easy to follow, and it made my tree look so elegant. Thanks for sharing these creative ideas!
I absolutely loved these techniques! I never thought about using the “river” method before, but it looks stunning. Can’t wait to try it on my tree this year. Thanks for the helpful tips!
Loved these techniques! The idea of using the ribbon as a cascading effect really adds a beautiful touch to the tree. Can’t wait to try the spiral method this year. Thanks for the inspiration!
This post was incredibly helpful! I never knew there were different techniques for adding ribbon to the tree. I especially loved the idea of using the cascading method—it really adds such elegance! Can’t wait to try these tips on my own tree this year. Thank you for sharing!
I absolutely love these ribbon techniques! The step-by-step instructions are super helpful. I can’t wait to try the cascading method on my tree this year. Thanks for the inspiration!
I loved your tips on adding ribbon to the Christmas tree! The technique you described for the cascading effect is my favorite—it’s such a beautiful way to enhance the tree’s elegance. Can’t wait to try these out this holiday season! Thank you for the inspiration!